DIY Reversible Kimono Refashion

October 25, 2014

I was pretty excited when I found this dress at my local Goodwill. You may be wondering why, since it is obviously just a big shapeless sack on me. Well, let me tell you: 1. The larger size/longer length means more fabric, 2. It was actually 2(!) whole dresses (the outer tank dress and inner short sleeved one) sewn together at the shoulder seams, which means double fabric, and 3. It had a yellow tag, which just so happened to be that week's 50% off color. SOLD.
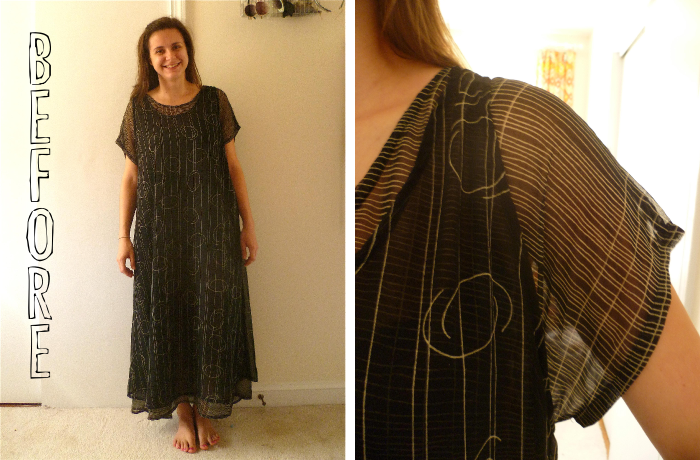
reversible kimono before
Since I had a lot of fabric, I thought this would be the perfect time to jump on the DIY kimono bandwagon (seriously, these things are all over the blogosphere right now). Although my sister (who was shopping with me that day) didn't care for them, I really liked the prints on both of the dresses. I played around with the idea of doing a contrast sleeve or back, but then decided to just make two kimonos. This quickly turned into sewing the two together to create a reversible kimono, and voilĂ !
DIY Reversible Kimono Refashion from Dress by Hey, it's SJ
As far as the pattern/construction goes... I based my measurements for my pieces on this tutorial, but my front pieces were slightly shorter and my sleeves were a little more narrow. I sewed the shoulder, sleeves and side seams with french seams, and inserted the sleeves "on-the-flat" (before sewing the underarm or the side seams together, see this post). Inserting them this way was a lot easier with the chiffon, but I would also recommend it for any fabric with this pattern since there is absolutely no difference in the finished product and it is SO much easier.
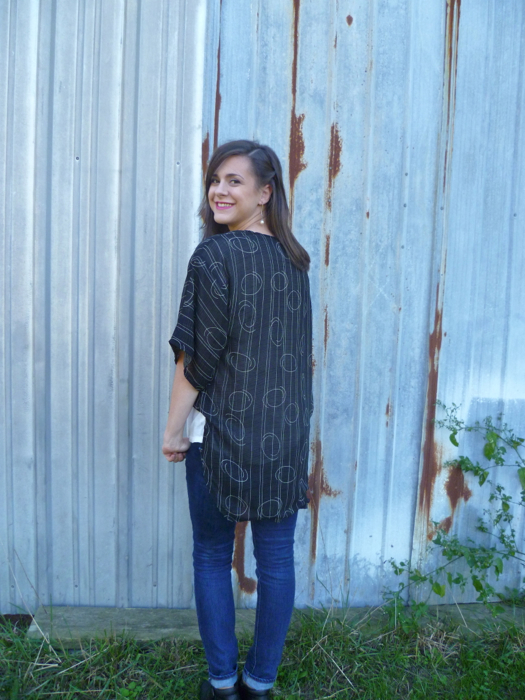
DIY Reversible Kimono Refashion from Dress by Hey, it's SJ
To make it reversible, I sewed up the two kimonos, one from each of the dresses. Then with right sides together, I stitched along the front and bottom hems, leaving the back of the neck open to turn, and then turned the kimono right side out. To finish the sleeves I folded a 1/2 inch hem to the wrong side of each of the sleeves (each side has two sleeves, so I had to do this 4 times), then I pinned the two sleeves on each side together and top stitched them, creating a single sleeve with no raw edges. I closed the hole in the neckline just by topstitching, and then also topstitched around the front and bottom hems to give the edges a cleaner finish.

DIY Reversible Kimono Refashion from Dress - front side 2 by Hey, it's SJ
I have to say, I struggled through pretty much every step of this process, not because it was hard, just because I didn't enjoy it. Cutting/sewing the chiffon was a nightmare; it's one of those fabrics that I love to wear, but then I sit down to work with it and it frustrates me to no end. But I sucked it up. I figured that since it was just a bunch of rectangles it wouldn't be too bad. Well, it's not easy to cut any shape out of slippery chiffon (which I knew going into the project, but that still doesn't make it any easier to actually do). Then, after I started cutting, I realized I wasn't going to have enough fabric to make the front panels and sleeves quite as big as I wanted. No biggie, I just cut them a little smaller and dealt with it. Then, even though this kimono was going to be reversible with no exposed seams, I had the *genius* idea to use french seams for a super professional finish. So I had to sew each seam twice, and since it is reversible, I had to do them on each of the two kimonos. UGH. This greatly increased the amount of time it took me to sew the whole thing together, turning what could have been a quick and easy project into a long(er), more dreadful one. But I finally got it finished, and I don't know, it just doesn't wow or excite me. Yes, it's a kimono, it's reversible, and I like the prints, but I look at it and I just think "meh." I am happy with the construction; I think most of my dissatisfaction is with the fact that I want it to be longer in the front. I don't know, I'm going to give it a few weeks and wear it some and see if it grows on me. 

DIY Reversible Kimono Refashion from Dress - front side 1 by Hey, it's SJ
I didn't get very many (good) photos of this make because it was crazy windy the day I decided to take pictures and of course chiffon + wind = impossible to photograph. I did get some good outtakes though!

DIY Reversible Kimono Refashion from Dress - outake 2 by Hey, it's SJ
DIY Reversible Kimono Refashion from Dress - outake 1 by Hey, it's SJ
And I even got this one with the cows grazing in the background. (I also didn't pick the best time of day, and the lighting was less than desirable.) Still a pretty unique picture, I think!

DIY Reversible Kimono Refashion from Dress - with cows by Hey, it's SJ
I really don't want to discourage anyone from making one of these; I think with a different fabric choice and enough fabric to make it the way I wanted I would absolutely love this project, and to prove it to myself I will probably give it another try. In the meantime, I think this one will be nice to wear on these cool but not cold, transitional fall days.
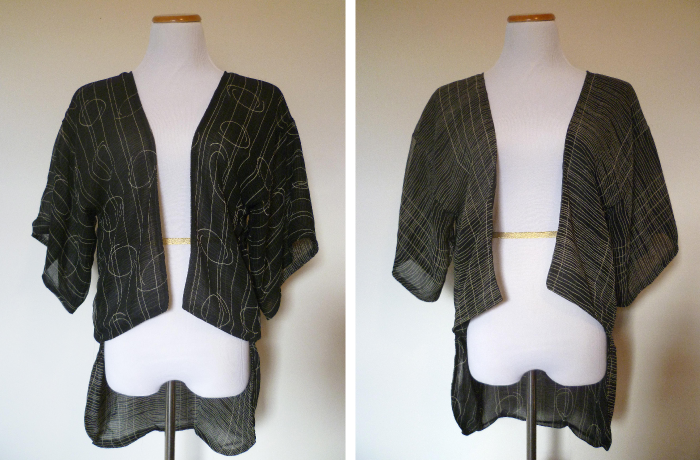
DIY Reversible Kimono after by Hey, it's SJ
Now, I'm curious to know, which side do you like better? The one with the circle-y things, or the one that's just lines? Also, would anyone be interested in a more detailed tutorial about the reversible part? I'm thinking about writing one up, with diagrams and everything!

I am also sharing this project over on Refashion Co-Op. Here's the link to check it out, if you so desire.
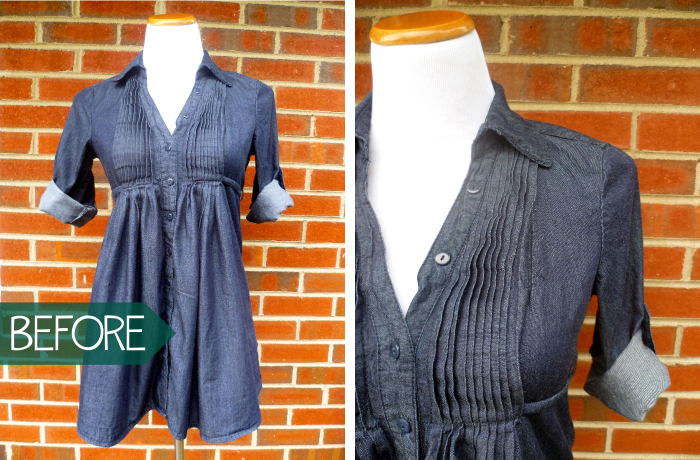
One Last Summer Sewing Project: A Tunic Refashioned into Prefontaine Shorts

September 23, 2014

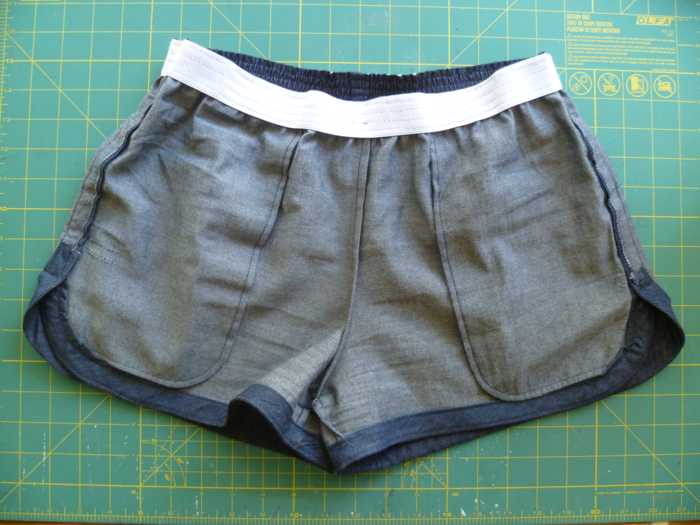
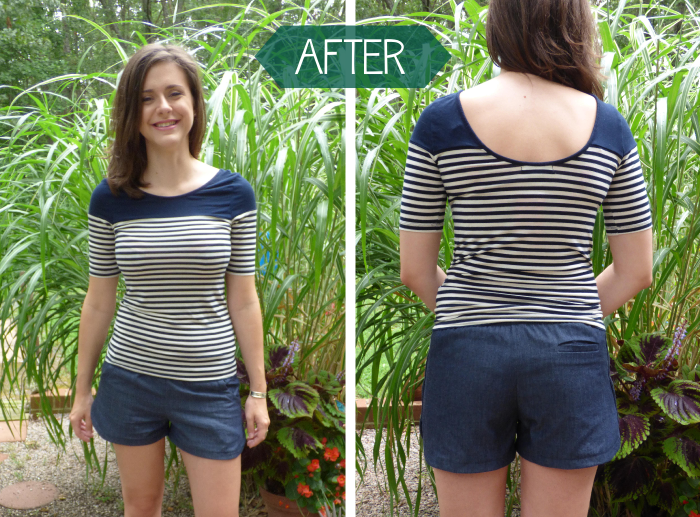
I know what you're probably thinking, yet ANOTHER pair of Prefontaine Shorts. But this particular pair is special for a couple reasons. First, I refashioned them from an unworn lightweight denim tunic I had hanging around in my closet. Also, this is my first contribution over on the Refashion Co-op!! I'm really excited to be one of the newest contributors, and I'm looking forward to being able to share my refashions with a whole new audience.
Denim Tunic to Prefontaine Shorts Refashion before by Hey it's SJ
You can head over to the co-op to check out the history of this shirt, and since I've made this shorts pattern one, two, three times already, I'm just going to talk about the modifications I made for this particular pair.
Denim Tunic to Prefontaine Shorts Refashion after by Hey, it's SJ
--I used the same inseam length as my American Flag pair, about an inch shorter than the longest inseam on the pattern.
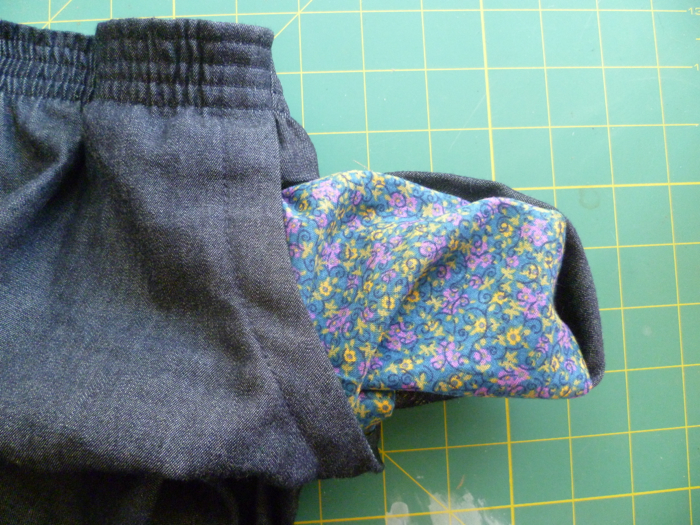
Denim Tunic to Prefontaine Shorts Refashion inside front by Hey, it's SJ Denim Tunic to Prefontaine Shorts Refashion inside front pocket by Hey, it's SJ
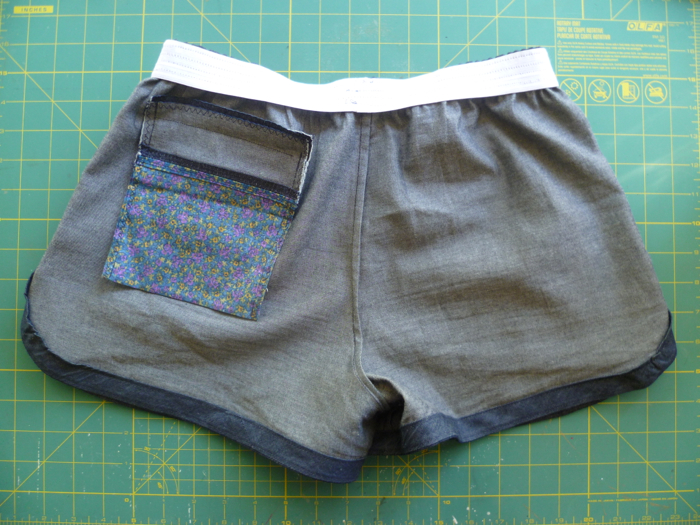
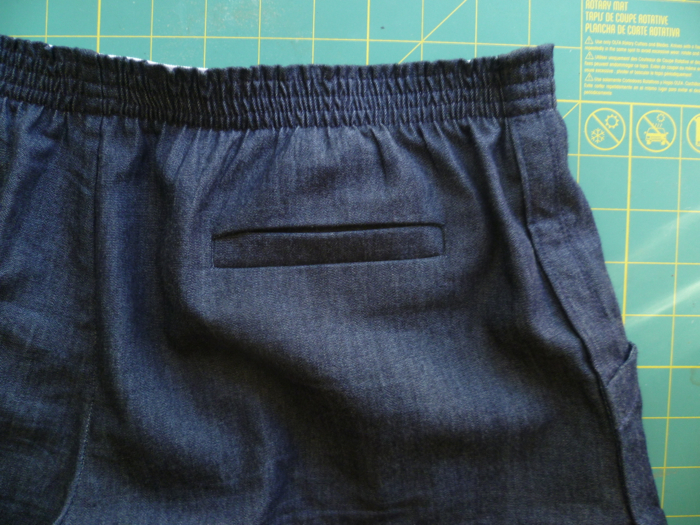
--I kept the front pockets on this pair, but to prevent a line of stitching from showing on the front of the shorts, I added a pocket lining piece. I picked up a fat quarter from Joann's to use as the lining for the front and the back welt pockets. Speaking of the back welt pocket, I did it a little differently than the pattern. Instead, I used this single welt pocket technique from Poppy Kettle. It definitely took a little longer than the pattern instructions, but I think the results are a bit better so I think it was worth it.
Denim Tunic to Prefontaine Shorts Refashion inside back by Hey, it's SJ Denim Tunic to Prefontaine Shorts Refashion close up back pocket by Hey, it's SJ
--The only other change I made was with how I applied the bias tape. Unfortunately, there wasn't quite enough fabric to make self bias tape from the tunic; however I was able to find some dark lightweight denim at Joann's that was very similar (By the way, chambray and lightweight denim are not the same thing. This tunic was made out of a 4 oz. denim.) While both fabrics felt and looked the same, after I prewashed the new fabric there was quite a noticeable color difference. I wanted the shorts to be all the same color, so I decided to turn the bias tape to the inside of the shorts rather than leave it visible on the outside. I used the same technique that you would if you were finishing a neckline or armhole.
Denim Tunic to Prefontaine Shorts Refashion by Hey, it's SJ
I absolutely love how they turned out! I've already worn them more times that I ever wore the ill-fitting tunic, so in my book that is a super successful refashion!

Welp, this officially marks the end of my summer sewing for this year (sad face), but I already have some of my fall sewing projects in the works. I plan on sharing at least one as part of Selfish Sewing Week, so stay tuned later in the week for that post(s)!

A Simple Shirt Refashion + A New Mantra

August 17, 2014

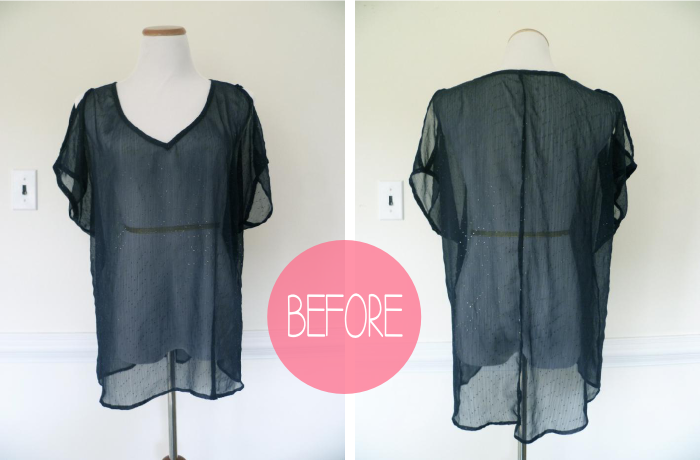
Hmm... another refashion? I'm sensing a theme, but more on that later. Let's talk about this shirt. When I found this little number on the Target clearance rack, I immediately fell in love. The cold shoulder sleeves (love that term), the high-low hem, and the sheer fabric made me immediately say, I have to have this (OK, so the price didn't hurt either). The only problem, though, was the smallest size they had was a large. There are definitely cases where I have to size up in tops to accommodate my bust, but for loose, flowy shirts like this one I tend to size down because otherwise they swallow me, which is exactly what this shirt did (and then some).
Simple Shirt Refashion before
See how it is super boxy and there is all that extra fabric hanging on the sides? Yeah, not flattering. But I justified the purchase by telling myself I would just wear it belted, and I did. But no belt loops and all that extra fabric meant I was constantly adjusting and readjusting throughout the day, so this shirt has just been hanging in my closet pretty much unworn for the 3(!!) years I've owned it.

I wrote a couple weeks ago about cleaning out my closet, and this is one of the pieces that fell into category 3 along with the other clothes I like but never wear because they need a little attention. Once I realized just wearing it with a belt wasn't going to get this shirt into regular rotation, it hung around while I pondered how to take it in. Because of how it is constructed, simply slimming it at the sides would cause issues with the armholes, so that wasn't an option. There is already a seam down the back, so that would be the next logical place to ease out the fullness, but I really like the shape of the hem and worried that doing so would distort it. So it hung there for a little while longer until it hit me.
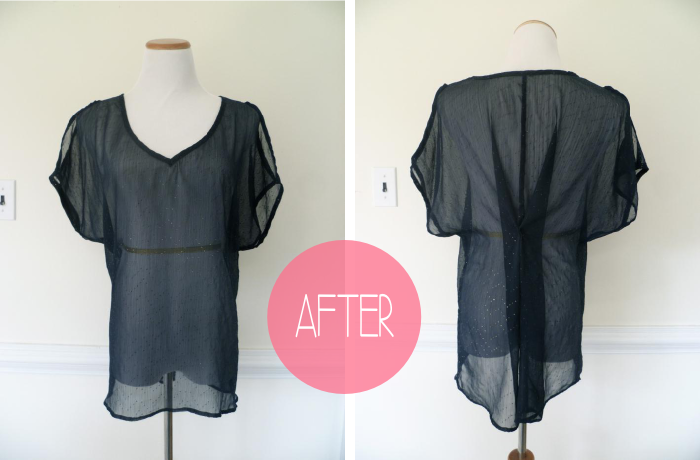
Simple Shirt Refashion after
You know when you go into those little boutiques and the clothes on the mannequins always fit them so well? Well trust me, they don't come off the hanger that way. The secret? Usually just a clothes pin that holds all the extra fabric in the back. What I needed to make this shirt wearable was a permanent clothes pin! All I did was pinch a bit of fabric about 4 inches to the left and right of the center back seam along the waistline. Then I brought the two pinches to the center and tacked them together by hand. So simple, and even with the measuring, pinning, trying on, and hand sewing it only took me 15 minutes!
Simple Shirt Refashion back
It's not a very dramatic change from the front, but I love the fullness it created in the back and I am 100% more comfortable wearing it now. For such an easy alteration, it really is shameful that it took me three years to get it done. But now that it is, this shirt has quickly become one of my favorites.
Simple Shirt Refashion front
In that same post about cleaning out my closet, I mentioned that I purchased Elizabeth Cline's book Overdressed: The Shockingly High Cost of Cheap Fashion. Well, once it finally arrived I finished it in about two days; it was an interesting but quick read and really gives a perspective on retail clothing that we as a society simply don't think about. One of my favorite takeaways from the book and my new sewing/fashion/life mantra is her chapter title "Make. Mend. Alter." Such a simple concept that has become pretty much extinct in our "quick, easy, disposable" society. I could go on and on about this topic but I will leave it at this: I want to make clothes that fit, alter the ones I already own that don't, and mend the ones that need it to get as much life out of them as possible. By doing so I hope to reduce the amount of clothes that end up in landfills and the secondhand clothing industry (read chapter 5 "The Afterlife of Cheap Clothes" if you want to know more about what really happens to those donations that you write off every year), and also of course to have a wardrobe I love and am proud of and that lasts. Obviously there will still be occasions where donating a garment is the best option, and my latest big purge has resulted in a laundry basket full of clothes that are headed to Goodwill. Hopefully this mindset will prevent me from ever having to do a big purge like that again, and instead I can focus on "working with what I've got" and creating clothes that I love to wear. So in short, expect to see some more refashions and alterations of clothes I already have in my wardrobe along with all my new makes!
Has anyone else read Overdressed and want to gush about it? I'm not usually one to fall for hyped-up, sensationalized media but the numbers and facts presented in the book seem to tell the story pretty clearly. What are your thoughts?

More Culottes! - McCall's 6965 Refashioned from a Skirt

July 31, 2014

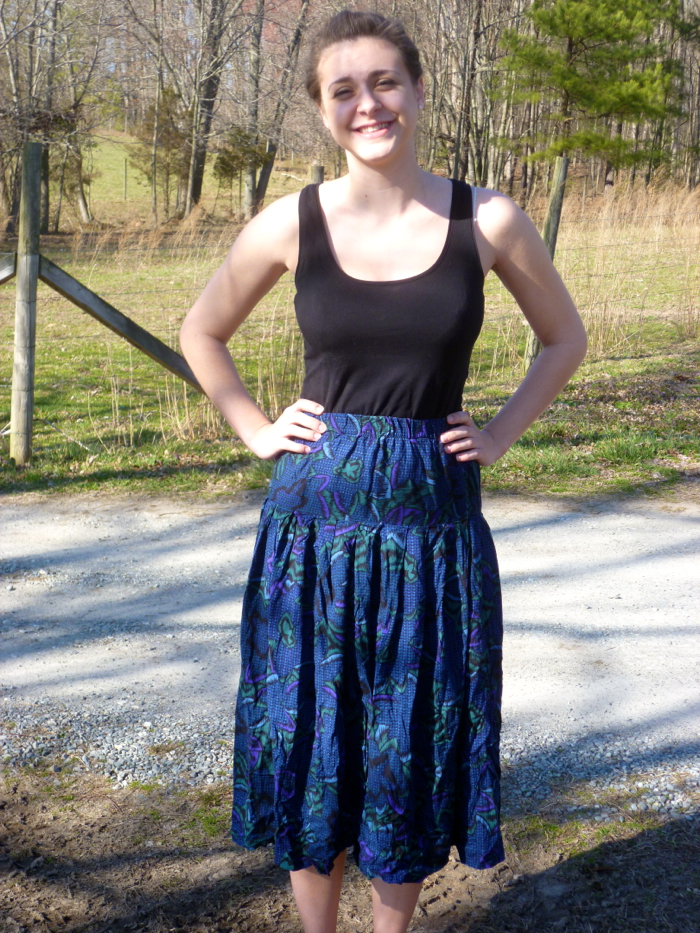
When I moved from my mom's house into the house I'm living in now, a lot of my clothes and stuff ended up in big black trash bags. Coincidentally, so did some of my mom's old clothes that were headed to Goodwill, and by some stoke of luck a bag containing her old clothes and this skirt ended up with me:
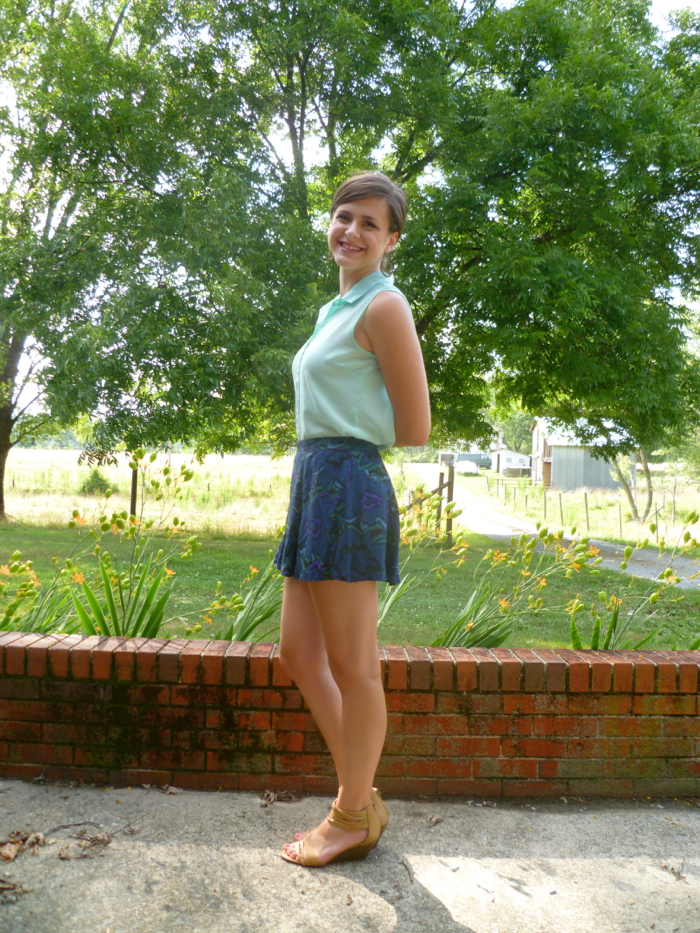
McCall's 6965 Skirt to Culottes Refashion - before by Hey, It's SJ I know you're probably thinking it was a stroke of BAD luck that made me the owner of this seriously dated number, and you can tell by the look on my face in that picture that I knew I had some work to do. BUT THAT FABRIC! I immediately fell in love with the print, and it's a rayon challis so it has a lovely drape and feel. However, the elastic waistband, drop waist, and midi-length were not doing it any favors. No worries, I knew I could make it into something fabulous that I would actually wear. Enter McCall's 6965.
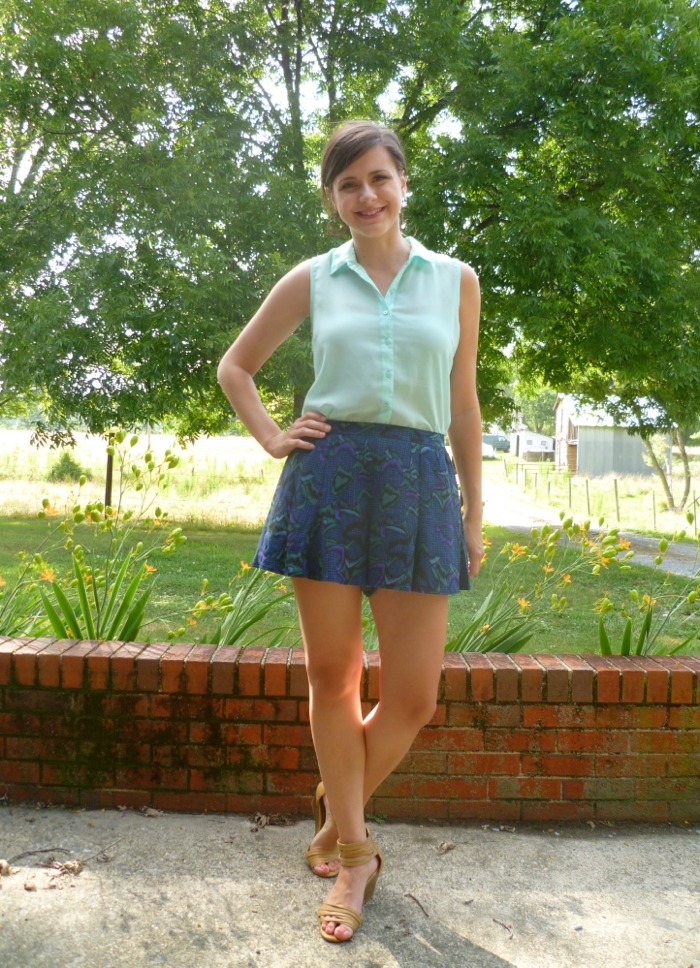
McCall's 6965 Skirt to Culottes Refashion - front by Hey, It's SJIt's no secret that I have a major clothes crush on culottes, and when I spotted this pattern in McCall's spring pattern line, I knew that skirt was destined to become a pair of cute and trendy culottes. First, I needed to deconstruct the skirt to see how much fabric I had to work with. It's hard to tell in the before pic, but the skirt is actually pleated along the drop waist so there was a bit more fabric hiding there. It had one front panel and two back panels with a center back seam (not sure why since it had an elastic waist??), so after I unpicked all the seams I had one larger panel, two smaller panels, and that whole elastic/drop waist thingy. I didn't take a picture of this step (boo) but the larger panel was about 30 x 30 inches and the two smaller panels were about 20 x 30 inches each.
McCall's 6965 Skirt to Culottes Refashion- side by Hey, It's SJ The front and back princess seams on the McCall's pattern meant smaller pattern pieces that were easier to fit onto the smaller pieces of fabric, and I had just enough fabric to cut out all of the pieces including the waistband. I folded the larger piece in half and cut the side front and side back pieces from it, then placed the two smaller pieces wrong sides together and cut the front, back, and waistband with almost nothing left over. I didn't have nearly enough fabric to even attempt to pattern match, but with this print the seams and zipper pretty much disappear anyway.
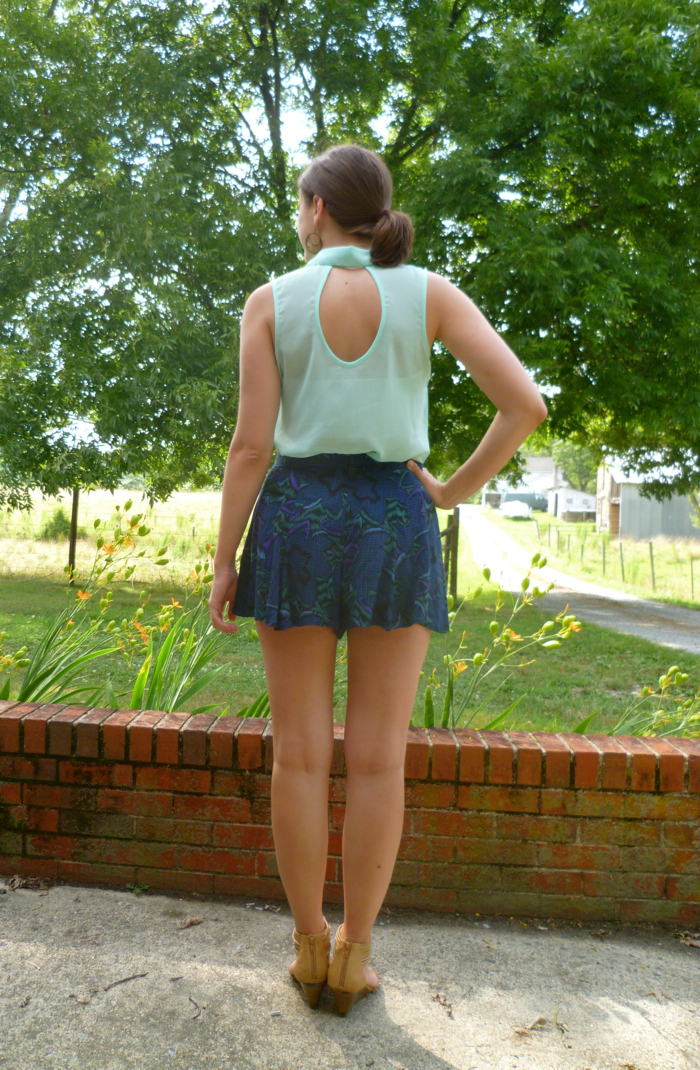
McCall's 6965 Skirt to Culottes Refashion - back by Hey, It's SJ The pattern directions were easy to follow, and since it is one of their Palmer/Pletsch patterns there are a bunch of tips for fixing fit issues and making pattern alterations. I sewed view B in a straight size 14 with no alterations (ironically not using any of those fit tips). I think this size actually sits a little lower on my waist that it is "supposed to" but it's very comfortable. And I'm going to go ahead and say what everyone is thinking: they are SHORT. If they actually sat on my waist where they were supposed to then they would be TOO short. I like short shorts so this length is fine for me, but if/when I make this pattern again I will probably add at least an inch to the hem, mostly for more butt coverage when I sit down.
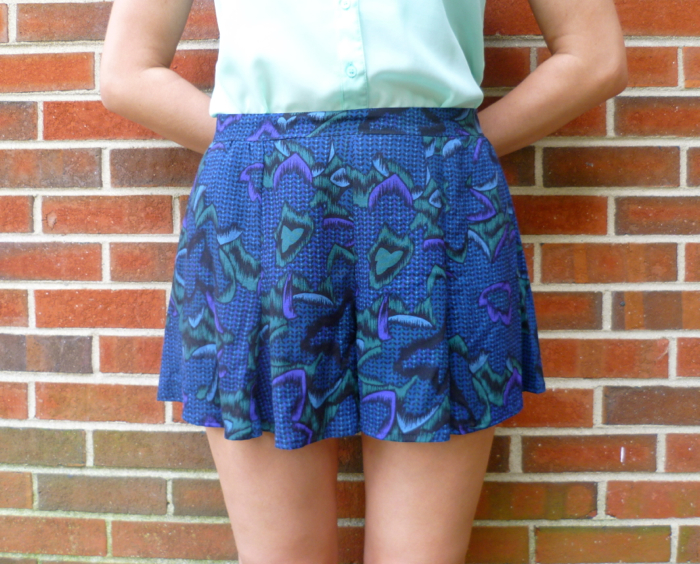
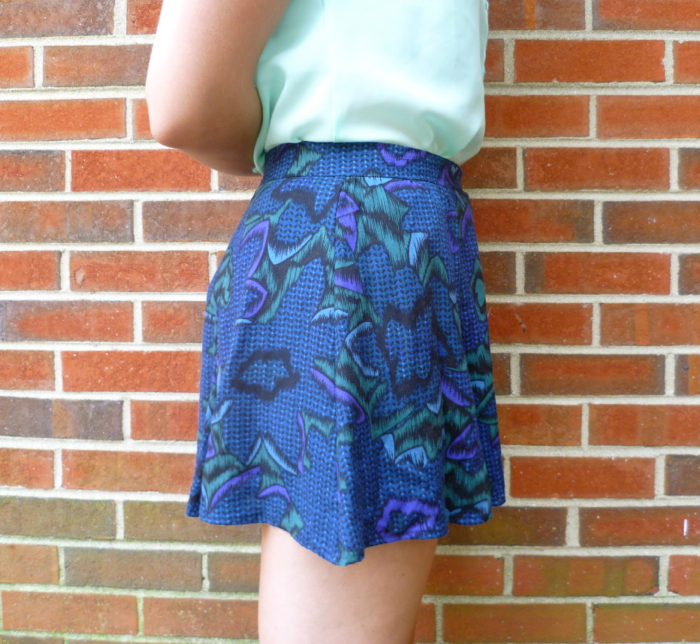
McCall's 6965 Skirt to Culottes Refashion - close up front by Hey, It's SJ McCall's 6965 Skirt to Culottes Refashion - close up side by Hey, It's SJ McCall's 6965 Skirt to Culottes Refashion - close up back by Hey, It's SJ As far as construction goes, I used french seams on all the seams except the center seam with the zipper. I really do wish french seams and zippers could learn to resolve their differences (haha), but in the meantime I finished that seam by simply folding under the seam allowance and stitching it in place. I followed the directions in the pattern for a standard lapped zipper, but next time I will probably use an invisible one. The zipper is far from my best, but again the print on this fabric is super forgiving so I didn't stress it too much. The pattern recommends a blind hem, but I used a 1/4 inch double fold hem. The blind hem just seemed like a lot of work for a fabric that you can't even see the hem stitching anyway.
McCall's 6965 Skirt to Culottes Refashion - with LuLu by Hey, It's SJ Of course I had to steal a picture with little Lu.
McCall's 6965 Skirt to Culottes Refashion - side 1 by Hey, It's SJ Even with all the french seams this pattern sewed up pretty quickly, and I was able to succesfully take that dated skirt and make it into a modern pair of culottes that are now one of my favorite pieces in my wardrobe! And one of my favorite parts of this project? The price! Since I got the pattern at Hancock Fabrics during one of their $1.99 sales, the zipper during one of their 50% off notions sales, and I had thread and black interfacing on hand, it only cost me about $3!!
McCall's 6965 Skirt to Culottes Refashion - collage by Hey, It's SJ I'm entering this project as part of the Summer 2014 Shorts on the Line Sewalong. Be sure to vote for my project, and all of your favorites, on Kollabora! Just click the little heart icon on the right hand side of the page to vote.

Did-It-Myself American Flag Shorts

June 14, 2012

DIY American Flag Shorts by Hey It's SJ

Do a quick search on the web for "American flag shorts" and you will find several a) pictures of celebrities rocking these patriotic pantaloons, b) any number of retailers trying to sell you their (usually over-priced) version, and c) numerous DIY-ers showing you how they made some from an old pair of jeans/shorts and some paint/fabric. So even though I won't be winning any Nobel prizes for originality, I figured I would share with ya'll how I made mine!

I started with this pair of jeans that I got from Old Navy for $4 circa 2006:
Jeans before being made into DIY American Flag Shorts
Blah. I haven't worn them in years, but they still fit me well and were in good shape. So what do I do with this perfectly good pair of jeans? Cut them up of course!Here is a good tutorial on how to make a cuffed pair of shorts, similar to what I did with mine. I prefer the more finished look of cuffed shorts, but I have also seen some really cute versions of these American flag shorts as cut-offs.

After my jeans got upgraded to shorts, it was time for some painting. Following the instructions on the bottle, I mixed a textile medium with regular acrylic craft paint. I have used some "ready-to-use" fabric paints in the past, but they have a tendency to dry a little stiff. Since the entire front of the shorts are covered in paint, I opted to use the textile medium that is a bit more flexible when it dries.

To achieve the American flag pattern, first I applied my navy paint mixture to one side of the shorts with a cut-up kitchen sponge. After that dried, I stenciled on the stars with my white paint mixture. At first I used a sponge with the stencil, but when that didn't give me the coverage I was looking for, I went back in by hand with a brush. For the stripes, I used painters tape and sponged (is that a word?) on the red, removed the tape and painted on the white with a brush. I wasn't worried about getting perfectly even coverage or making sure all the lines were straight because I was going for more of a vintage, handmade look. After all the paint was dry, I followed the directions on the bottle of textile medium to heat-set the design. And just like that, I had a festive new pair of shorts.

I finished 'em just in time to wear on a Memorial Day trip to the river!
Finished DIY American Flag Shorts at the River
Before and After DIY American Flag Shorts