Off-the-Shoulder Dress | M6558

May 20, 2016

I don't know how the weather has been in your part of the country/world, but here in Central Virginia it seems like we have had more cloudy/rainy days than sunny and I could count on one hand the number of days the temperature has gotten above 75, which is completely atypical for this area. It's basically felt like March for 3 months now and I CAN.NOT.WAIT. to be complaining about how hot and humid it is. Seriously! Consequently, this dress that I finished at the beginning of April hasn't been worn except to snap these photos :( It looks so sad hanging in my closet being all but ignored as I try to find sweaters and jackets that I'm not sick of wearing since October. My hope is that by blogging about it, some warm, sunny weather will be encouraged to head this way and stay for a while. Summer will come. It has to, right? I really hope so.
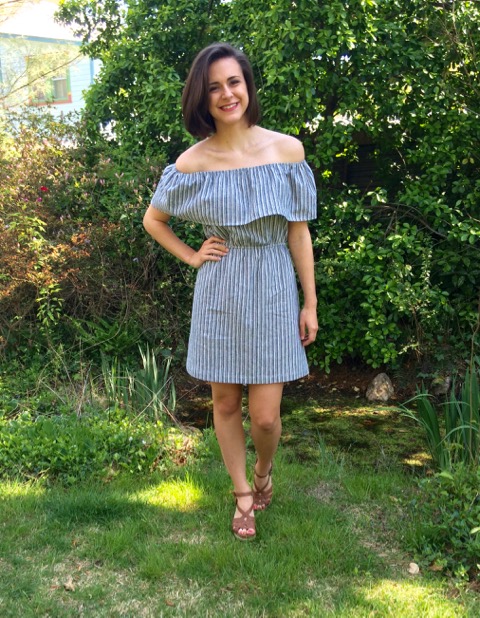
M6558 DIY Off-the-Shoulder Dress by Hey it's SJ

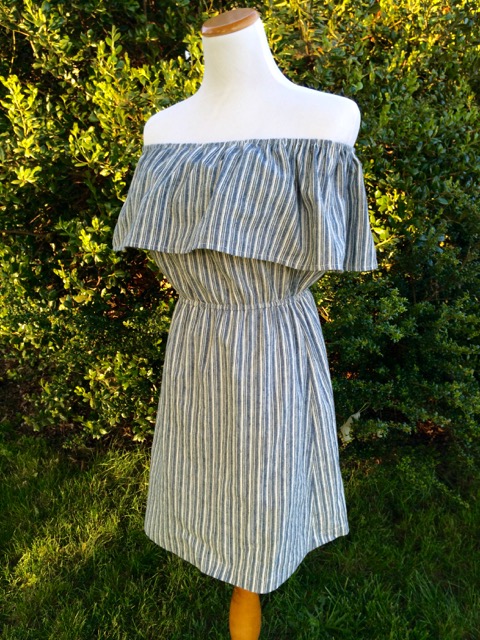
As you can see, I have punched my ticket for the off-the-should-trend bandwagon and I am not even slightly sorry! I used McCall's 6558 View B a modified it a little to get the look I was going for in my head.

M6558 DIY Off-the-Shoulder Dress by Hey it's SJ

I made a quick muslin of the size 10 and decided not to make any alterations for fit, so even with the muslin step this was a really quick sew. I only made a couple of design changes, specifically shortening the length to mid-thigh (using my Southport dress as a guide) and also shortening the shoulder ruffle by about 1 inch. If/when I make another version, I might give the skirt more of an a-line shape to add a little fullness.

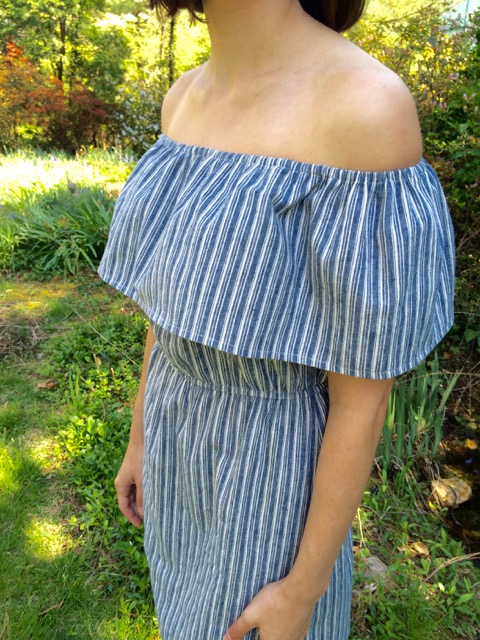
M6558 DIY Off-the-Shoulder Dress by Hey it's SJ

I picked up this fabric on my very last trip to Hancock Fabrics (R.I.P). I am super bummed to see them go as the only places in Richmond to buy apparel fabrics are Joann or Hancock and I have never been impressed with Joann's selection/pricing/quality of apparel fabrics. I guess that means a lot more online fabric shopping for me! I picked up a few different wovens on this trip, this one being a cotton/linen blend that was super soft even before washing it. It sort of has a mid-weight hand to it but because of the content I'm sure it will be nice and light and comfortable to wear if the weather ever decides to warm up.
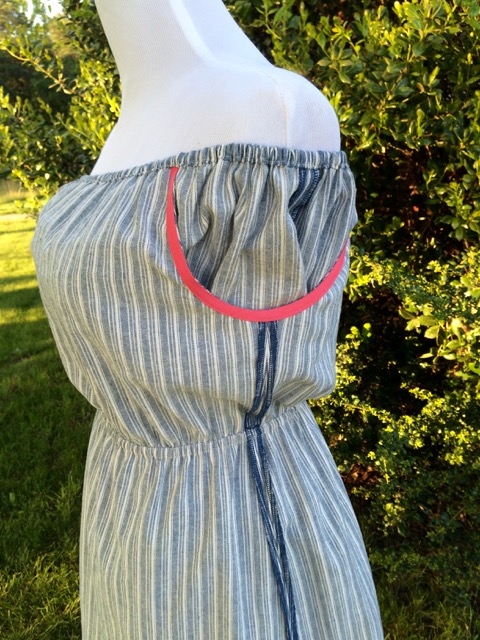
M6558 DIY Off-the-Shoulder Dress by Hey it's SJ

Construction on this dress was really straight forward. The hardest part for me was feeding the elastic through the casings as it was a veryyy tight squeeze. The armholes are finished with bias binding leftover from my Easter dress (yet to be blogged). I serged the side seams, and the hems on the ruffle and skirt are double folded and topstitched. My favorite sewing hack as of late is using doubled sided tape (like this) for hems. I used the 1/4" wide version for the hem on the ruffle. Just place it along the raw edge of the fabric, pull off the paper, fold up the fabric the width of the tape, fold up again, and stitch in place. The result is neat and even and there is no measuring involved! Love it.

M6558 DIY Off-the-Shoulder Dress by Hey it's SJ

While I was cutting and sewing this dress, the thought of adding pockets came to mind more than once but was rejected each time out of sheer laziness. Of course, the first thing I said to myself when I put it on to go take these pictures was "Man, I wish I had some pockets." I guess I could do some unpicking and throw in some inseam pockets, or maybe patch pockets on the front would be easier? I don't know, the lazy voice in my head is telling me it's not that big of a deal. Perhaps I will wait until I can really get some wear out of the dress before I make a final decision.
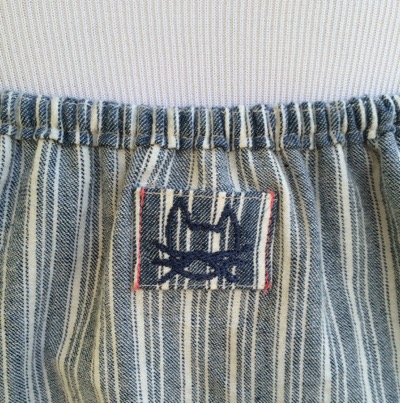
M6558 DIY Off-the-Shoulder Dress by Hey it's SJ

Oh! I almost forgot to tell you about my favorite part, the tag! This is one of those garments where it is impossible to tell the front from the back, so I knew I needed to add something to help me differentiate between the two. I went a little computer nerd and designed this guy in Inkscape then converted it to a digital embroidery file. I used one of the embroidery machines at work to embroider him onto a piece of scrap fabric which I made into a tag and sewed into the dress. And then all of the heart-eye cat face emojis. I love him, I really do! I realize that when I'm wearing the dress, no one will know it is there (except for you guys if you see me wearing it, haha) but there is just something about it that makes me happy. Maybe thats weird, but I don't care.
M6558 DIY Off-the-Shoulder Dress by Hey it's SJ

Anywaysss, I think that's all I have to say about this pretty straight-forward make. I'm going to go savor these last little bits of sunshine before it rains all weekend (again).


Pattern: M6558, View B by McCall Pattern Companym6558dressthumbnail
Fabric: Striped Cotton/Linen Blend from Hancock Fabrics
Body Measurements: Bust 36.5/Waist 27/Hip 37.5 (in inches)
Size: 10
Adjustments/Alterations: shortened skirt to mid-thigh length, shortened shoulder ruffle 1 inch

DIY Reversible Kimono Refashion

October 25, 2014

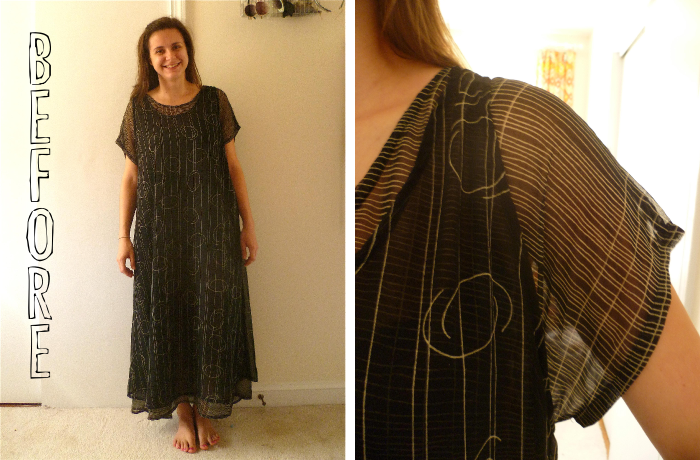
I was pretty excited when I found this dress at my local Goodwill. You may be wondering why, since it is obviously just a big shapeless sack on me. Well, let me tell you: 1. The larger size/longer length means more fabric, 2. It was actually 2(!) whole dresses (the outer tank dress and inner short sleeved one) sewn together at the shoulder seams, which means double fabric, and 3. It had a yellow tag, which just so happened to be that week's 50% off color. SOLD.
reversible kimono before
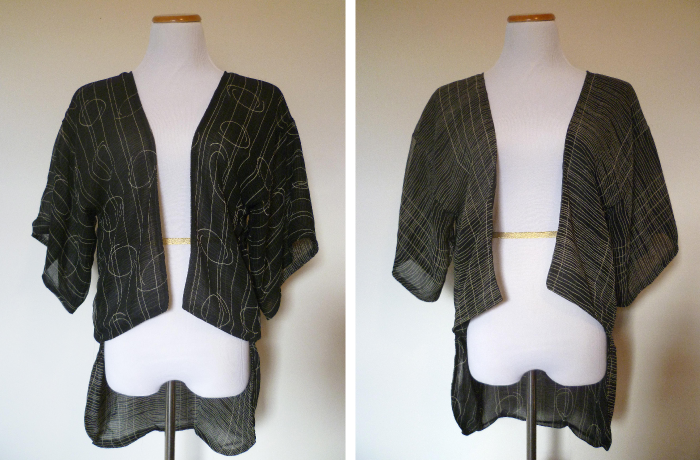
Since I had a lot of fabric, I thought this would be the perfect time to jump on the DIY kimono bandwagon (seriously, these things are all over the blogosphere right now). Although my sister (who was shopping with me that day) didn't care for them, I really liked the prints on both of the dresses. I played around with the idea of doing a contrast sleeve or back, but then decided to just make two kimonos. This quickly turned into sewing the two together to create a reversible kimono, and voilĂ !
DIY Reversible Kimono Refashion from Dress by Hey, it's SJ
As far as the pattern/construction goes... I based my measurements for my pieces on this tutorial, but my front pieces were slightly shorter and my sleeves were a little more narrow. I sewed the shoulder, sleeves and side seams with french seams, and inserted the sleeves "on-the-flat" (before sewing the underarm or the side seams together, see this post). Inserting them this way was a lot easier with the chiffon, but I would also recommend it for any fabric with this pattern since there is absolutely no difference in the finished product and it is SO much easier.
DIY Reversible Kimono Refashion from Dress by Hey, it's SJ
To make it reversible, I sewed up the two kimonos, one from each of the dresses. Then with right sides together, I stitched along the front and bottom hems, leaving the back of the neck open to turn, and then turned the kimono right side out. To finish the sleeves I folded a 1/2 inch hem to the wrong side of each of the sleeves (each side has two sleeves, so I had to do this 4 times), then I pinned the two sleeves on each side together and top stitched them, creating a single sleeve with no raw edges. I closed the hole in the neckline just by topstitching, and then also topstitched around the front and bottom hems to give the edges a cleaner finish.
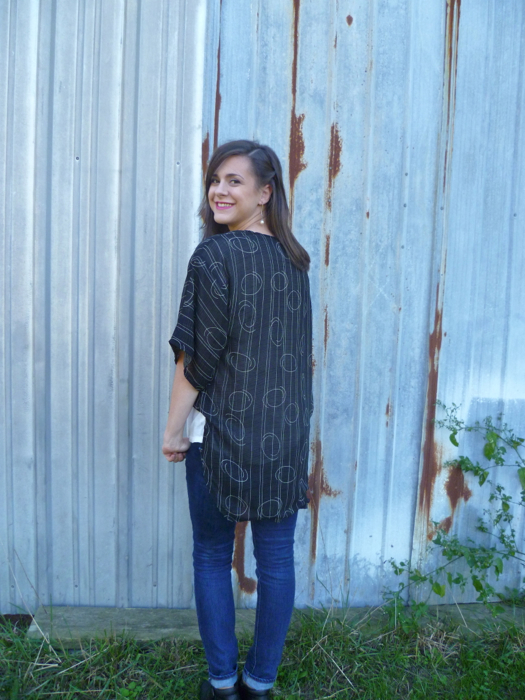
DIY Reversible Kimono Refashion from Dress - front side 2 by Hey, it's SJ
I have to say, I struggled through pretty much every step of this process, not because it was hard, just because I didn't enjoy it. Cutting/sewing the chiffon was a nightmare; it's one of those fabrics that I love to wear, but then I sit down to work with it and it frustrates me to no end. But I sucked it up. I figured that since it was just a bunch of rectangles it wouldn't be too bad. Well, it's not easy to cut any shape out of slippery chiffon (which I knew going into the project, but that still doesn't make it any easier to actually do). Then, after I started cutting, I realized I wasn't going to have enough fabric to make the front panels and sleeves quite as big as I wanted. No biggie, I just cut them a little smaller and dealt with it. Then, even though this kimono was going to be reversible with no exposed seams, I had the *genius* idea to use french seams for a super professional finish. So I had to sew each seam twice, and since it is reversible, I had to do them on each of the two kimonos. UGH. This greatly increased the amount of time it took me to sew the whole thing together, turning what could have been a quick and easy project into a long(er), more dreadful one. But I finally got it finished, and I don't know, it just doesn't wow or excite me. Yes, it's a kimono, it's reversible, and I like the prints, but I look at it and I just think "meh." I am happy with the construction; I think most of my dissatisfaction is with the fact that I want it to be longer in the front. I don't know, I'm going to give it a few weeks and wear it some and see if it grows on me. 
DIY Reversible Kimono Refashion from Dress - front side 1 by Hey, it's SJ
I didn't get very many (good) photos of this make because it was crazy windy the day I decided to take pictures and of course chiffon + wind = impossible to photograph. I did get some good outtakes though!
DIY Reversible Kimono Refashion from Dress - outake 2 by Hey, it's SJ
DIY Reversible Kimono Refashion from Dress - outake 1 by Hey, it's SJ
And I even got this one with the cows grazing in the background. (I also didn't pick the best time of day, and the lighting was less than desirable.) Still a pretty unique picture, I think!
DIY Reversible Kimono Refashion from Dress - with cows by Hey, it's SJ
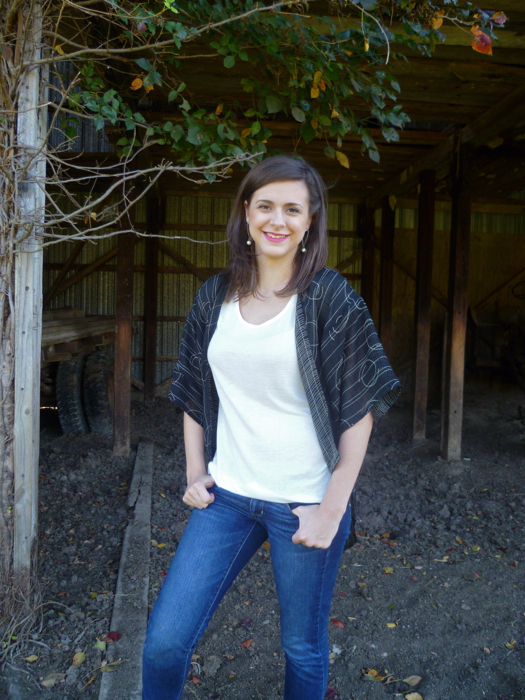
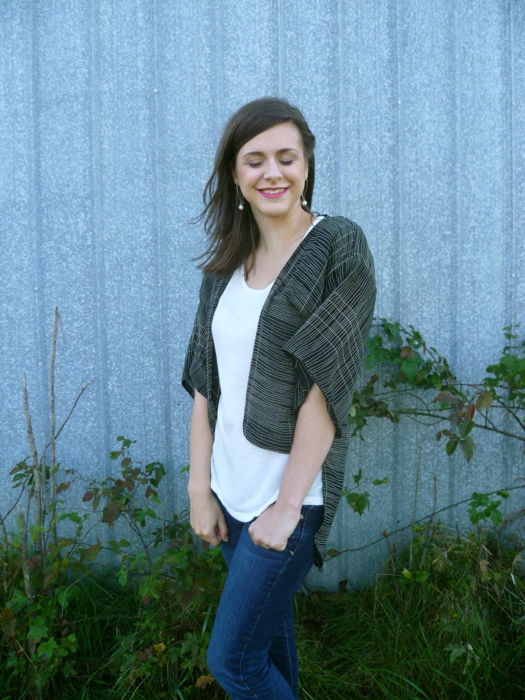
I really don't want to discourage anyone from making one of these; I think with a different fabric choice and enough fabric to make it the way I wanted I would absolutely love this project, and to prove it to myself I will probably give it another try. In the meantime, I think this one will be nice to wear on these cool but not cold, transitional fall days.
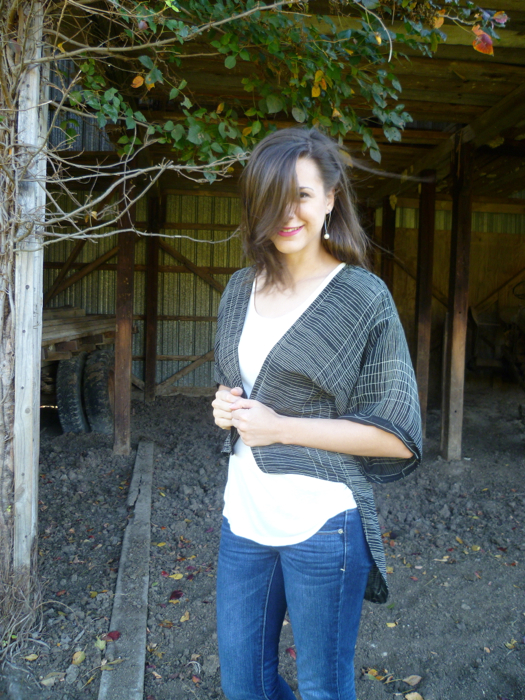
DIY Reversible Kimono after by Hey, it's SJ
Now, I'm curious to know, which side do you like better? The one with the circle-y things, or the one that's just lines? Also, would anyone be interested in a more detailed tutorial about the reversible part? I'm thinking about writing one up, with diagrams and everything!

I am also sharing this project over on Refashion Co-Op. Here's the link to check it out, if you so desire.

One Last Summer Sewing Project: A Tunic Refashioned into Prefontaine Shorts

September 23, 2014

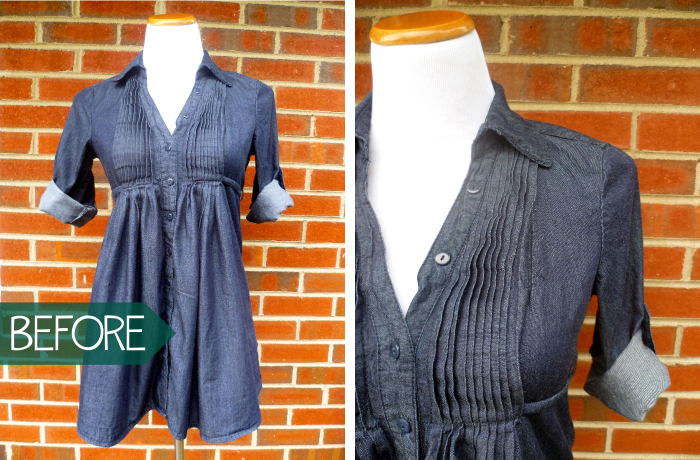
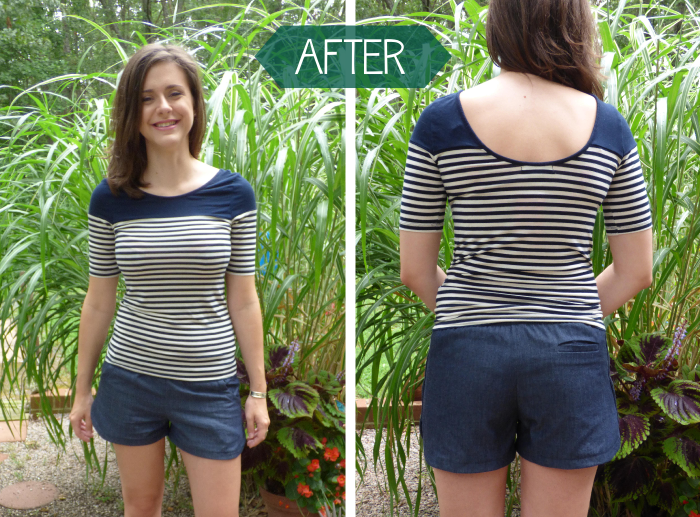
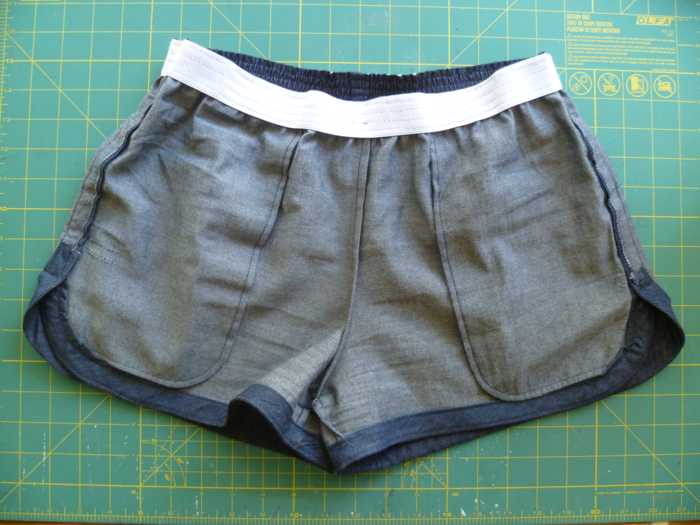
I know what you're probably thinking, yet ANOTHER pair of Prefontaine Shorts. But this particular pair is special for a couple reasons. First, I refashioned them from an unworn lightweight denim tunic I had hanging around in my closet. Also, this is my first contribution over on the Refashion Co-op!! I'm really excited to be one of the newest contributors, and I'm looking forward to being able to share my refashions with a whole new audience.
Denim Tunic to Prefontaine Shorts Refashion before by Hey it's SJ
You can head over to the co-op to check out the history of this shirt, and since I've made this shorts pattern one, two, three times already, I'm just going to talk about the modifications I made for this particular pair.
Denim Tunic to Prefontaine Shorts Refashion after by Hey, it's SJ
--I used the same inseam length as my American Flag pair, about an inch shorter than the longest inseam on the pattern.
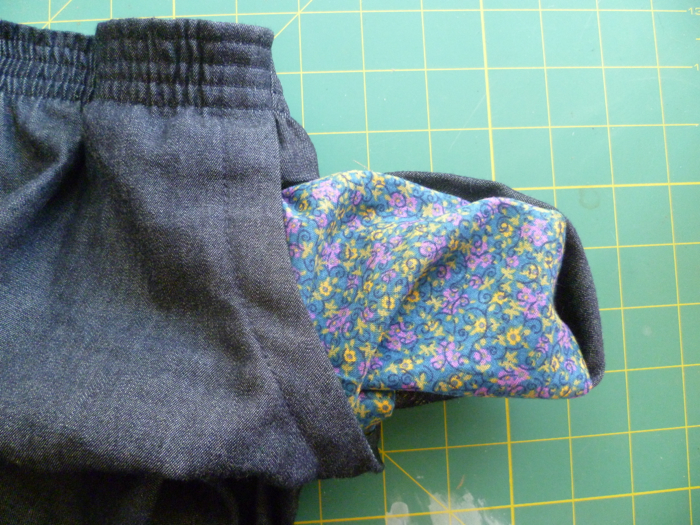
Denim Tunic to Prefontaine Shorts Refashion inside front by Hey, it's SJ Denim Tunic to Prefontaine Shorts Refashion inside front pocket by Hey, it's SJ
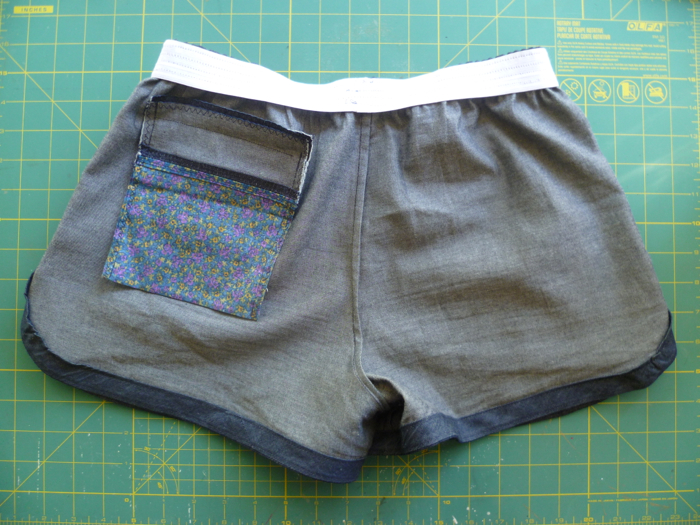
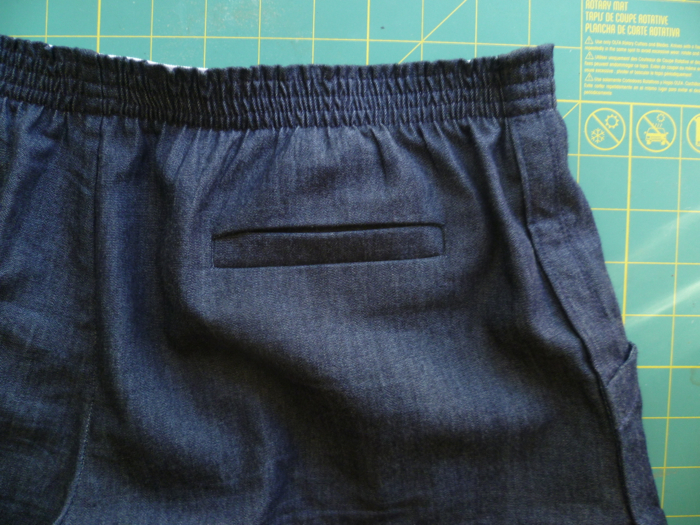
--I kept the front pockets on this pair, but to prevent a line of stitching from showing on the front of the shorts, I added a pocket lining piece. I picked up a fat quarter from Joann's to use as the lining for the front and the back welt pockets. Speaking of the back welt pocket, I did it a little differently than the pattern. Instead, I used this single welt pocket technique from Poppy Kettle. It definitely took a little longer than the pattern instructions, but I think the results are a bit better so I think it was worth it.
Denim Tunic to Prefontaine Shorts Refashion inside back by Hey, it's SJ Denim Tunic to Prefontaine Shorts Refashion close up back pocket by Hey, it's SJ
--The only other change I made was with how I applied the bias tape. Unfortunately, there wasn't quite enough fabric to make self bias tape from the tunic; however I was able to find some dark lightweight denim at Joann's that was very similar (By the way, chambray and lightweight denim are not the same thing. This tunic was made out of a 4 oz. denim.) While both fabrics felt and looked the same, after I prewashed the new fabric there was quite a noticeable color difference. I wanted the shorts to be all the same color, so I decided to turn the bias tape to the inside of the shorts rather than leave it visible on the outside. I used the same technique that you would if you were finishing a neckline or armhole.
Denim Tunic to Prefontaine Shorts Refashion by Hey, it's SJ
I absolutely love how they turned out! I've already worn them more times that I ever wore the ill-fitting tunic, so in my book that is a super successful refashion!

Welp, this officially marks the end of my summer sewing for this year (sad face), but I already have some of my fall sewing projects in the works. I plan on sharing at least one as part of Selfish Sewing Week, so stay tuned later in the week for that post(s)!

DIY Calendar and FREE 2014 Monthly Calendar Printables

August 26, 2014

**UPDATE December 2014: My new 2015 monthly calendar is available (and it's still free to print and download) !!

Just a quick little post today! I mentioned last week that I was starting school full time this week... Well yesterday I got all of my syllabuses (syllabi?) and these next 16 weeks are going to be BUSY. I realized I don't have a planner, and after browsing around Target realized that most of the ones on the market are either out of my budget or not exactly what I am looking for. So of course I decided to DIY one! 

I created some printable monthly calendars so I can keep track of the big things at a glance. 
Then I printed off some of these free weekly pages from Passion Planner. I probably would have just purchased one of these planners, but they are sold out (sad face). Don't worry, I totally plan (pun intended) on buying a 2015 one! Until then, the free pages will do just fine for breaking down each day and organizing my to-do list on a weekly basis. 
To keep all these loose pages free, I just punch some holes in them and stuck them in a 3-ring binder. Not the fanciest planner, but it was essentially free and has everything I was looking for. 
The best part of all of this is YOU can make one, too! Below are links to download my printable monthly calendars for FREE. Right now I have them through then end of 2014, but stay tuned for 2015! 

Just click on the images to download that month's calendar. The calendars are in PDF format, so you will need Adobe Reader to view and print them. 
Please note that the monthly calendars are free for personal use only. Please contact me in regards to using the calendars in items for sale.

What are your tips for keeping your to-do list organized? Do you have any tip for making sure all those things actually get done? I can pretty much use all the help I can get right now!

Back-to-School Senna Tote + A Life Update

August 20, 2014

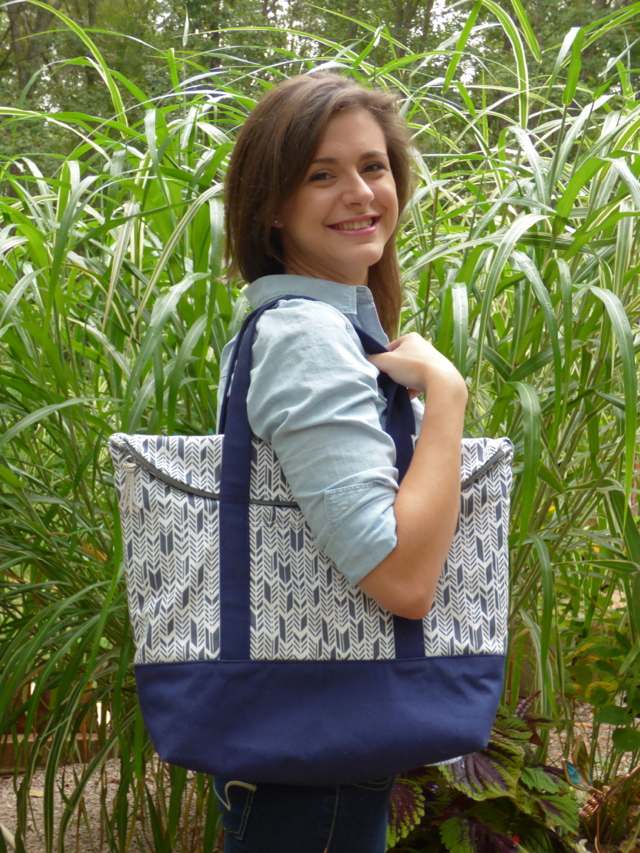
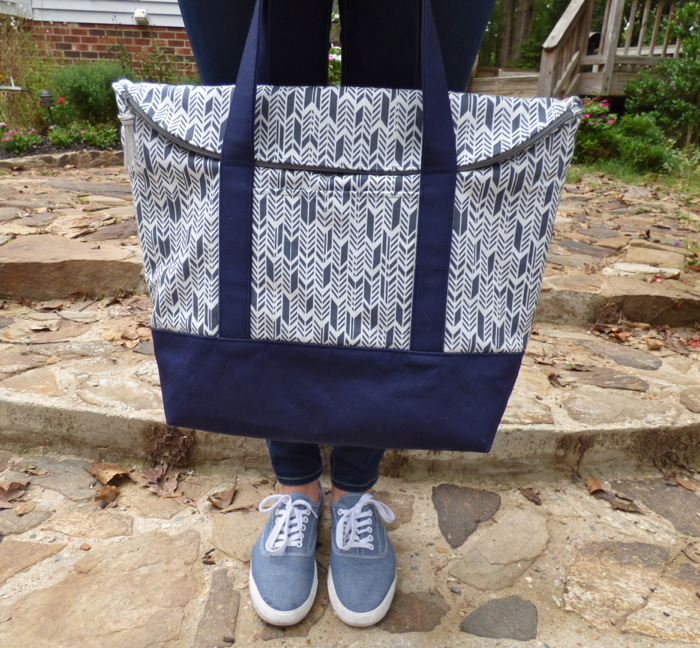
I'm kinda a sucker for a canvas tote; they are classic and practical, perfect for the beach or school and everywhere in between. So when I came across the Senna Tote pattern by LBG Studios with its fun, fold-over design twist, I knew I would have to have one, and now I do!
Senna Tote by Hey, It's SJ
I actually really enjoying sewing bags. They are usually just made up of a bunch of rectangles and you don't have to worry about anything fitting onto a body, which for me is absolutely the hardest part of sewing clothes. But if you have never sewn a bag before, here's what you need to know: 1. They might only be made up of rectangles, but there are usually A LOT of them, and 2. The materials can get pretty expensive pretty quickly. Both of these facts come from one thing: interfacing. Now, interfacing and I have a love/hate relationship. I hate buying it because it's expensive, it usually only comes in 20 inch widths so I need ridiculous amounts of it, I have to cut all of the pieces out AGAIN as if just cutting all the fabric and lining pieces wasn't bad enough, and then I have to sit there and fuse all of the interfacing to the aforementioned fabric and lining pieces. Ugh. But it is an absolute necessity when making any type of bag, and I do love the structure and weight it gives to the fabric. Once you get past the whole cutting and interfacing process, the sewing part of the bag making process is so much fun, it totally makes it worth it. Plus you end up with a brand new bag you can sport around town everyday (unlike a self-made top or bottom that people might look at you funny for wearing to work 5 days in a row).
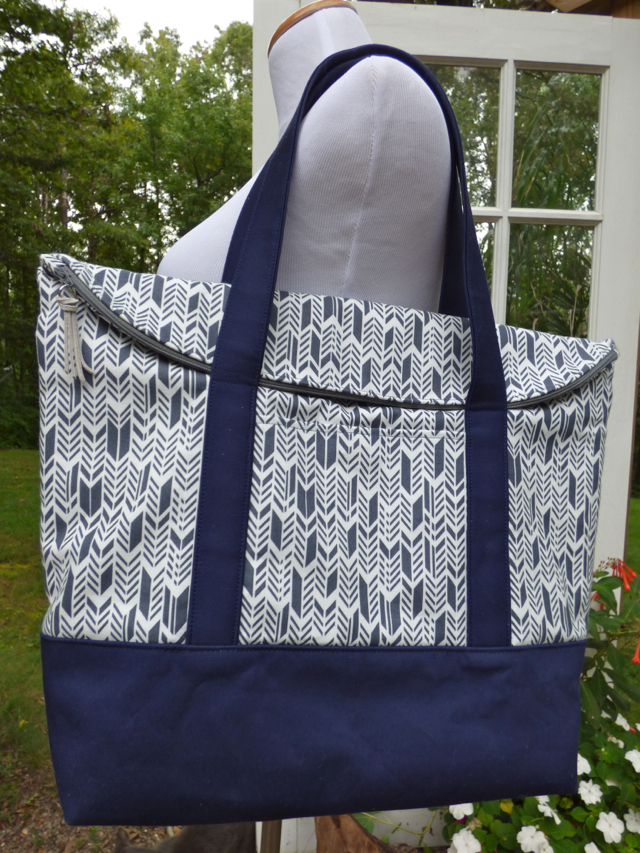
Senna Tote by Hey, It's SJ
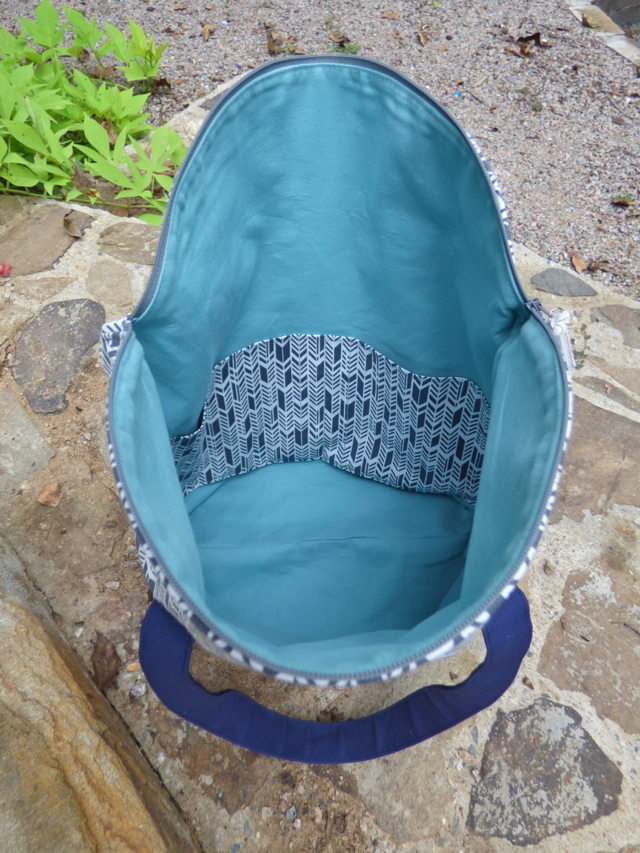
But anyway, let's talk specifically about this AMAZING pattern. I was super impressed by the thoroughness of the pattern in general. The instructions were well thought out and easy to follow, the cutting layouts were spot on in minimizing waste, and the construction was exactly in the order of how I would have done it sans-pattern. One of the only major things it was missing for me was lining for the outside pockets. If you follow the pattern instructions, the inside of the exterior pockets would have just been the canvas interlining. Maybe it was designed that way to reduce some of the bulk in the seams, but to me that is too unfinished of a look, especially on the back outside pocket where you would see the stitching from the handles. Unfortunately I didn't realize this until I had already purchased my fabric, and and I didn't have nearly enough of the lining which is what I would have preferred to use. Instead, I used the main fabric to line the front pocket, and I pieced together some of the lining and main fabric for the back pocket. For next time, I know to get a little bit more lining fabric than the pattern calls for.
Senna Tote inside back pocket by Hey, It's SJ
Speaking of next time, I will definitely keep the lining on the back pocket free when sewing on the handles. I kind of hate that I didn't think about this until after I had already sewn on both handles, but you live and you learn. I am probably one of the few people who will actually see the inside of that pocket, still annoys me, though.
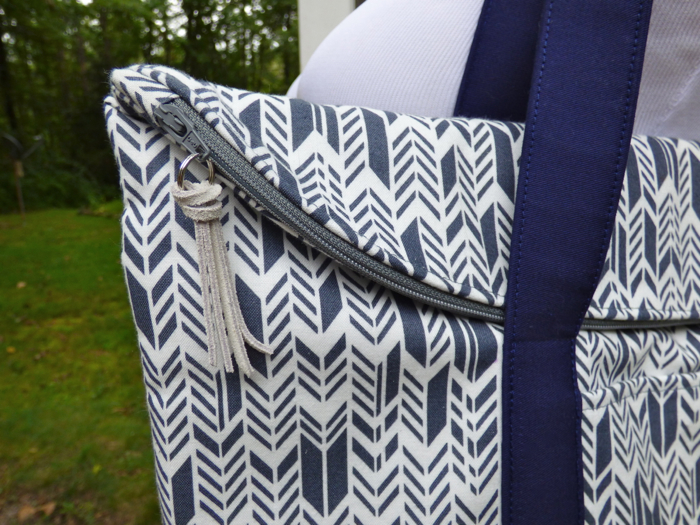
Senna Tote by Hey, It's SJ Senna Tote close up zipper closed by Hey, It's SJ
For me the most challenging part of making this bag was sewing through the multiple layers of thick fabric. Each exterior piece is fabric, interfacing, and canvas interlining, as well as the pockets and handles. Needless to say the seam where the bottom meets the main piece, as well as the side seams, were more than a little tricky to get through. I had a whole new sewing machine debacle that started in the middle of sewing the handles on that I don't even want to get into because it makes me so upset (sad face), but my little Brother machine ended up saving the day and I somehow managed to get all the pieces together without breaking a needle (I used a size 16 jeans needle that helped tremendously). Some of the topstitching isn't anything to write home about, but I'm still proud of my machine nonetheless.
Senna Tote by Hey, It's SJ
The only change I made to the pattern was adding the lining to the exterior pockets. I also used a bottomweight cotton twill for the bottom and handles rather than a quilting cotton. These are the parts of the bag that will get the most wear, so I figured something more heavy duty than a quilting cotton, even with interfacing, would hold up better. Because of this, I omitted the extra interfacing the pattern says to add to the canvas interlining for the bag bottom. For the interlining throughout the entire bag I used duck cloth canvas from Joann's, the same stuff used to make cornhole bags. I think it is a little thicker than the weight that the pattern recommends, but I had about a yard of the white on hand so I used that up. It definitely adds some great structure to the bag, but it probably made everything a little harder to sew through and next time I will probably try something a little lighter weight. Other than that I did everything as directed.
Senna Tote by Hey, It's SJ
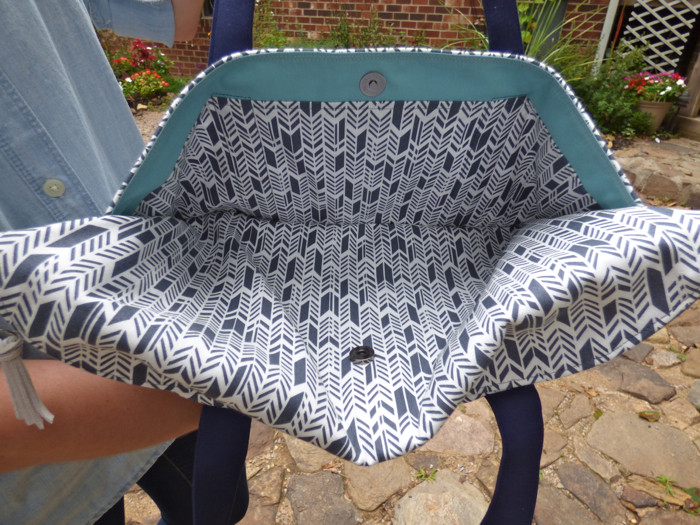
Speaking of fabrics, the main fabric is a print by Alison Glass for Andover Fabrics from her Sun Print collection. I used the Feathers print in charcoal, purchased from Quilting Adventures. The bottom is a navy bottomweight cotton twill that I got from Joann's, and the lining is a Country Classic solid also from Joann's, I believe the color is called spray green.
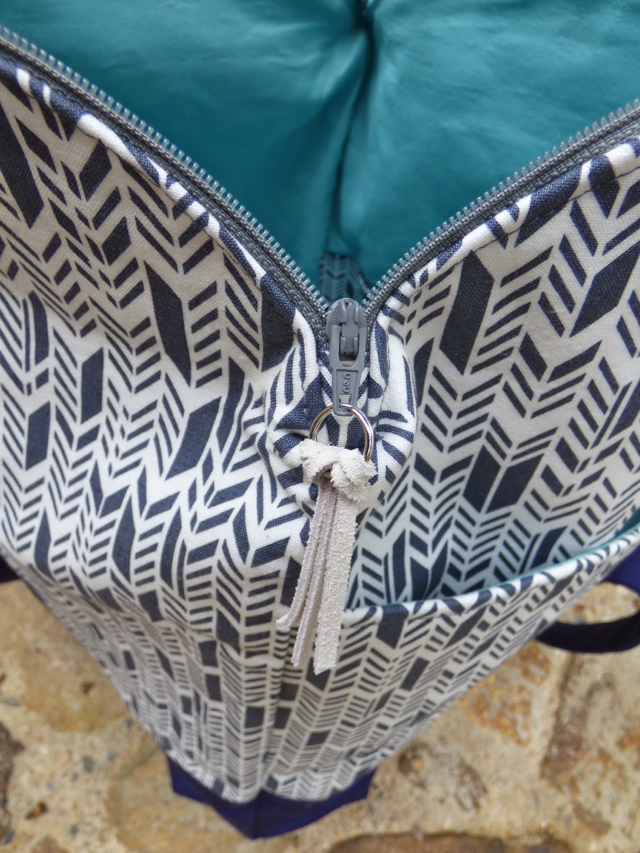
Senna Tote zipper close up open by Hey, It's SJ
I finished the zipper pull with a split ring and some suede leather lace from Michael's (yay for finally using up some birthday/Christmas gift cards!).
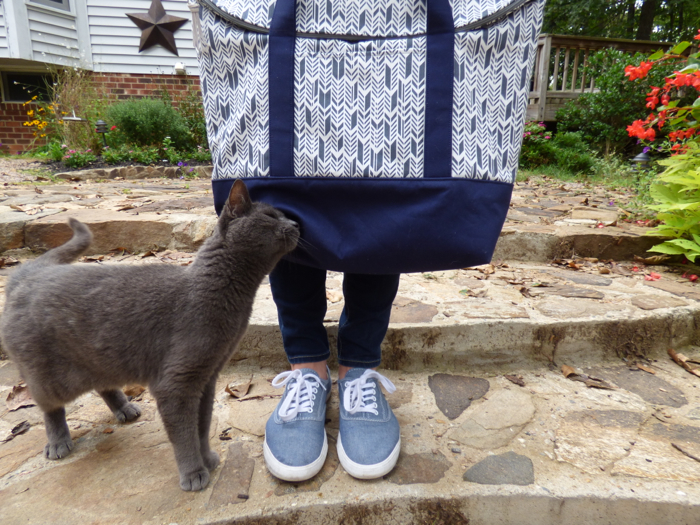
Senna Tote and Miss Kitty by Hey, It's SJ
That's my mom's cat, Miss Kitty, and I think she likes this tote, too! I have to give a little shout out to my lovely and talented mother for snapping these pictures for me with her fancy-pants camera. I know you're reading, so thanks, Momma!

So, you might have noticed that I dubbed this my "back-to-school" Senna tote, and that's because I'm going back to school!!! Actually I've been in school part-time for about a year now, and I finished my Certificate in Accounting (34 credit hours) at the local community college in May. I was studying accounting when I was in Asheville, so I figured I might as well have something to show for it, and I only had to take 4 more classes. But this fall (actually next week, eek!) I will be taking a full course load while working part-time and sewing and blogging. I will be working on my Associates in Information Systems Technology, again from the local community college. I still haven't decided if I want to concentrate in Programming or Web Design, so I'm gonna take some different classes before I decide, and who knows, maybe I will end up doing both!

Now as if all that wasn't enough to keep me busy, I have also joined the local Junior League! If you are not familiar with the Junior League, you can check out the Richmond chapter's website here. Basically it is an organization of women committed to volunteerism and service in the local community. The year hasn't officially started yet, but all of the women I've met so far have been amazing and I can't wait to start really getting involved in the upcoming months.

So lots of new and exciting things going around here. Now that the summer is getting closer and closer to turning into fall, do you have anything new or exciting happening? Have you started making plans for your fall/winter sewing? I'm in denial that summer is ever going to end so I've been putting mine off!

A Simple Shirt Refashion + A New Mantra

August 17, 2014

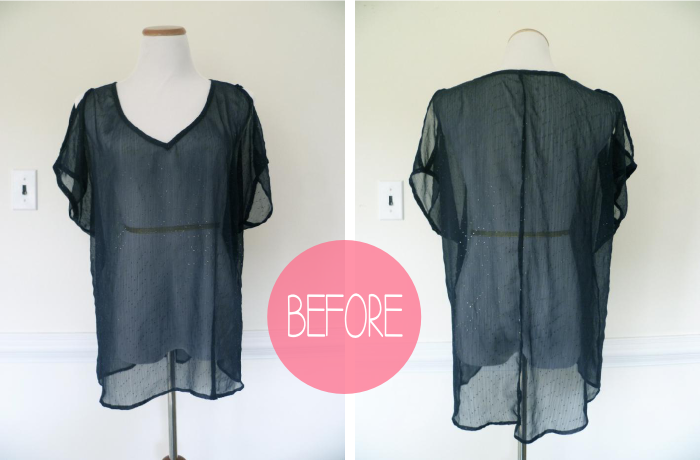
Hmm... another refashion? I'm sensing a theme, but more on that later. Let's talk about this shirt. When I found this little number on the Target clearance rack, I immediately fell in love. The cold shoulder sleeves (love that term), the high-low hem, and the sheer fabric made me immediately say, I have to have this (OK, so the price didn't hurt either). The only problem, though, was the smallest size they had was a large. There are definitely cases where I have to size up in tops to accommodate my bust, but for loose, flowy shirts like this one I tend to size down because otherwise they swallow me, which is exactly what this shirt did (and then some).
Simple Shirt Refashion before
See how it is super boxy and there is all that extra fabric hanging on the sides? Yeah, not flattering. But I justified the purchase by telling myself I would just wear it belted, and I did. But no belt loops and all that extra fabric meant I was constantly adjusting and readjusting throughout the day, so this shirt has just been hanging in my closet pretty much unworn for the 3(!!) years I've owned it.

I wrote a couple weeks ago about cleaning out my closet, and this is one of the pieces that fell into category 3 along with the other clothes I like but never wear because they need a little attention. Once I realized just wearing it with a belt wasn't going to get this shirt into regular rotation, it hung around while I pondered how to take it in. Because of how it is constructed, simply slimming it at the sides would cause issues with the armholes, so that wasn't an option. There is already a seam down the back, so that would be the next logical place to ease out the fullness, but I really like the shape of the hem and worried that doing so would distort it. So it hung there for a little while longer until it hit me.
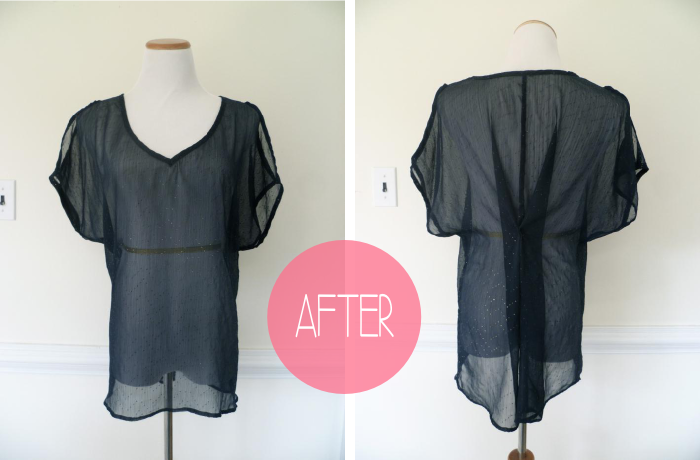
Simple Shirt Refashion after
You know when you go into those little boutiques and the clothes on the mannequins always fit them so well? Well trust me, they don't come off the hanger that way. The secret? Usually just a clothes pin that holds all the extra fabric in the back. What I needed to make this shirt wearable was a permanent clothes pin! All I did was pinch a bit of fabric about 4 inches to the left and right of the center back seam along the waistline. Then I brought the two pinches to the center and tacked them together by hand. So simple, and even with the measuring, pinning, trying on, and hand sewing it only took me 15 minutes!
Simple Shirt Refashion back
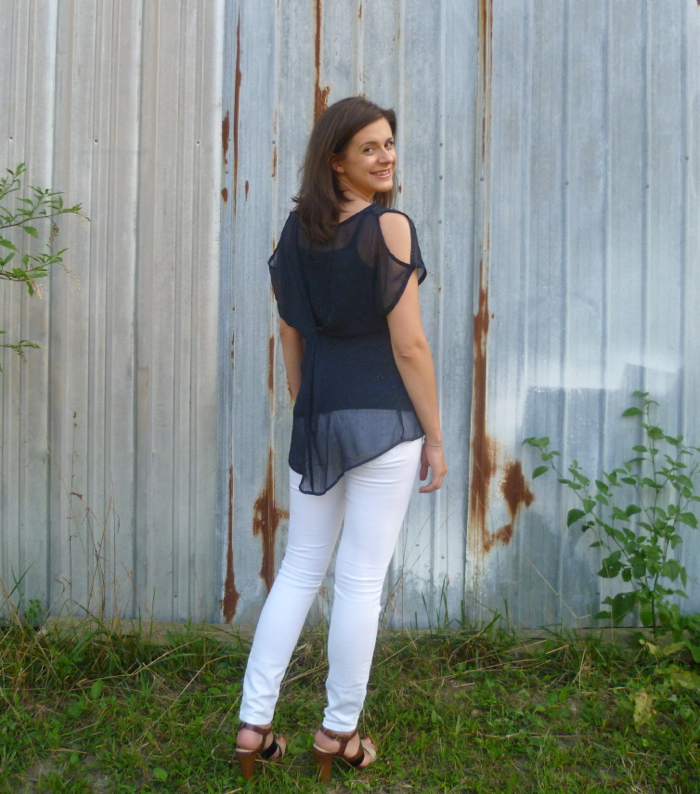
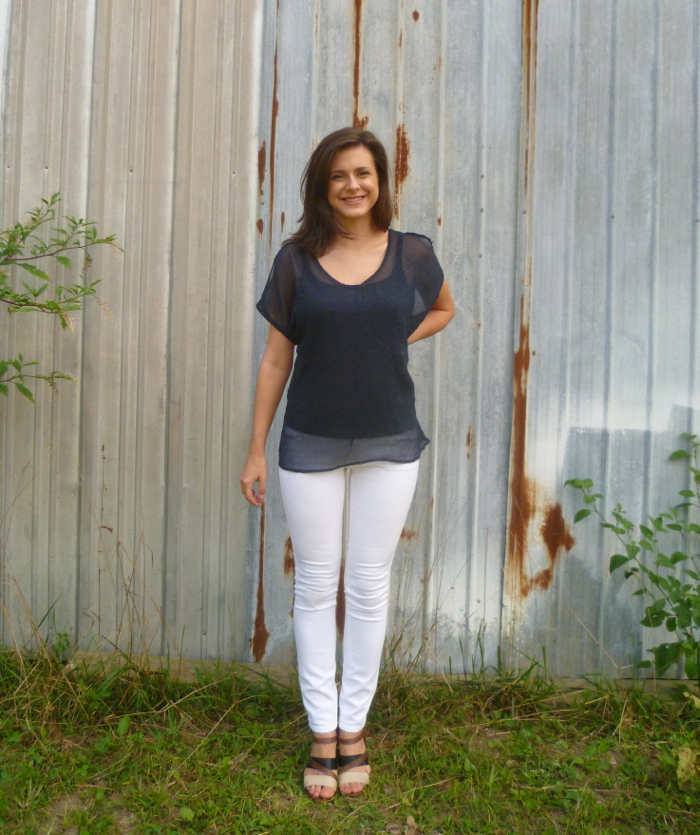
It's not a very dramatic change from the front, but I love the fullness it created in the back and I am 100% more comfortable wearing it now. For such an easy alteration, it really is shameful that it took me three years to get it done. But now that it is, this shirt has quickly become one of my favorites.
Simple Shirt Refashion front
In that same post about cleaning out my closet, I mentioned that I purchased Elizabeth Cline's book Overdressed: The Shockingly High Cost of Cheap Fashion. Well, once it finally arrived I finished it in about two days; it was an interesting but quick read and really gives a perspective on retail clothing that we as a society simply don't think about. One of my favorite takeaways from the book and my new sewing/fashion/life mantra is her chapter title "Make. Mend. Alter." Such a simple concept that has become pretty much extinct in our "quick, easy, disposable" society. I could go on and on about this topic but I will leave it at this: I want to make clothes that fit, alter the ones I already own that don't, and mend the ones that need it to get as much life out of them as possible. By doing so I hope to reduce the amount of clothes that end up in landfills and the secondhand clothing industry (read chapter 5 "The Afterlife of Cheap Clothes" if you want to know more about what really happens to those donations that you write off every year), and also of course to have a wardrobe I love and am proud of and that lasts. Obviously there will still be occasions where donating a garment is the best option, and my latest big purge has resulted in a laundry basket full of clothes that are headed to Goodwill. Hopefully this mindset will prevent me from ever having to do a big purge like that again, and instead I can focus on "working with what I've got" and creating clothes that I love to wear. So in short, expect to see some more refashions and alterations of clothes I already have in my wardrobe along with all my new makes!
Has anyone else read Overdressed and want to gush about it? I'm not usually one to fall for hyped-up, sensationalized media but the numbers and facts presented in the book seem to tell the story pretty clearly. What are your thoughts?