2015 Monthly Calendar FREE Printable

December 31, 2014

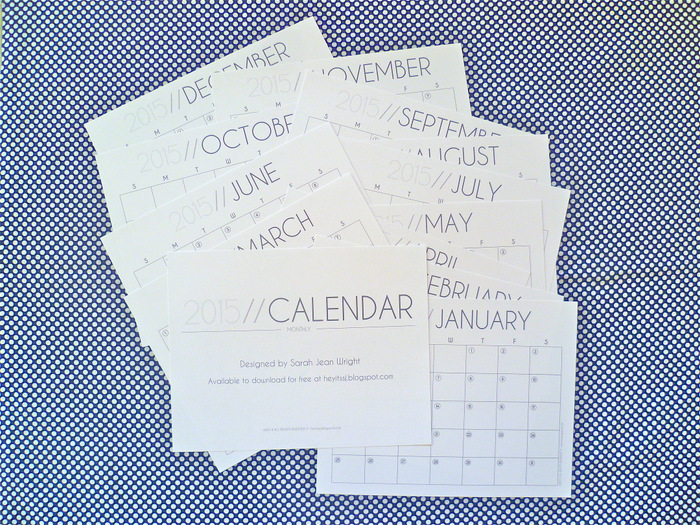
2015 Monthly Calendar Free Printable by Hey, it's SJ
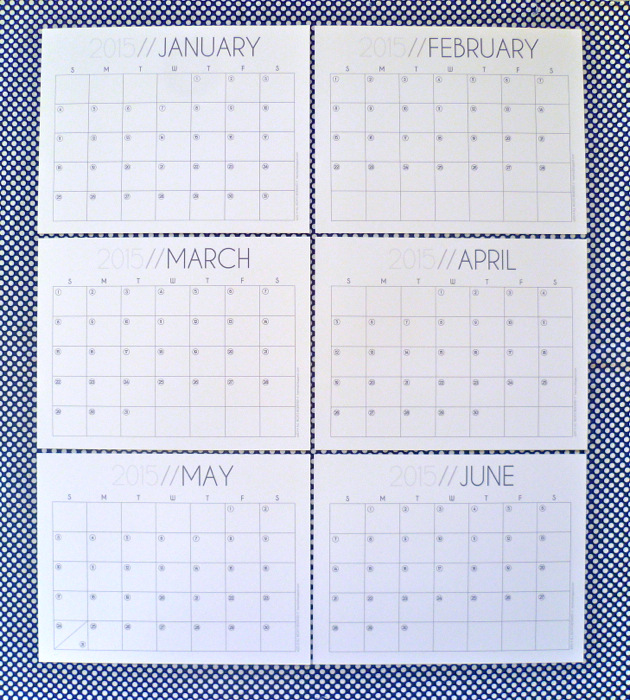
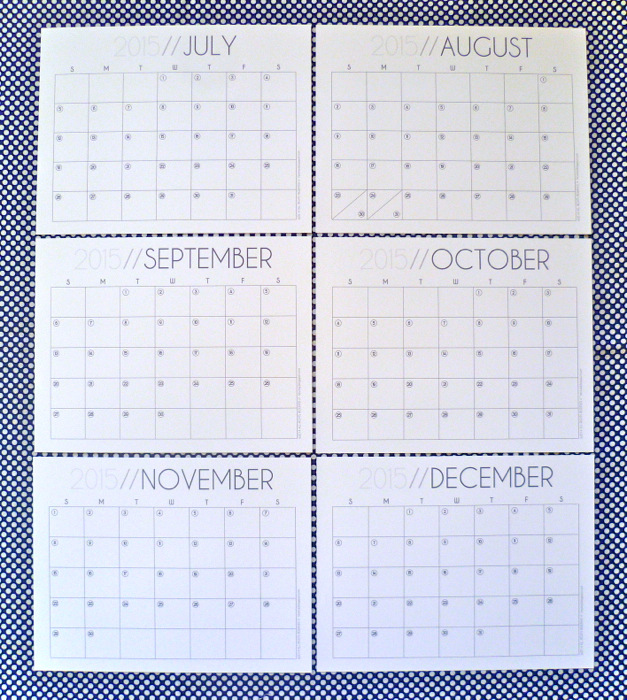
New year, new calendar, and this clean and modern 2015 monthly calendar is FREE for you to print and use!

[The link will open in a new window]

2015 Monthly Calendar Free Printable by Hey, it's SJ


The PDF document is 13 pages long and contains monthly calendars for January through December 2015. Don't need the whole year? You can just print the individual page! The page numbers correspond to the month: for example, if you only need January, just print page one(1), February page two(2), March page three(3), etc.

Please note this calendar is free for personal use only. Please contact me in regards to using the calendar in items for sale, or if you have any other questions.
2015 Monthly Calendar Free Printable by Hey, it's SJ pt 1 2015 Monthly Calendar Free Printable by Hey, it's SJ part 2

Potential Project Tuesday Vol. 2 // DIY J.Crew Inspired Vest

October 28, 2014

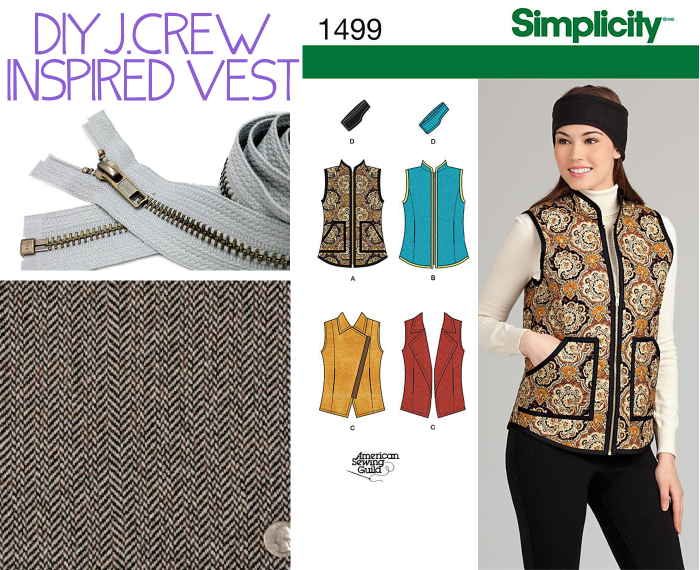
So I don't know about you, but now that it's fall I can't seem to get on Pinterest without coming across this J.Crew vest. I've never actually seen this vest in person (I really do need to get out more), so it was only the other day that I realized that it isn't actually made out of tweed, it's just printed nylon. WUT?! Maybe I'm just super cheap but for a $100+ jacket I expect it to be made out of something other than polyester. In fact, I'm pretty sure I could make an actual wool one for less than half that price.
DIY J.Crew Inspired Vest // Potential Project Tuesday Vol. 2 by Hey, it's SJ
(Click on images for product information)
One of the hardest parts (which I don't even think would be that hard) would be quilting the fabric. I would cut the outer, interlining, and lining fabric into smaller pieces that are several inches larger on all sides than each of the pattern pieces, make a little interlining sandwich, and then get to quilting. This post about cross hatch quilting would be a good reference. 

Here's a quick little list of the materials needed and some sources: 

Lining-- I would probably use an affordable Ambiance/bemberg lining, but silk charmeuse or silk crepe de chine would also be options for a luxe vest. 

Interlining-- For a super warm vest, I'm really interested in using Thinsulate


Bias Tape-- The quick and dirty way would obviously be to use store-bought tape. Alternatively, you could get a really nice quality cotton and make your own. 

Zipper-- My only condition would be that it is separating (obviously), and metal, because I hate the look of those plastic parka zippers that they sell at Joann's/Hancock. Something like this but in black would work.

And an estimated cost break down...

$20/yd for a decent wool outer fabric (and I would get 1.5 yards to be safe) = $30
$8/yd for lining (again, 1.5 yards) = $12
$8/yd for Thinsulate (again, 1.5 yards) = $12
$6 for bias tape (store bought or homemade)
$5 for a zipper

Total = $65 IF everything was purchased at full price (and that's a big if because you know I love a good sale!)

I think this would be relatively simple as far as sewing outwear goes (there are no sleeves!) and I think the results would be absolutely amazingggg. And for only about $65 worth of materials it wouldn't break the bank! Someone please make one of these up so I can live vicariously through you :)

DIY Reversible Kimono Refashion

October 25, 2014

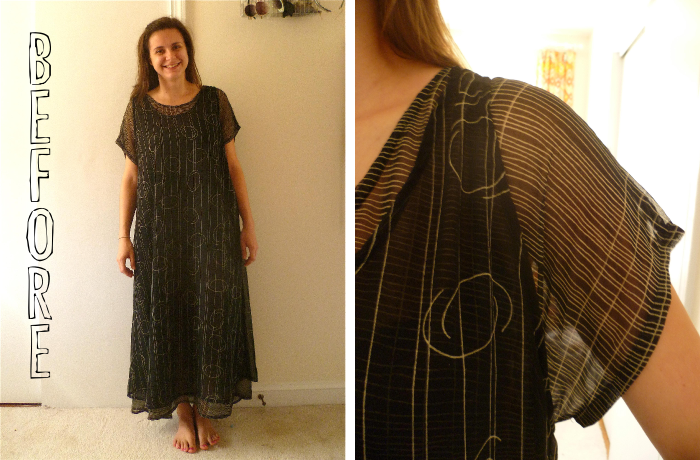
I was pretty excited when I found this dress at my local Goodwill. You may be wondering why, since it is obviously just a big shapeless sack on me. Well, let me tell you: 1. The larger size/longer length means more fabric, 2. It was actually 2(!) whole dresses (the outer tank dress and inner short sleeved one) sewn together at the shoulder seams, which means double fabric, and 3. It had a yellow tag, which just so happened to be that week's 50% off color. SOLD.
reversible kimono before
Since I had a lot of fabric, I thought this would be the perfect time to jump on the DIY kimono bandwagon (seriously, these things are all over the blogosphere right now). Although my sister (who was shopping with me that day) didn't care for them, I really liked the prints on both of the dresses. I played around with the idea of doing a contrast sleeve or back, but then decided to just make two kimonos. This quickly turned into sewing the two together to create a reversible kimono, and voilĂ !
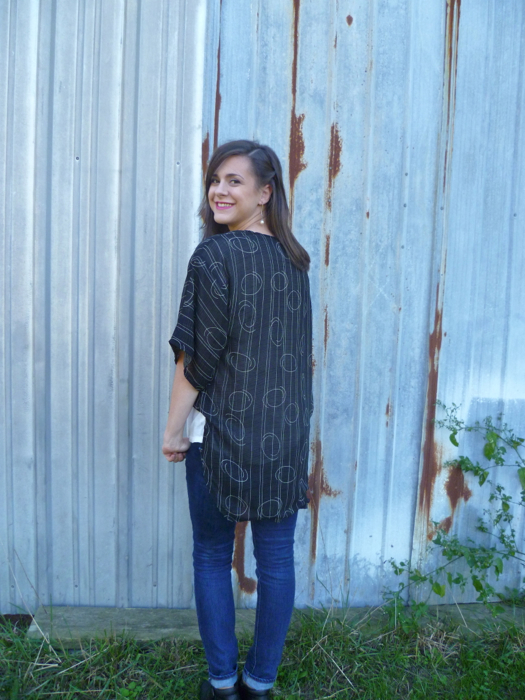
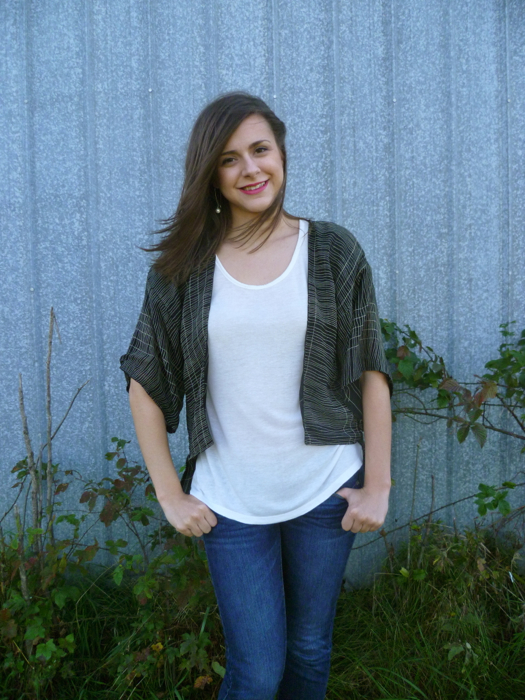
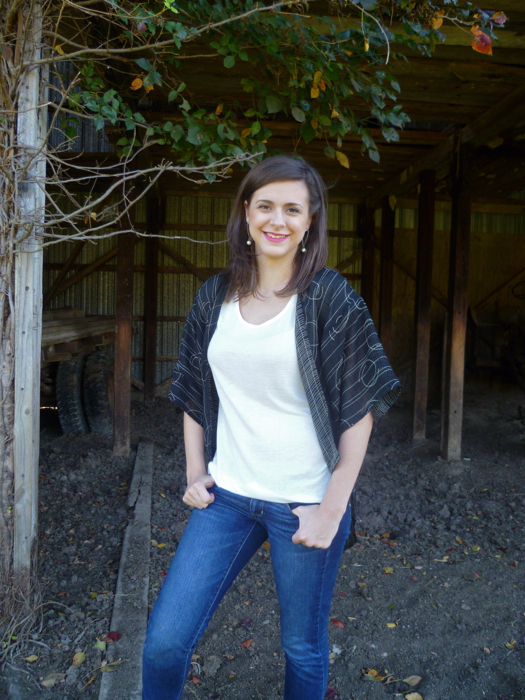
DIY Reversible Kimono Refashion from Dress by Hey, it's SJ
As far as the pattern/construction goes... I based my measurements for my pieces on this tutorial, but my front pieces were slightly shorter and my sleeves were a little more narrow. I sewed the shoulder, sleeves and side seams with french seams, and inserted the sleeves "on-the-flat" (before sewing the underarm or the side seams together, see this post). Inserting them this way was a lot easier with the chiffon, but I would also recommend it for any fabric with this pattern since there is absolutely no difference in the finished product and it is SO much easier.
DIY Reversible Kimono Refashion from Dress by Hey, it's SJ
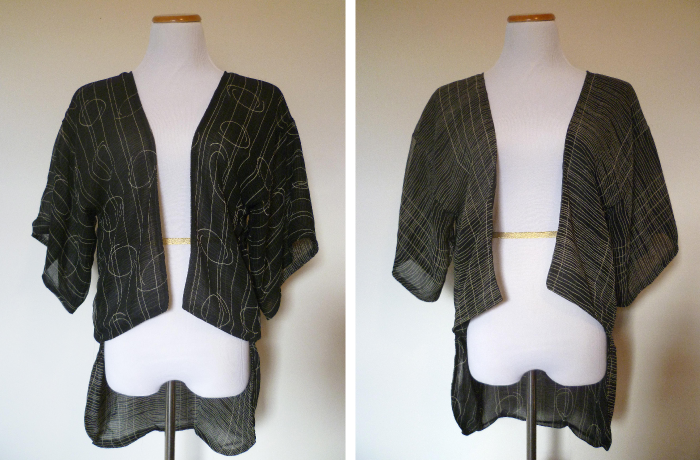
To make it reversible, I sewed up the two kimonos, one from each of the dresses. Then with right sides together, I stitched along the front and bottom hems, leaving the back of the neck open to turn, and then turned the kimono right side out. To finish the sleeves I folded a 1/2 inch hem to the wrong side of each of the sleeves (each side has two sleeves, so I had to do this 4 times), then I pinned the two sleeves on each side together and top stitched them, creating a single sleeve with no raw edges. I closed the hole in the neckline just by topstitching, and then also topstitched around the front and bottom hems to give the edges a cleaner finish.
DIY Reversible Kimono Refashion from Dress - front side 2 by Hey, it's SJ
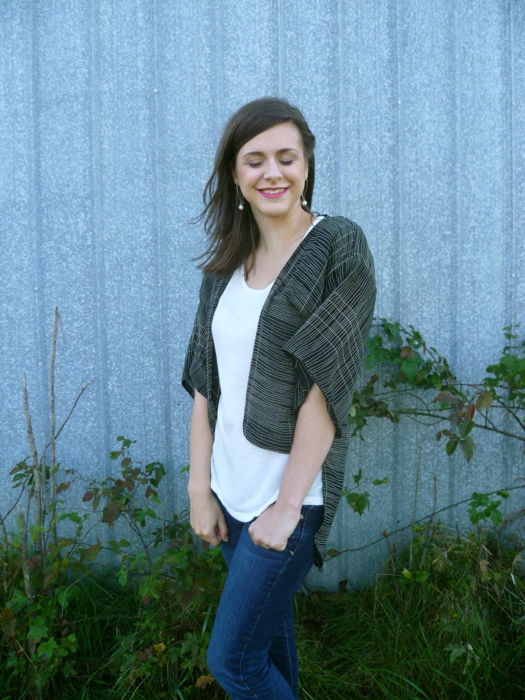
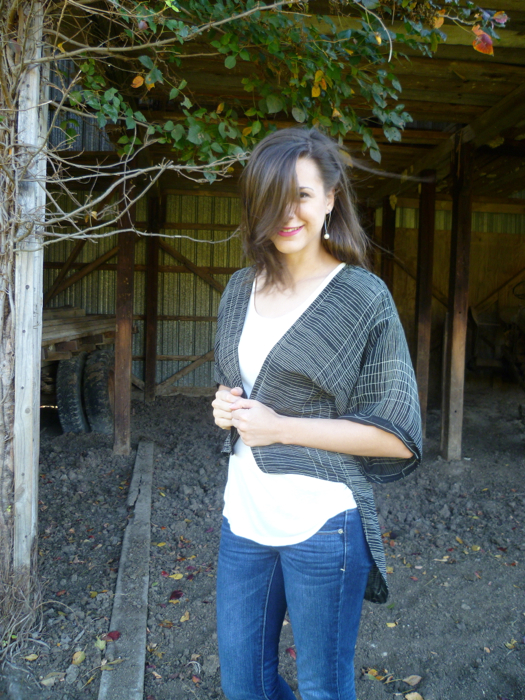
I have to say, I struggled through pretty much every step of this process, not because it was hard, just because I didn't enjoy it. Cutting/sewing the chiffon was a nightmare; it's one of those fabrics that I love to wear, but then I sit down to work with it and it frustrates me to no end. But I sucked it up. I figured that since it was just a bunch of rectangles it wouldn't be too bad. Well, it's not easy to cut any shape out of slippery chiffon (which I knew going into the project, but that still doesn't make it any easier to actually do). Then, after I started cutting, I realized I wasn't going to have enough fabric to make the front panels and sleeves quite as big as I wanted. No biggie, I just cut them a little smaller and dealt with it. Then, even though this kimono was going to be reversible with no exposed seams, I had the *genius* idea to use french seams for a super professional finish. So I had to sew each seam twice, and since it is reversible, I had to do them on each of the two kimonos. UGH. This greatly increased the amount of time it took me to sew the whole thing together, turning what could have been a quick and easy project into a long(er), more dreadful one. But I finally got it finished, and I don't know, it just doesn't wow or excite me. Yes, it's a kimono, it's reversible, and I like the prints, but I look at it and I just think "meh." I am happy with the construction; I think most of my dissatisfaction is with the fact that I want it to be longer in the front. I don't know, I'm going to give it a few weeks and wear it some and see if it grows on me. 
DIY Reversible Kimono Refashion from Dress - front side 1 by Hey, it's SJ
I didn't get very many (good) photos of this make because it was crazy windy the day I decided to take pictures and of course chiffon + wind = impossible to photograph. I did get some good outtakes though!
DIY Reversible Kimono Refashion from Dress - outake 2 by Hey, it's SJ
DIY Reversible Kimono Refashion from Dress - outake 1 by Hey, it's SJ
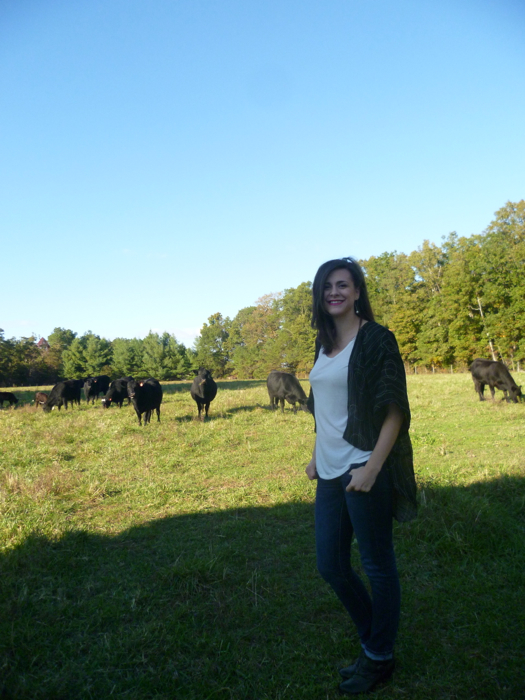
And I even got this one with the cows grazing in the background. (I also didn't pick the best time of day, and the lighting was less than desirable.) Still a pretty unique picture, I think!
DIY Reversible Kimono Refashion from Dress - with cows by Hey, it's SJ
I really don't want to discourage anyone from making one of these; I think with a different fabric choice and enough fabric to make it the way I wanted I would absolutely love this project, and to prove it to myself I will probably give it another try. In the meantime, I think this one will be nice to wear on these cool but not cold, transitional fall days.
DIY Reversible Kimono after by Hey, it's SJ
Now, I'm curious to know, which side do you like better? The one with the circle-y things, or the one that's just lines? Also, would anyone be interested in a more detailed tutorial about the reversible part? I'm thinking about writing one up, with diagrams and everything!

I am also sharing this project over on Refashion Co-Op. Here's the link to check it out, if you so desire.

Potential Project Tuesday, Vol. 1 // A Raincoat

September 30, 2014

Last week was pretty much all clouds and rain here, and as I was getting my things together to leave my Wednesday night class, I had this conversation with myself:

"Man, this lightweight, waterproof jacket is so functional."
"It really is ugly, though. I wish I had a cuter one."
"Oooh, I want a pink one! No, a printed one! A polka dot one! Better yet, plaid!"
"I could totally make one, I would just need the right pattern and fabric. I'm going to look into it when I get home."

Once I got home, I started searching through online pattern catalogs and trying to source fabrics, and I realize I do this all.the.time. I'll find inspiration from ready-to-wear clothes/accessories/decor or wandering thoughts like the ones above, I'll research everything I need to make it, sometimes I will even buy some of the supplies, and then I won't have time to get around to it for weeks/months/years, if at all. Then, if I do finally get around to working on the project, I have to track down the pattern and fabric sources AGAIN because it has been so long since I first found them. I waste all that time researching and sourcing and the idea just floats around in my head. So, I have decided to start a new blog series, Potential Project Tuesday, where I can get all of my ideas down on "paper" and have a resource when I do get around to the project. It may also serve as inspiration for you if you are looking for a new project and need ideas, making it a win-win for us both! Here are the ground rules:

  • I might not have a potential project every Tuesday, but I'm aiming for at least bi-weekly
  • The series will probably focus mostly on garments, but some accessories/decor items may creep in, too
  • Each post will contain my inspiration, 3 potential patterns, and 3 potential fabrics. I feel like 3 is a good number that gives some different options, but limits me so it's not overwhelming (and when it comes to me and fabric, things can get out of hand very quickly, so I think it's good to have a place to make me stop).

Anyway, without further ado, the first Potential Project Tuesday, a lightweight, waterproof rain jacket!

Inspiration

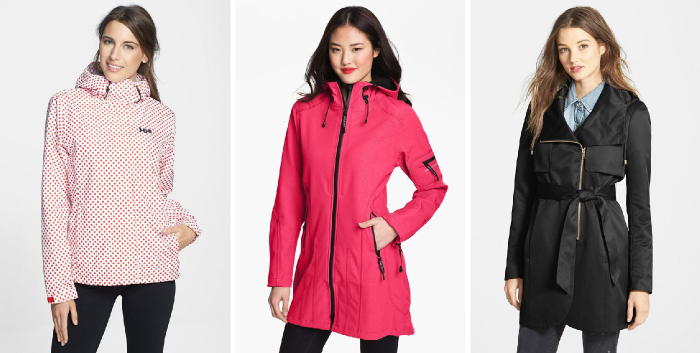
Replacing my current ugly one (see above). My current jacket is a short, sporty one like the first image, but after looking around online at some other jackets I kinda like the idea of a longer, dressier, trench length one.
PPT Vol. 1 // A Raincoat - Inspiration by Hey it's SJ
From left to right: Helly Hansen (via Nordstrom)
Ilse Jacobsen (via Nordstom)
French Connection (via Nordstrom)

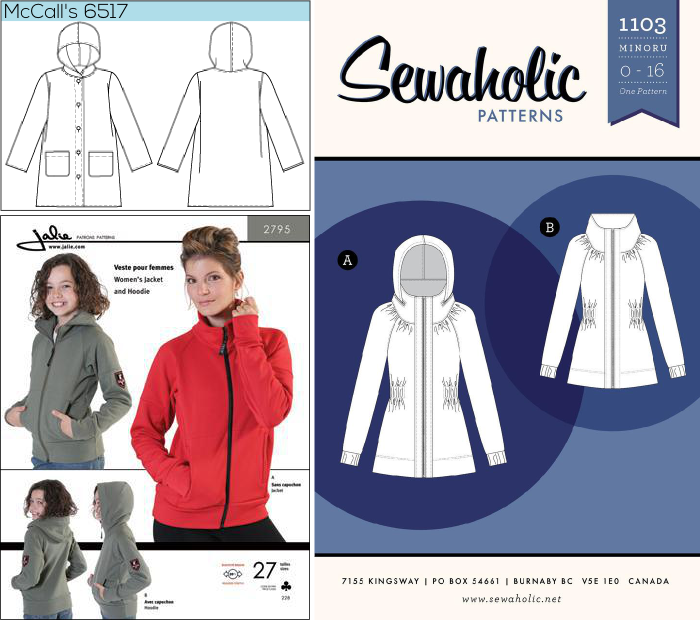
Patterns

McCall's 6517: This is a more classic take on a raincoat. I don't love the button front, but I like the length, the sash (not pictured), and it has front pockets.

Sewaholic Minoru: I love that this pattern has a zip front and a hood, but I think my favorite part is that the hood can be hidden in that awesome wide collar! I also think the ruching would be very flattering. I would definitely have to figure out a way to add front pockets, though.

Jalie 2795: This is obviously a sporty, windbreaker style. The pattern is written for stretch fabrics, but I think with a few minor tweaks it could be easily made in a non-stretch fabric.

PPT Vol. 1 // A Raincoat - Patterns by Hey it's SJ


Fabrics

Sport Nylon in Royal Blue: If ya'll don't know by now, I have a serious soft spot for royal blue. I think the Minoru jacket would look uh-mazing in this color.

Polyurethane Laminate in Black: This is a more classic raincoat fabric and has a bit of a sheen in real life. While making it up in the McCall's pattern may be a bit on the boring side, it's sure to be a classic jacket that would never go out of style. 

Diagonal Waves Waterproof and Breathable Polyester: A jacket in this fabric would definitely be a statement piece! I know it's a little loud, but I love the colors and the abstract plaid print. I think this fabric would work for any of the patterns as long as you aren't scared to stand out in a crowd.

PPT Vol. 1 // A Raincoat - Fabrics by Hey it's SJ

So are you feeling inspired?! Do you have a favorite raincoat pattern or one that you are dying to try out? I think that royal blue Minoru is calling my name, but I have a ton of projects in the line up that I need/want to get to first.

One Last Summer Sewing Project: A Tunic Refashioned into Prefontaine Shorts

September 23, 2014

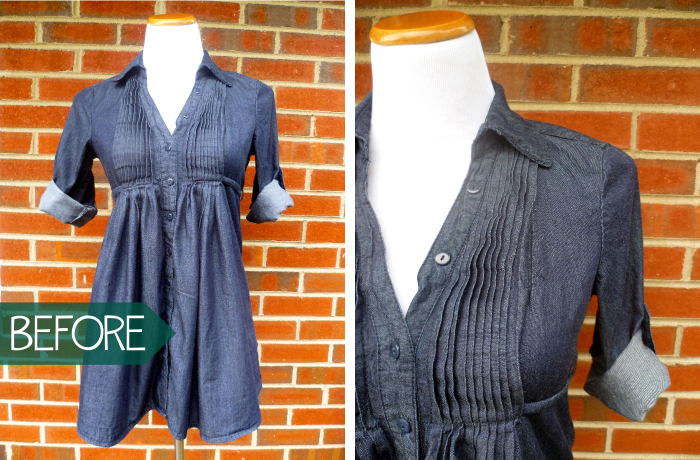
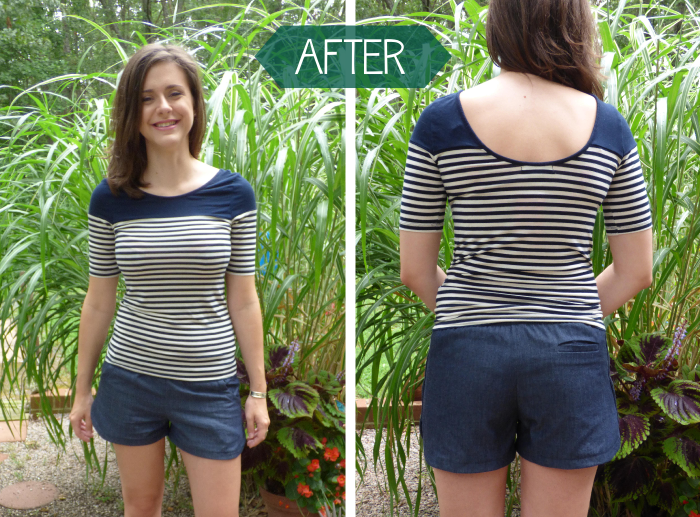
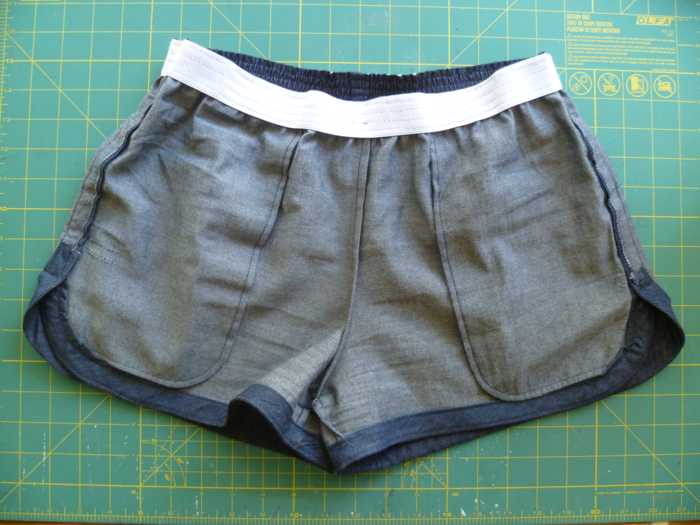
I know what you're probably thinking, yet ANOTHER pair of Prefontaine Shorts. But this particular pair is special for a couple reasons. First, I refashioned them from an unworn lightweight denim tunic I had hanging around in my closet. Also, this is my first contribution over on the Refashion Co-op!! I'm really excited to be one of the newest contributors, and I'm looking forward to being able to share my refashions with a whole new audience.
Denim Tunic to Prefontaine Shorts Refashion before by Hey it's SJ
You can head over to the co-op to check out the history of this shirt, and since I've made this shorts pattern one, two, three times already, I'm just going to talk about the modifications I made for this particular pair.
Denim Tunic to Prefontaine Shorts Refashion after by Hey, it's SJ
--I used the same inseam length as my American Flag pair, about an inch shorter than the longest inseam on the pattern.
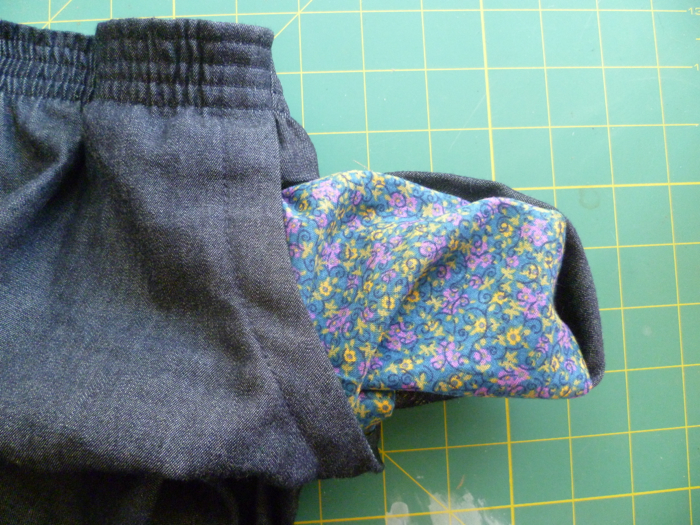
Denim Tunic to Prefontaine Shorts Refashion inside front by Hey, it's SJ Denim Tunic to Prefontaine Shorts Refashion inside front pocket by Hey, it's SJ
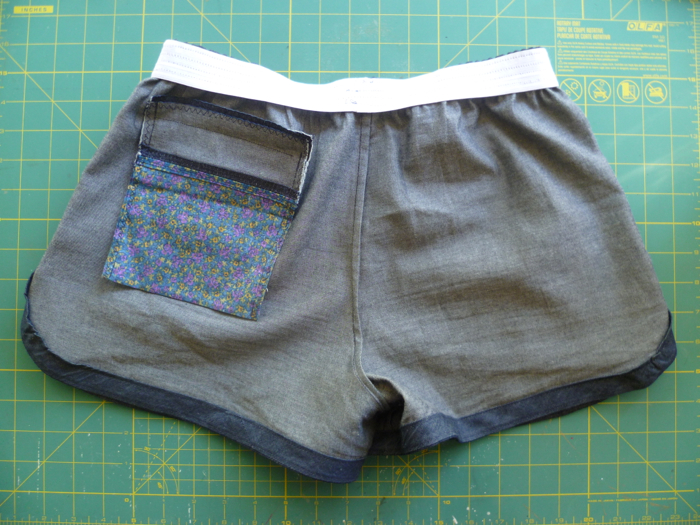
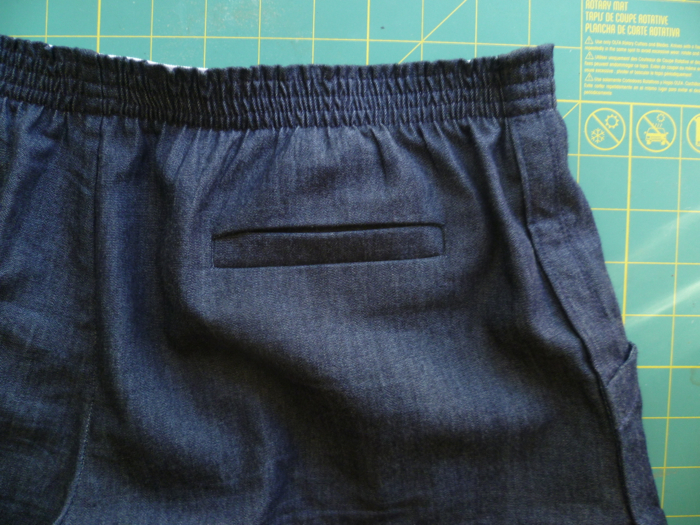
--I kept the front pockets on this pair, but to prevent a line of stitching from showing on the front of the shorts, I added a pocket lining piece. I picked up a fat quarter from Joann's to use as the lining for the front and the back welt pockets. Speaking of the back welt pocket, I did it a little differently than the pattern. Instead, I used this single welt pocket technique from Poppy Kettle. It definitely took a little longer than the pattern instructions, but I think the results are a bit better so I think it was worth it.
Denim Tunic to Prefontaine Shorts Refashion inside back by Hey, it's SJ Denim Tunic to Prefontaine Shorts Refashion close up back pocket by Hey, it's SJ
--The only other change I made was with how I applied the bias tape. Unfortunately, there wasn't quite enough fabric to make self bias tape from the tunic; however I was able to find some dark lightweight denim at Joann's that was very similar (By the way, chambray and lightweight denim are not the same thing. This tunic was made out of a 4 oz. denim.) While both fabrics felt and looked the same, after I prewashed the new fabric there was quite a noticeable color difference. I wanted the shorts to be all the same color, so I decided to turn the bias tape to the inside of the shorts rather than leave it visible on the outside. I used the same technique that you would if you were finishing a neckline or armhole.
Denim Tunic to Prefontaine Shorts Refashion by Hey, it's SJ
I absolutely love how they turned out! I've already worn them more times that I ever wore the ill-fitting tunic, so in my book that is a super successful refashion!

Welp, this officially marks the end of my summer sewing for this year (sad face), but I already have some of my fall sewing projects in the works. I plan on sharing at least one as part of Selfish Sewing Week, so stay tuned later in the week for that post(s)!

Planning for Fall Sewing

September 15, 2014

Things have been a little quiet here on the blogfront lately for a few a reasons...

--School is officially in full swing, so my homework has been cutting in to my sewing and blogging time. I knew that going back to school was going to be an adjustment so I haven't been putting a lot of pressure on myself to post. But don't worry, I plan on getting back into the swing of things in the next couple of weeks.

--Also, I've been working two jobs since last Tuesday; I put in my notice at the Lab so I was riding out my last weeks there, but I've also been working at my new job in the mornings. It's not like a super big deal or anything, but my new job title is SEAMSTRESS!! Ok, so it is a humongous deal to me, and I am so over the moon not only to be able to do something I love everyday, but to also get paid for it. The company I'm working for is called Bloom (you can check out our website here). We have various home goods and accessories, and it kinda works like 31 where you get to pick the fabric and personalization. But unlike 31, everything is made by hand here in Ashland, VA by me and some other very lovely ladies. I have to give a huge shout-out to Mrs. Lent in case she is reading; I will forever be grateful to her for letting me know they were hiring. There really is no way I could thank her enough! Thank you, thank you, thank you!!

So enough about life stuff, let's talk about the end of summer. If you're anything like me, this isn't a happy conversation. I totally get why people love fall; the cooler weather, the changing leaves, football. But for me, fall just means we are that much closer to winter and I do not like winter one bit. Unfortunately fall and winter are coming whether I like it or not, so that means reluctantly setting aside my summer sewing projects and starting to think about clothes for cooler weather.

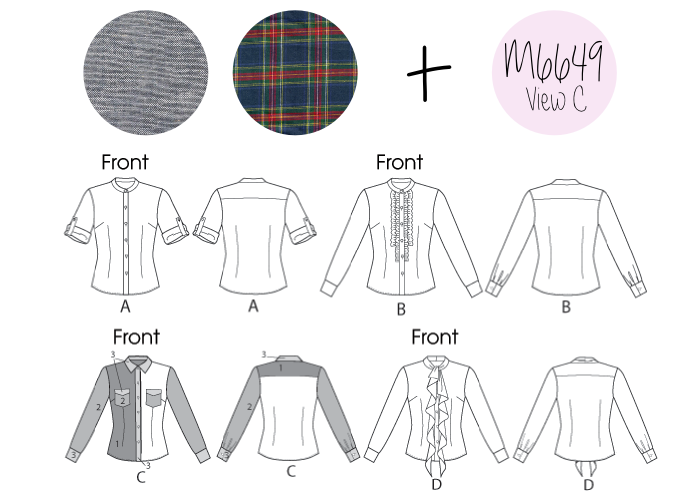
One of the projects I've had on my mind for a while now is a plaid flannel collared shirt, specifically one like this from J.Crew. I've had both the pattern and the fabric purchased for a while now, but it doesn't make a whole lot of sense to be working on a flannel shirt when it is 95+ degrees outside, does it? Now that the weather has started to cool off I can't wait to get started. Since I've never made a collared shirt, I will definitely make a muslin but I think I might also make one up in a solid fabric before trying to tackle plaid matching. I'm also very interested to use this pattern since it has different pieces for A/B, C, and D cup sizes in each size. Fingers crossed that it will save me a lot of time fitting!

(You can click on each swatch/line drawing for more fabric and pattern information.)
McCall's 6649 Collared Shirt Grey Linen Blend Royal Stewart Plaid Flannel Shirting M6649 View C M6649 Line Drawing
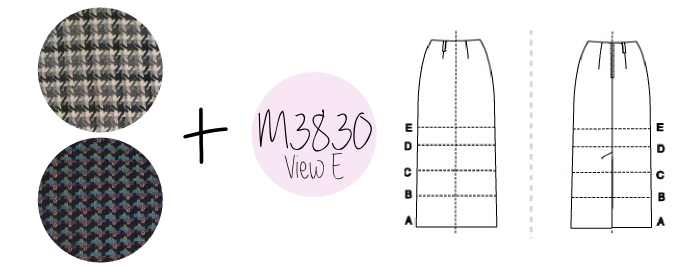
One of my favorite fall/winter "uniforms" is a skirt or dress with tights and boots. Most of the skirts I own now are dressier pencil skirts from when I was working at the bank, so when I found an amazing deal on some wool-blends I knew I was going to be making some skirts. I want to try this simple straight skirt pattern for one, but I also want to hack it and add a flounce/ruffle hem, a la this Topshop skirt.
McCall's 3830 Straight Skirt M3830 View E M3830 Line Drawing
Since I've started sewing my own clothes, I have pretty much steered away from tackling any knit projects. I'm not intimidated by them (I did make my own bathing suit, which is about as intimidating as knits get I think), but I don't have a serger, which I really think is the best way to finish seams on knit garments. So as to expand my garment sewing repertoire, I have plans to purchase a serger in the next month or two, and then I have a few different projects I want to dive into.

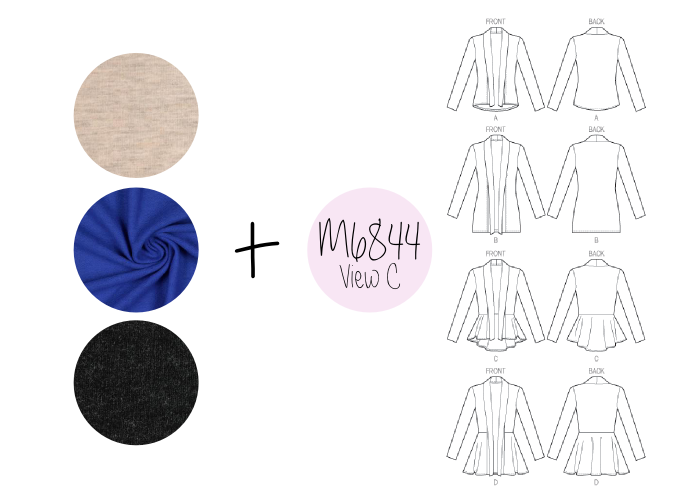
If skirts/tights/boots are the bottom half of my cool weather "uniform," then cardigans and scarves are the top half. I love this cardigan pattern from McCall's, especially the peplum-like detail at the waist on views C and D. Sewn up in some wool or sweater knits, I am sure it will become an instant fall/winter staple.
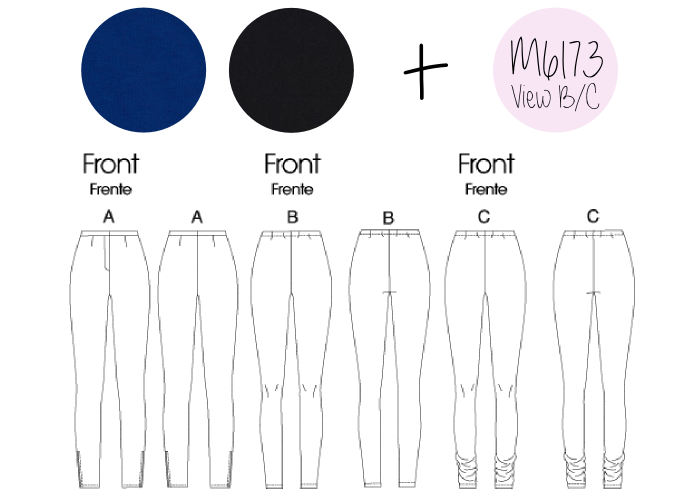
McCall's 6844 Cardigan Heathered Beige Wool Knit Royal Blue Wool Knit Black Lurex Wool Knit M6844 View C M6844 Line Drawing I am definitely pro-leggings as pants (as long as my butt is covered by a shirt/tunic) and I purchased this pattern during one of those $1.99 pattern sales at the fabric store. Actually, I only purchase Big 4 patterns when they are on sale at the fabric store, but that is beside the point. I obviously would like to make a classic black pair, because everyone needs at least one black pair of leggings, but I also really want a pair of royal blue ones, too.
M6173 Leggings Royal Jersey Stretch Knit Black Cotton Spandex Knit M6173 View B M6173 Line Drawing Last but absolutely not least on my list is the Papercut Patterns SJ Tee. I mean, it's called the SJ tee. That means I have to make it, right? I can see SO.MANY.POSSIBILITES. with this pattern, from a slouchy short-sleeve version in a light weight knit to a long-sleeve version in a heavier sweatshirt knit. I would also love to lengthen it a bit for a tunic to wear with my new handmade leggings.
Papercut Patterns SJ Tee Wool Blended Knit Salmon Rayon Jersey Plum Jersey Cream Mohair Wool Acrylic Knit Papercut Patterns SJ Tee SJ Tee Line Drawing This list is sure to keep me busy, but I also have some scarf projects from last year that I plan on expanding on, along with some new ones in the works this year. And if by some crazy miracle I have some time and a ton of motivation, I would love to start working on some jeans. I'm still searching for a good pattern, so if you have any recommendations I would love to hear.

(Although it may seem like it, this post was in no way sponsored by McCall's. For some reason I just always happen to be pattern shopping when their patterns are on sale for $1.99. I had all of these patterns in my stash already, and I purchased each one with my own money.)

Do you have big sewing plans for this fall? Are you planning on buying any fun new toys or tackling a project that you have never tried before? I may not be looking forward to the weather, but I am definitely looking forward to some fun new sewing challenges!

DIY Calendar and FREE 2014 Monthly Calendar Printables

August 26, 2014

**UPDATE December 2014: My new 2015 monthly calendar is available (and it's still free to print and download) !!

Just a quick little post today! I mentioned last week that I was starting school full time this week... Well yesterday I got all of my syllabuses (syllabi?) and these next 16 weeks are going to be BUSY. I realized I don't have a planner, and after browsing around Target realized that most of the ones on the market are either out of my budget or not exactly what I am looking for. So of course I decided to DIY one! 

I created some printable monthly calendars so I can keep track of the big things at a glance. 
Then I printed off some of these free weekly pages from Passion Planner. I probably would have just purchased one of these planners, but they are sold out (sad face). Don't worry, I totally plan (pun intended) on buying a 2015 one! Until then, the free pages will do just fine for breaking down each day and organizing my to-do list on a weekly basis. 
To keep all these loose pages free, I just punch some holes in them and stuck them in a 3-ring binder. Not the fanciest planner, but it was essentially free and has everything I was looking for. 
The best part of all of this is YOU can make one, too! Below are links to download my printable monthly calendars for FREE. Right now I have them through then end of 2014, but stay tuned for 2015! 

Just click on the images to download that month's calendar. The calendars are in PDF format, so you will need Adobe Reader to view and print them. 
Please note that the monthly calendars are free for personal use only. Please contact me in regards to using the calendars in items for sale.

What are your tips for keeping your to-do list organized? Do you have any tip for making sure all those things actually get done? I can pretty much use all the help I can get right now!

Back-to-School Senna Tote + A Life Update

August 20, 2014

I'm kinda a sucker for a canvas tote; they are classic and practical, perfect for the beach or school and everywhere in between. So when I came across the Senna Tote pattern by LBG Studios with its fun, fold-over design twist, I knew I would have to have one, and now I do!
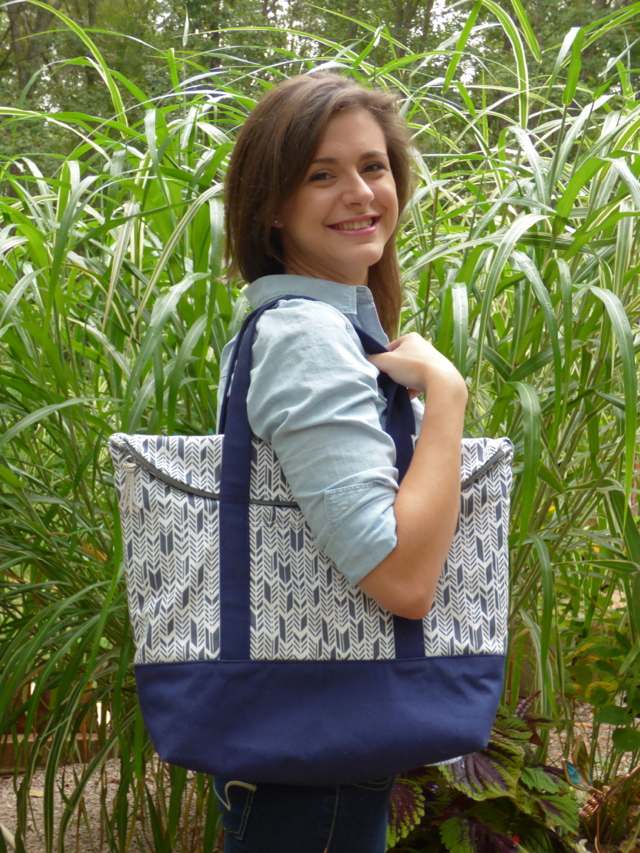
Senna Tote by Hey, It's SJ
I actually really enjoying sewing bags. They are usually just made up of a bunch of rectangles and you don't have to worry about anything fitting onto a body, which for me is absolutely the hardest part of sewing clothes. But if you have never sewn a bag before, here's what you need to know: 1. They might only be made up of rectangles, but there are usually A LOT of them, and 2. The materials can get pretty expensive pretty quickly. Both of these facts come from one thing: interfacing. Now, interfacing and I have a love/hate relationship. I hate buying it because it's expensive, it usually only comes in 20 inch widths so I need ridiculous amounts of it, I have to cut all of the pieces out AGAIN as if just cutting all the fabric and lining pieces wasn't bad enough, and then I have to sit there and fuse all of the interfacing to the aforementioned fabric and lining pieces. Ugh. But it is an absolute necessity when making any type of bag, and I do love the structure and weight it gives to the fabric. Once you get past the whole cutting and interfacing process, the sewing part of the bag making process is so much fun, it totally makes it worth it. Plus you end up with a brand new bag you can sport around town everyday (unlike a self-made top or bottom that people might look at you funny for wearing to work 5 days in a row).
Senna Tote by Hey, It's SJ
But anyway, let's talk specifically about this AMAZING pattern. I was super impressed by the thoroughness of the pattern in general. The instructions were well thought out and easy to follow, the cutting layouts were spot on in minimizing waste, and the construction was exactly in the order of how I would have done it sans-pattern. One of the only major things it was missing for me was lining for the outside pockets. If you follow the pattern instructions, the inside of the exterior pockets would have just been the canvas interlining. Maybe it was designed that way to reduce some of the bulk in the seams, but to me that is too unfinished of a look, especially on the back outside pocket where you would see the stitching from the handles. Unfortunately I didn't realize this until I had already purchased my fabric, and and I didn't have nearly enough of the lining which is what I would have preferred to use. Instead, I used the main fabric to line the front pocket, and I pieced together some of the lining and main fabric for the back pocket. For next time, I know to get a little bit more lining fabric than the pattern calls for.
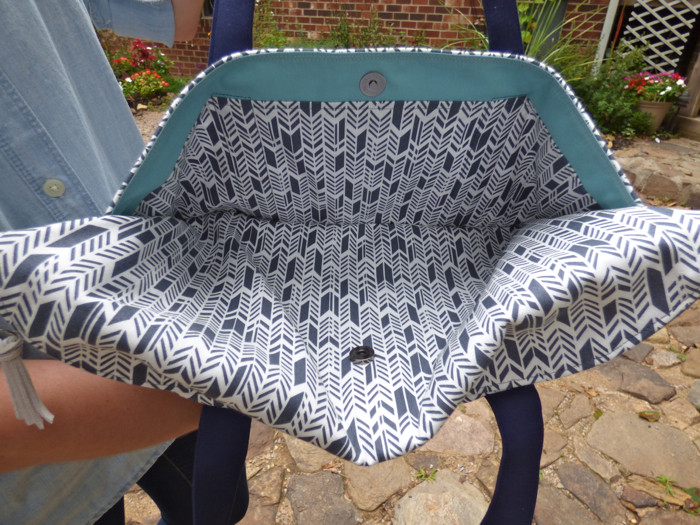
Senna Tote inside back pocket by Hey, It's SJ
Speaking of next time, I will definitely keep the lining on the back pocket free when sewing on the handles. I kind of hate that I didn't think about this until after I had already sewn on both handles, but you live and you learn. I am probably one of the few people who will actually see the inside of that pocket, still annoys me, though.
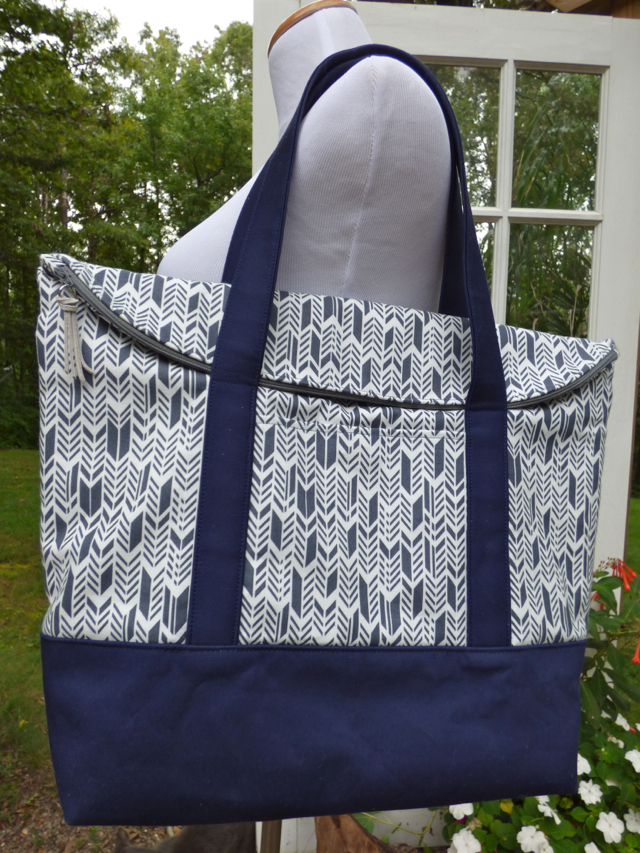
Senna Tote by Hey, It's SJ Senna Tote close up zipper closed by Hey, It's SJ
For me the most challenging part of making this bag was sewing through the multiple layers of thick fabric. Each exterior piece is fabric, interfacing, and canvas interlining, as well as the pockets and handles. Needless to say the seam where the bottom meets the main piece, as well as the side seams, were more than a little tricky to get through. I had a whole new sewing machine debacle that started in the middle of sewing the handles on that I don't even want to get into because it makes me so upset (sad face), but my little Brother machine ended up saving the day and I somehow managed to get all the pieces together without breaking a needle (I used a size 16 jeans needle that helped tremendously). Some of the topstitching isn't anything to write home about, but I'm still proud of my machine nonetheless.
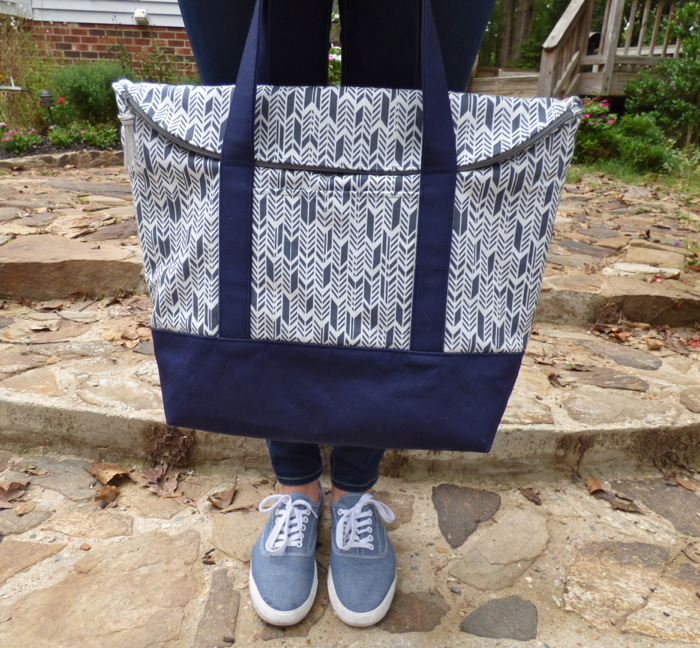
Senna Tote by Hey, It's SJ
The only change I made to the pattern was adding the lining to the exterior pockets. I also used a bottomweight cotton twill for the bottom and handles rather than a quilting cotton. These are the parts of the bag that will get the most wear, so I figured something more heavy duty than a quilting cotton, even with interfacing, would hold up better. Because of this, I omitted the extra interfacing the pattern says to add to the canvas interlining for the bag bottom. For the interlining throughout the entire bag I used duck cloth canvas from Joann's, the same stuff used to make cornhole bags. I think it is a little thicker than the weight that the pattern recommends, but I had about a yard of the white on hand so I used that up. It definitely adds some great structure to the bag, but it probably made everything a little harder to sew through and next time I will probably try something a little lighter weight. Other than that I did everything as directed.
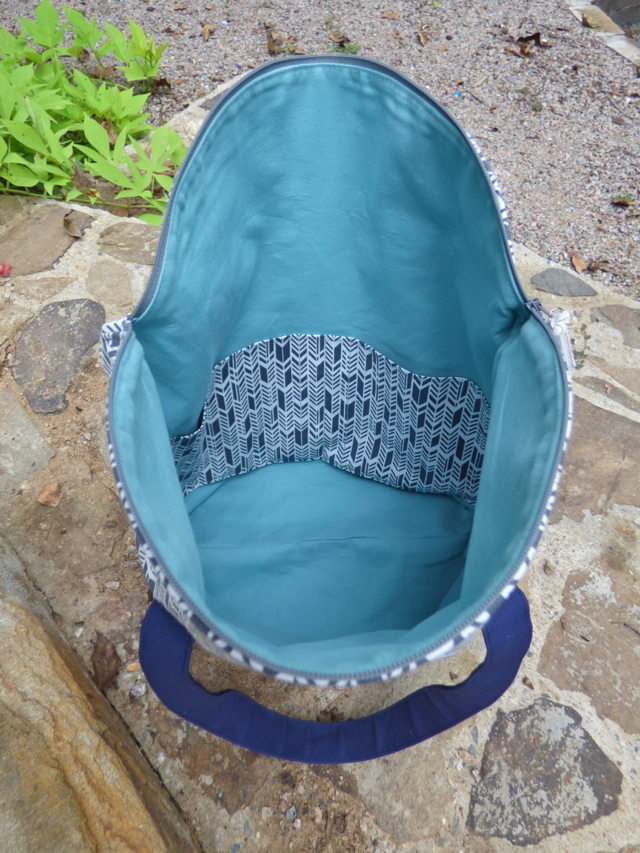
Senna Tote by Hey, It's SJ
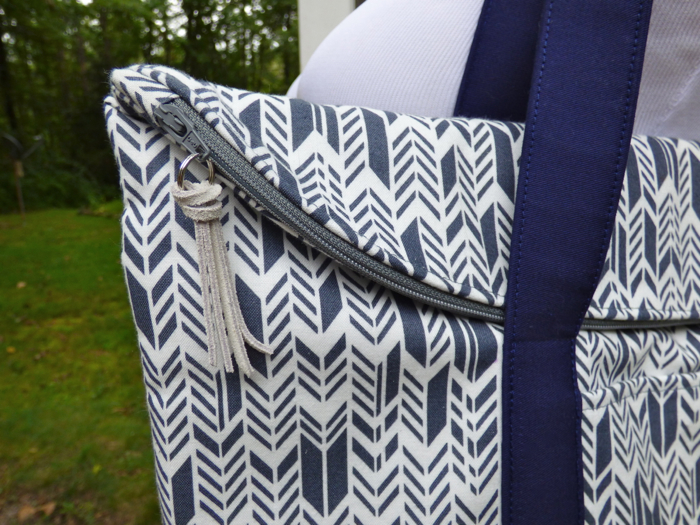
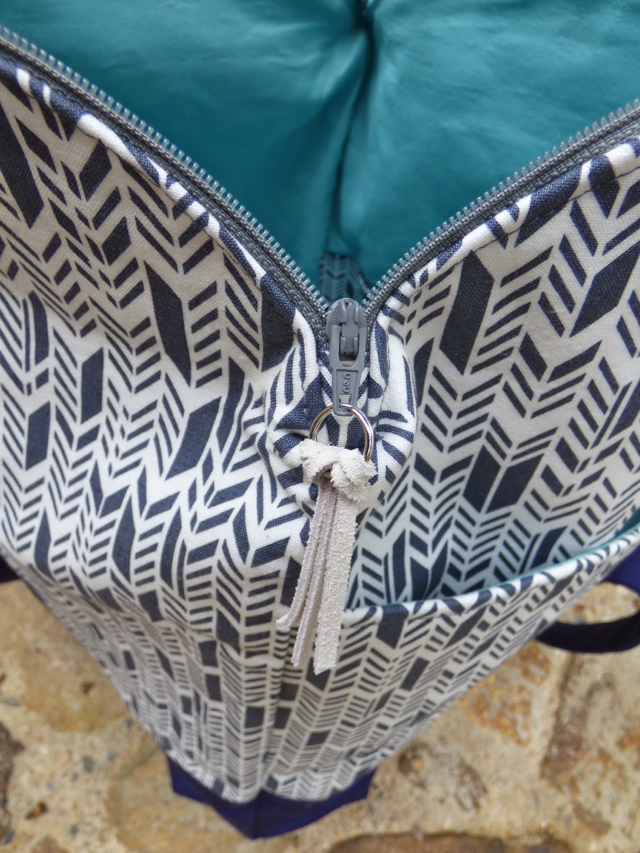
Speaking of fabrics, the main fabric is a print by Alison Glass for Andover Fabrics from her Sun Print collection. I used the Feathers print in charcoal, purchased from Quilting Adventures. The bottom is a navy bottomweight cotton twill that I got from Joann's, and the lining is a Country Classic solid also from Joann's, I believe the color is called spray green.
Senna Tote zipper close up open by Hey, It's SJ
I finished the zipper pull with a split ring and some suede leather lace from Michael's (yay for finally using up some birthday/Christmas gift cards!).
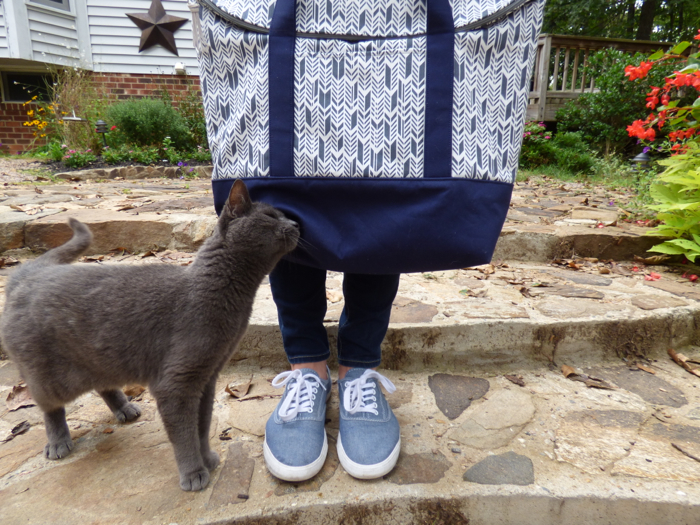
Senna Tote and Miss Kitty by Hey, It's SJ
That's my mom's cat, Miss Kitty, and I think she likes this tote, too! I have to give a little shout out to my lovely and talented mother for snapping these pictures for me with her fancy-pants camera. I know you're reading, so thanks, Momma!

So, you might have noticed that I dubbed this my "back-to-school" Senna tote, and that's because I'm going back to school!!! Actually I've been in school part-time for about a year now, and I finished my Certificate in Accounting (34 credit hours) at the local community college in May. I was studying accounting when I was in Asheville, so I figured I might as well have something to show for it, and I only had to take 4 more classes. But this fall (actually next week, eek!) I will be taking a full course load while working part-time and sewing and blogging. I will be working on my Associates in Information Systems Technology, again from the local community college. I still haven't decided if I want to concentrate in Programming or Web Design, so I'm gonna take some different classes before I decide, and who knows, maybe I will end up doing both!

Now as if all that wasn't enough to keep me busy, I have also joined the local Junior League! If you are not familiar with the Junior League, you can check out the Richmond chapter's website here. Basically it is an organization of women committed to volunteerism and service in the local community. The year hasn't officially started yet, but all of the women I've met so far have been amazing and I can't wait to start really getting involved in the upcoming months.

So lots of new and exciting things going around here. Now that the summer is getting closer and closer to turning into fall, do you have anything new or exciting happening? Have you started making plans for your fall/winter sewing? I'm in denial that summer is ever going to end so I've been putting mine off!

A Simple Shirt Refashion + A New Mantra

August 17, 2014

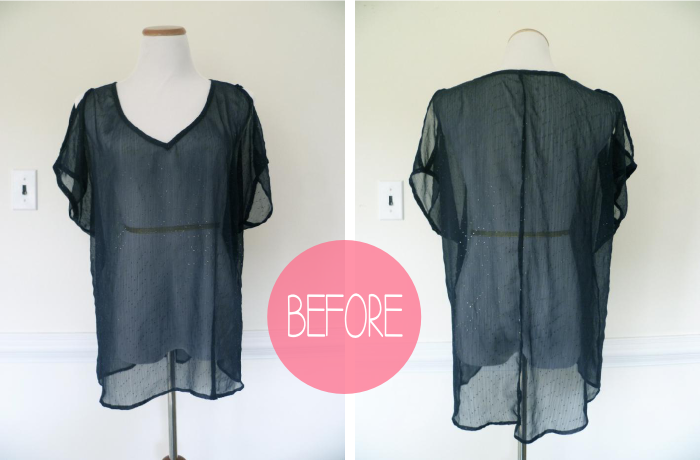
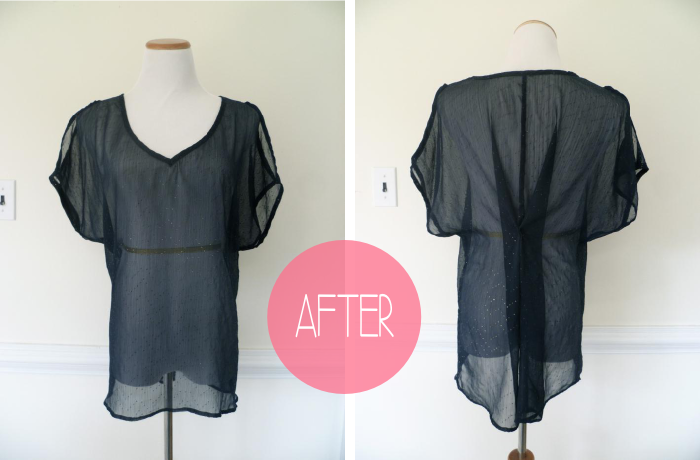
Hmm... another refashion? I'm sensing a theme, but more on that later. Let's talk about this shirt. When I found this little number on the Target clearance rack, I immediately fell in love. The cold shoulder sleeves (love that term), the high-low hem, and the sheer fabric made me immediately say, I have to have this (OK, so the price didn't hurt either). The only problem, though, was the smallest size they had was a large. There are definitely cases where I have to size up in tops to accommodate my bust, but for loose, flowy shirts like this one I tend to size down because otherwise they swallow me, which is exactly what this shirt did (and then some).
Simple Shirt Refashion before
See how it is super boxy and there is all that extra fabric hanging on the sides? Yeah, not flattering. But I justified the purchase by telling myself I would just wear it belted, and I did. But no belt loops and all that extra fabric meant I was constantly adjusting and readjusting throughout the day, so this shirt has just been hanging in my closet pretty much unworn for the 3(!!) years I've owned it.

I wrote a couple weeks ago about cleaning out my closet, and this is one of the pieces that fell into category 3 along with the other clothes I like but never wear because they need a little attention. Once I realized just wearing it with a belt wasn't going to get this shirt into regular rotation, it hung around while I pondered how to take it in. Because of how it is constructed, simply slimming it at the sides would cause issues with the armholes, so that wasn't an option. There is already a seam down the back, so that would be the next logical place to ease out the fullness, but I really like the shape of the hem and worried that doing so would distort it. So it hung there for a little while longer until it hit me.
Simple Shirt Refashion after
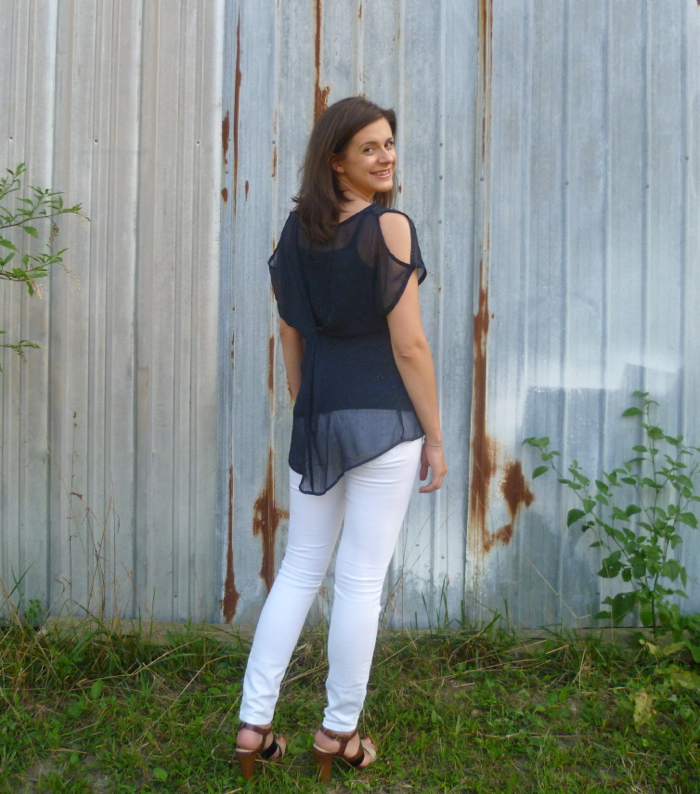
You know when you go into those little boutiques and the clothes on the mannequins always fit them so well? Well trust me, they don't come off the hanger that way. The secret? Usually just a clothes pin that holds all the extra fabric in the back. What I needed to make this shirt wearable was a permanent clothes pin! All I did was pinch a bit of fabric about 4 inches to the left and right of the center back seam along the waistline. Then I brought the two pinches to the center and tacked them together by hand. So simple, and even with the measuring, pinning, trying on, and hand sewing it only took me 15 minutes!
Simple Shirt Refashion back
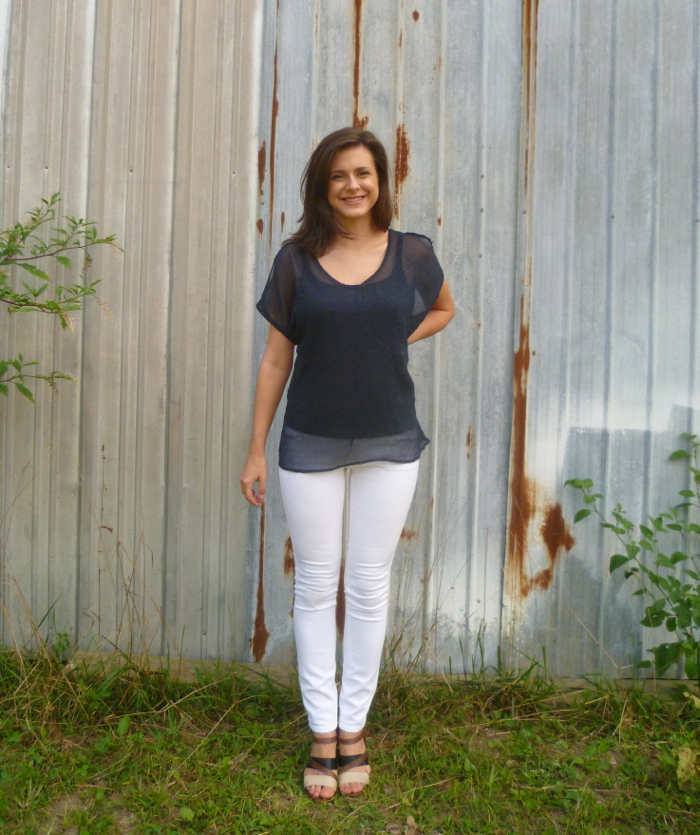
It's not a very dramatic change from the front, but I love the fullness it created in the back and I am 100% more comfortable wearing it now. For such an easy alteration, it really is shameful that it took me three years to get it done. But now that it is, this shirt has quickly become one of my favorites.
Simple Shirt Refashion front
In that same post about cleaning out my closet, I mentioned that I purchased Elizabeth Cline's book Overdressed: The Shockingly High Cost of Cheap Fashion. Well, once it finally arrived I finished it in about two days; it was an interesting but quick read and really gives a perspective on retail clothing that we as a society simply don't think about. One of my favorite takeaways from the book and my new sewing/fashion/life mantra is her chapter title "Make. Mend. Alter." Such a simple concept that has become pretty much extinct in our "quick, easy, disposable" society. I could go on and on about this topic but I will leave it at this: I want to make clothes that fit, alter the ones I already own that don't, and mend the ones that need it to get as much life out of them as possible. By doing so I hope to reduce the amount of clothes that end up in landfills and the secondhand clothing industry (read chapter 5 "The Afterlife of Cheap Clothes" if you want to know more about what really happens to those donations that you write off every year), and also of course to have a wardrobe I love and am proud of and that lasts. Obviously there will still be occasions where donating a garment is the best option, and my latest big purge has resulted in a laundry basket full of clothes that are headed to Goodwill. Hopefully this mindset will prevent me from ever having to do a big purge like that again, and instead I can focus on "working with what I've got" and creating clothes that I love to wear. So in short, expect to see some more refashions and alterations of clothes I already have in my wardrobe along with all my new makes!
Has anyone else read Overdressed and want to gush about it? I'm not usually one to fall for hyped-up, sensationalized media but the numbers and facts presented in the book seem to tell the story pretty clearly. What are your thoughts?