
I've Moved!
February 25, 2019
You can now follow along with my sewing adventures at www.sarahjeanwright.com. Or for the most frequent updates and more dog pictures, follow me @ohheyitssj on Instagram.
Off-the-Shoulder Dress | M6558
May 20, 2016
I don't know how the weather has been in your part of the country/world, but here in Central Virginia it seems like we have had more cloudy/rainy days than sunny and I could count on one hand the number of days the temperature has gotten above 75, which is completely atypical for this area. It's basically felt like March for 3 months now and I CAN.NOT.WAIT. to be complaining about how hot and humid it is. Seriously! Consequently, this dress that I finished at the beginning of April hasn't been worn except to snap these photos :( It looks so sad hanging in my closet being all but ignored as I try to find sweaters and jackets that I'm not sick of wearing since October. My hope is that by blogging about it, some warm, sunny weather will be encouraged to head this way and stay for a while. Summer will come. It has to, right? I really hope so.
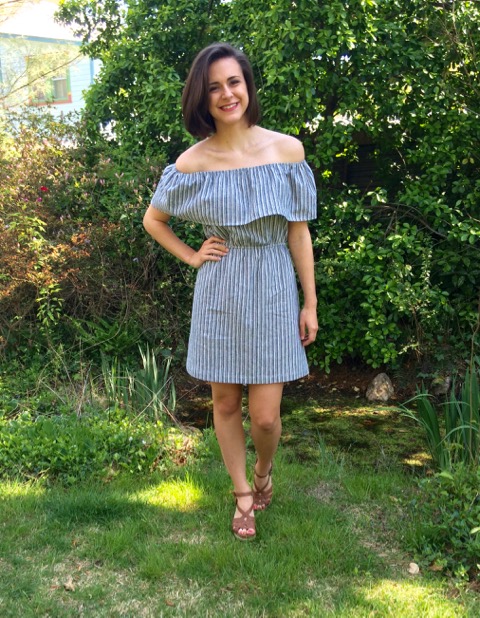
As you can see, I have punched my ticket for the off-the-should-trend bandwagon and I am not even slightly sorry! I used McCall's 6558 View B a modified it a little to get the look I was going for in my head.

I made a quick muslin of the size 10 and decided not to make any alterations for fit, so even with the muslin step this was a really quick sew. I only made a couple of design changes, specifically shortening the length to mid-thigh (using my Southport dress as a guide) and also shortening the shoulder ruffle by about 1 inch. If/when I make another version, I might give the skirt more of an a-line shape to add a little fullness.

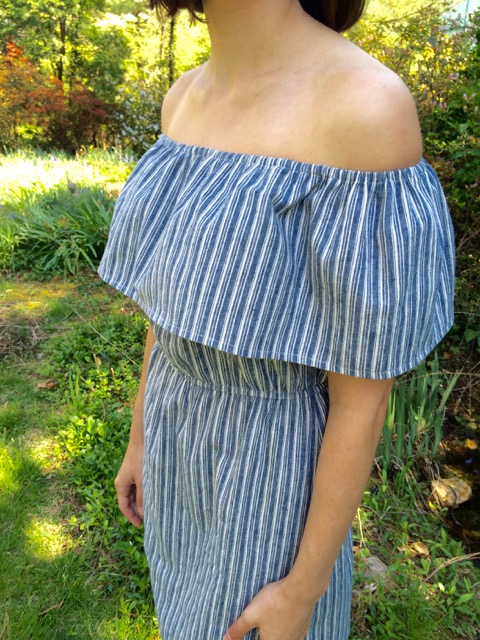
I picked up this fabric on my very last trip to Hancock Fabrics (R.I.P). I am super bummed to see them go as the only places in Richmond to buy apparel fabrics are Joann or Hancock and I have never been impressed with Joann's selection/pricing/quality of apparel fabrics. I guess that means a lot more online fabric shopping for me! I picked up a few different wovens on this trip, this one being a cotton/linen blend that was super soft even before washing it. It sort of has a mid-weight hand to it but because of the content I'm sure it will be nice and light and comfortable to wear if the weather ever decides to warm up.
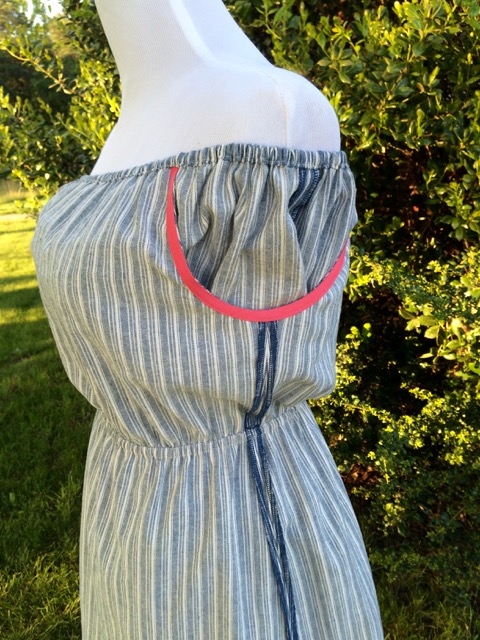
Construction on this dress was really straight forward. The hardest part for me was feeding the elastic through the casings as it was a veryyy tight squeeze. The armholes are finished with bias binding leftover from my Easter dress (yet to be blogged). I serged the side seams, and the hems on the ruffle and skirt are double folded and topstitched. My favorite sewing hack as of late is using doubled sided tape (like this) for hems. I used the 1/4" wide version for the hem on the ruffle. Just place it along the raw edge of the fabric, pull off the paper, fold up the fabric the width of the tape, fold up again, and stitch in place. The result is neat and even and there is no measuring involved! Love it.

While I was cutting and sewing this dress, the thought of adding pockets came to mind more than once but was rejected each time out of sheer laziness. Of course, the first thing I said to myself when I put it on to go take these pictures was "Man, I wish I had some pockets." I guess I could do some unpicking and throw in some inseam pockets, or maybe patch pockets on the front would be easier? I don't know, the lazy voice in my head is telling me it's not that big of a deal. Perhaps I will wait until I can really get some wear out of the dress before I make a final decision.
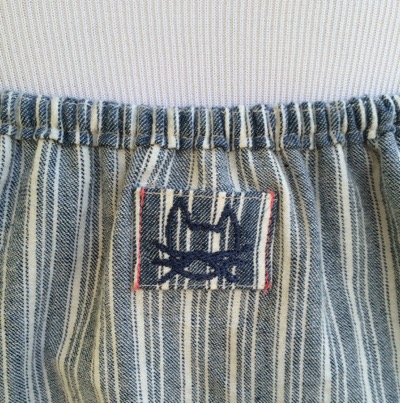
Oh! I almost forgot to tell you about my favorite part, the tag! This is one of those garments where it is impossible to tell the front from the back, so I knew I needed to add something to help me differentiate between the two. I went a little computer nerd and designed this guy in Inkscape then converted it to a digital embroidery file. I used one of the embroidery machines at work to embroider him onto a piece of scrap fabric which I made into a tag and sewed into the dress. And then all of the heart-eye cat face emojis. I love him, I really do! I realize that when I'm wearing the dress, no one will know it is there (except for you guys if you see me wearing it, haha) but there is just something about it that makes me happy. Maybe thats weird, but I don't care.
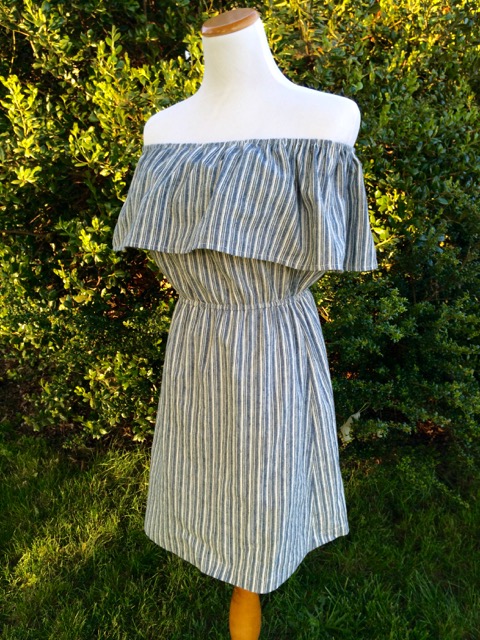
Anywaysss, I think that's all I have to say about this pretty straight-forward make. I'm going to go savor these last little bits of sunshine before it rains all weekend (again).

| Pattern: | M6558, View B by McCall Pattern Company |  |
|---|---|---|
| Fabric: | Striped Cotton/Linen Blend from Hancock Fabrics | |
| Body Measurements: | Bust 36.5/Waist 27/Hip 37.5 (in inches) | |
| Size: | 10 | |
| Adjustments/Alterations: | shortened skirt to mid-thigh length, shortened shoulder ruffle 1 inch |
Geometric Southport Dress
September 25, 2015
Wednesday was officially the first day of fall, so of course I am posting about a summer dress today! My timing might not be the best but I actually think this Southport Dress will be a good fall transition piece when layered with a cardigan/tights/boots (but it was in the upper 80s when these pics were taken so you won't see any of those things today).
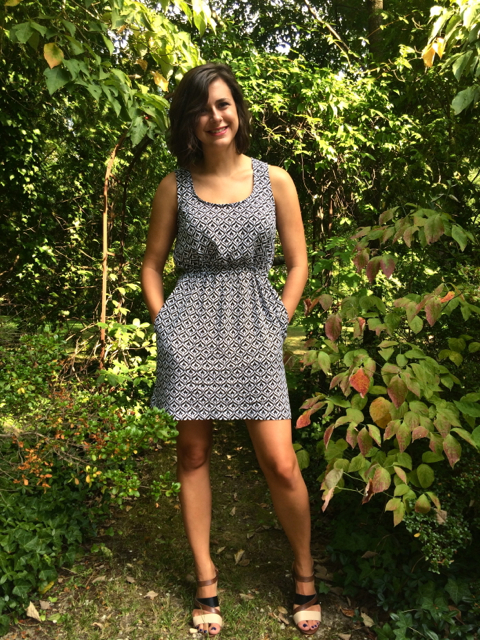
I have a "dress" that I bought years ago from Forever21 that I love (I think it is supposed to be a dress but it is completely inappropriate without leggings, so I wear it as a tunic). It is a tank with a front button placket and elasticized waist. It is one of those items of clothing that I seem to wear whenever it is clean, so when Kelli of True Bias released the Southport Dress pattern that is so similar to my well-loved "dress" I knew I wanted to make one.
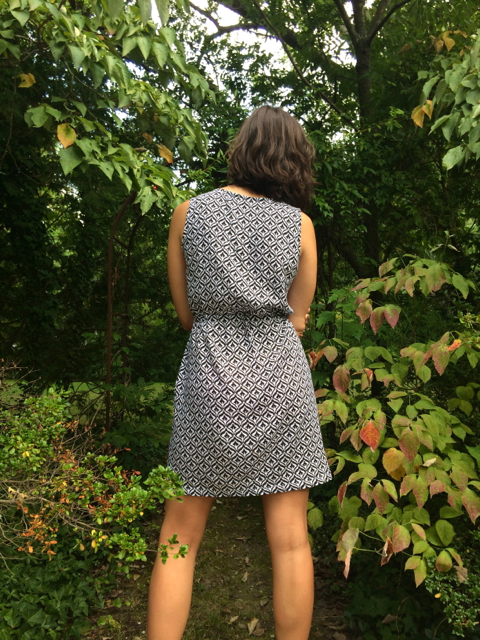
I found this rayon challis at Hancock Fabrics. Black & white geometric print in my favorite textile ever? Yes, please! I can't remember exactly how much I paid for it but I know they were having a really good sale that weekend. It was probably about or just under $10 for the 1.5 yards I needed and that's not a bad deal for a dress at all. I am pretty impressed with the quality, too; it is definitely one of the softer rayon challises that I have come across.
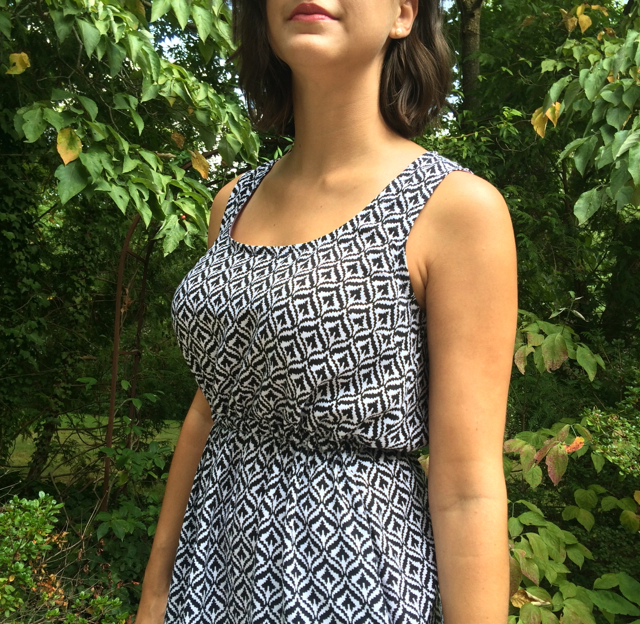
I don't really have a whole lot to say about this pattern except it is awesome and I love it. The instructions were great and for me the fit right out of the envelope was awesome. I opted to leave off the front bodice button placket for this version. It's a pretty busy print and I felt like the buttons would just get lost anyway so I saved myself some time by cutting the front bodice on the fold at the center front. I also decided to use elastic in the waist instead of the drawstring that comes with the pattern. This required a little modification to the construction, but not much. I lengthened the casing so that it would be the entire width of the dress, then instead of sewing the casing into the waist seam so that it folds to the outside of the dress, I simply sewed it so that it would fold to the inside of the dress. I stitched all around the bottom of the casing like in the pattern instructions, left a hole to feed the elastic through, fed the elastic through, and then sewed up the hole. And voilá, no drawstrings to fiddle with.
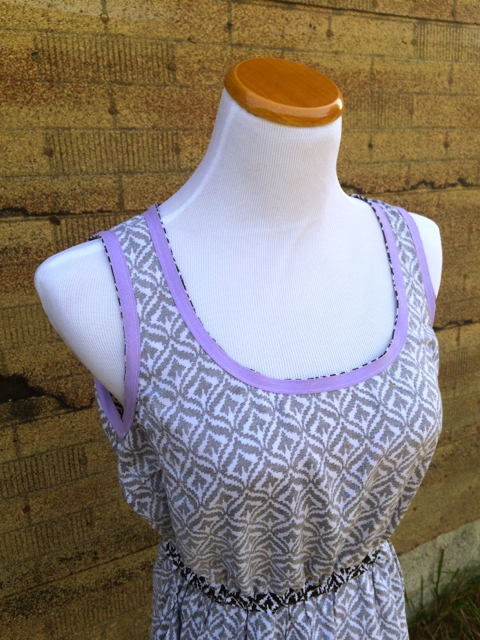
I finished the neckline and armholes with some vintage lavender bias tape that was gifted to me by my boss's mom (seriously, I may never need to buy bias or hem tape ever again). I'm still working on getting necklines to lay flat when finishing them this way, as you can see from the photos. Surprisingly, the pokey-outey-ness bothers me way more in these photos than it does IRL, so that's good, I guess. I used french seams throughout the dress, even on the side seam pockets which was interesting (I used this tutorial). The point where the pocket and the side seam intersect was a little funky but overall I'm happy with how they turned out, and from the outside they look just like any other side seam pocket.
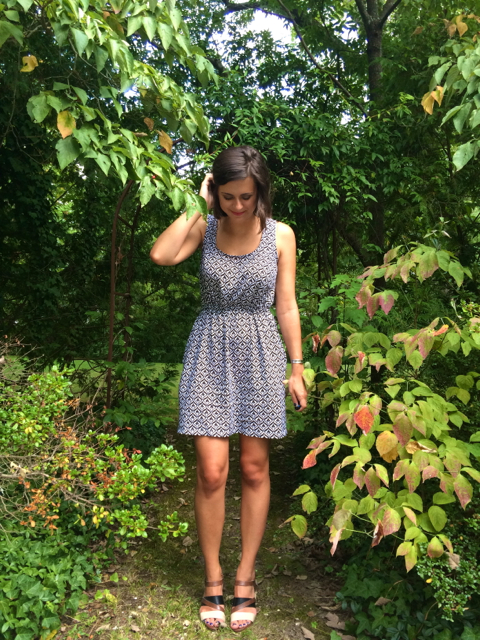
I had a lot of fun during the whole process of sewing this dress but I think my favorite part was the fact that I did not have to make any fit adjustments! I had read a few other posts mentioning that the bodice runs a little big and the skirt a little narrow so I wanted to play it safe and sewed up a muslin. My body measurements are exactly a size 8 on the size chart, but based on the finished measurements I decided to size down to a 6 and the fit is pretty spot on. Don't you just love it when that happens?
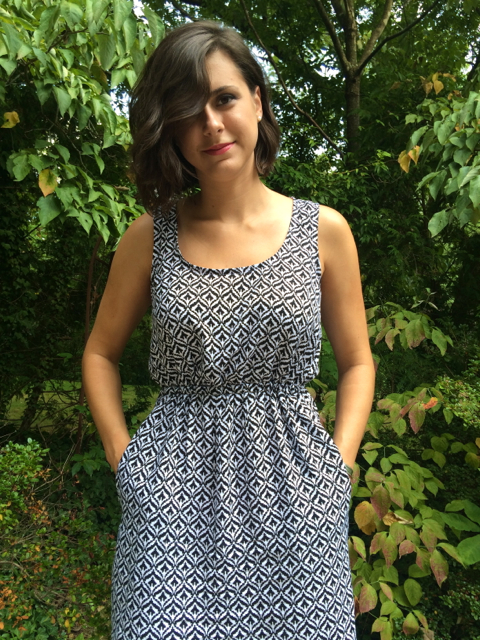
I absolutely have plans for more Southports, though they might be put on hold until the spring to make way for some more seasonally appropriate sewing. But I think it would be super cute to add a shirttail hem detail to the skirt. I don't own any maxi dresses (gasp!, I know) but I am definitely interested in giving the maxi version a go, too.
Do you have any favorite patterns that fit right out of the envelope? Do you like making fit adjustments to patterns? Sometimes I find the whole fitting process fun (I love a good challenge/puzzle) but being able to skip it is such a time saver.
Do you have any favorite patterns that fit right out of the envelope? Do you like making fit adjustments to patterns? Sometimes I find the whole fitting process fun (I love a good challenge/puzzle) but being able to skip it is such a time saver.
| Pattern: | Southport Dress by True Bias Patterns |  |
|---|---|---|
| Fabric: | Rayon Challis from Hancock Fabrics | |
| Body Measurements: | Bust 36/Waist 29/Hip 38 (in inches) | |
| Size: | 6 | |
| Adjustments/Alterations: | no adjustments for fit; cut front bodice on fold and removed front button placket; removed drawstring and added elasticized waist |
Mandy Boat Tee | Version 2
September 8, 2015
I know ya'll have probably been on the edge of your seat waiting for this post that I promised a month ago... okay, probably not, but I am super happy to be catching up on my blogging back log. So let's get straight down to business, my second version of the Mandy Boat Tee by Tessuti Fabrics. I talked a lot about the pattern and adjustments I made in this post about my first version, so this time I'm going to focus on the additional changes I made the second time around.
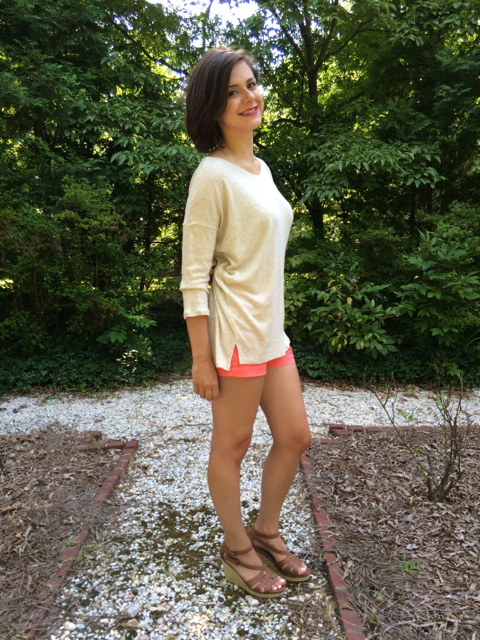
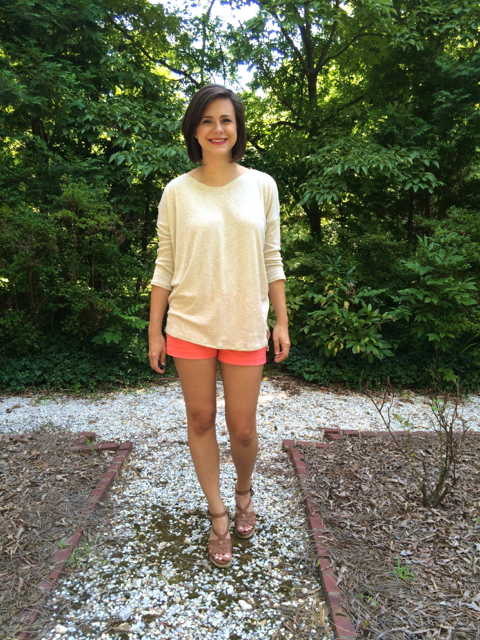
I have a slight (and sorta random) obsession with high-low split hems right now. I can't really explain why, I just love them, and I thought the Mandy Boat Tee pattern would be a great pattern to add a split-hem detail to. When I was doing research on techniques on how to sew a split hem for a shirt I realized that most of them involve adding two different length bands of fabric to the bottom of a shirt. For mine I really wanted the front and back to be continuous pieces of fabric, so I was just going to "wing it" until I found a men's shirt at Urban Outfitters that had the exact hem I wanted. I used this shirt as a guide for how long to make the front and back and also copied the technique used to construct the hem. Here is a brief synopsis of the steps I took:
1. Add 1 inch of length to front and 2 inches of length to back
2. Serge side seams, stopping 1/2 inch from where split will start (mine was about 4.5 inches from bottom of back piece)
3. Sew short line of straight stitching along side seam starting 1/2 inch above where serging stops and continuing to point where split will start
4. Finish/hem bottom of shirt on front and back
5. Fold under unfinished sides of hem twice and straight stitch in place
6. Stitch perpendicular to side seam just above spilt for reinforcement
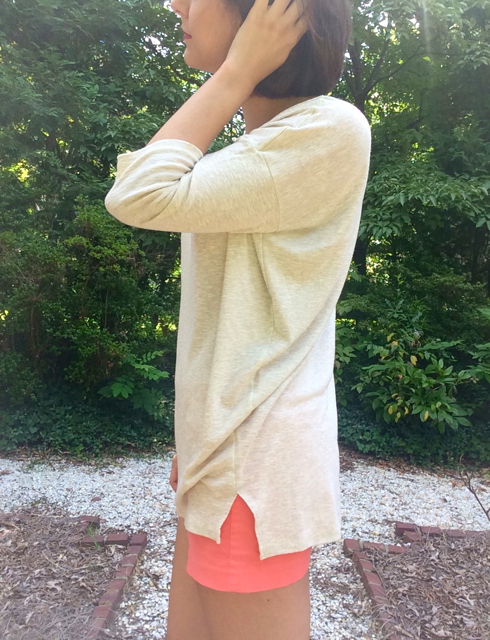
I might put together a full tutorial for this technique (with pictures and all that jazz) at some point but in the meantime I hope that makes some sort of sense. Here's what the inside looks like:
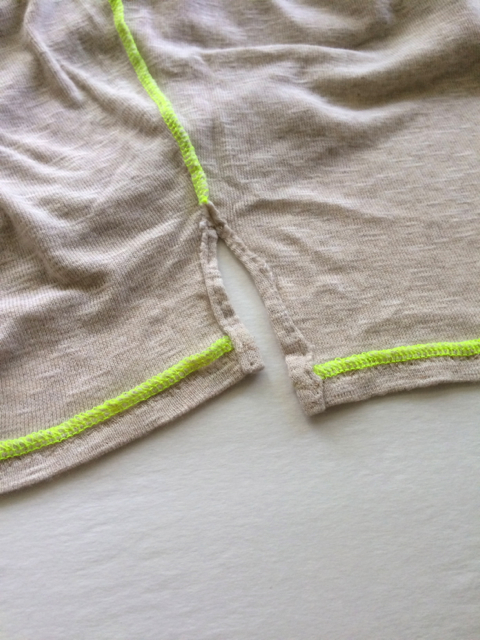
I'm not super proud of my craftsmanship (it's a little sloppy) but I gave myself a break since it's my first time using the technique. And as you can see, I used neon yellow serger thread as a fun detail. You can kinda see it through the fabric but it doesn't bother me--I kinda have this thing for neon accents (see here, here, and here).
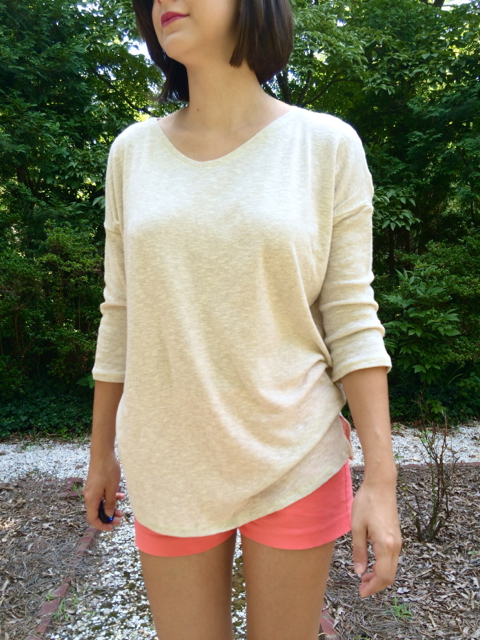
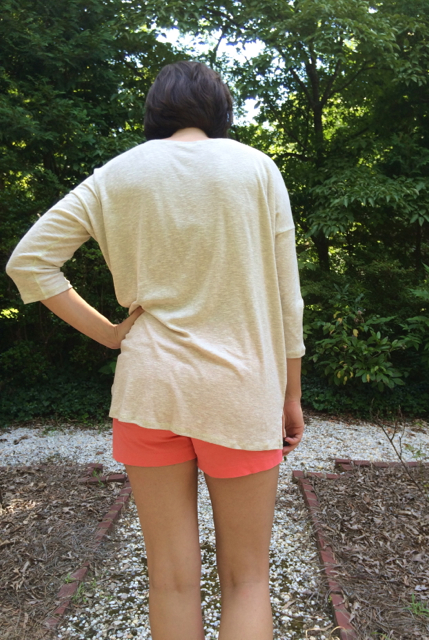
I made the same fit adjustments to this version as I did in my first version (remove width from side seams, lower font neckline), and in addition I removed 1 inch from the center front and center back (inspired by Kelli's version here). This version sits much better on my shoulders thanks to that adjustment, so if you have made this pattern before and were having similar issues, then I definitely recommend trying it. I also added clear elastic to stabilize the shoulder seams since the fabric was pretty stretchy and I think this also helps keep the shirt from stretching out as I wear it and therefore stays on my shoulders better.
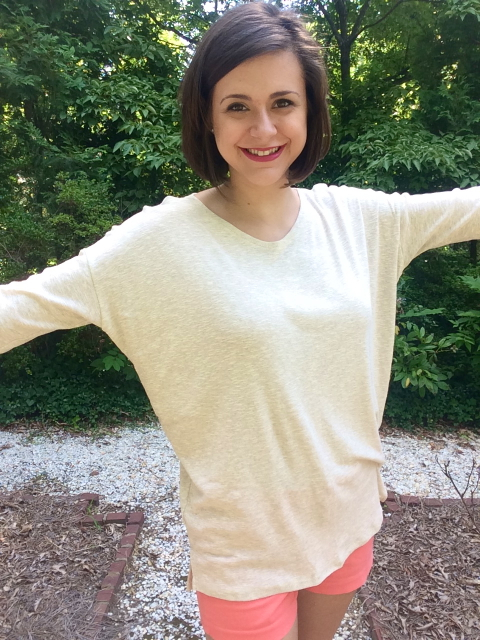
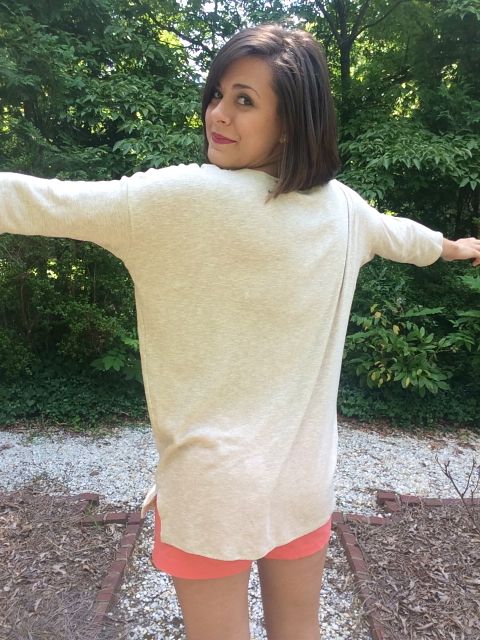
The fabric I used is a lightweight sweater knit from Hancock Fabrics. I found it in their value fabrics section and I can't remember the exact fiber content. It's probably some blend of cotton/polyester and maybe a little bit of Spandex. The recovery is pretty awful (especially in the arms, which you can see in some of the photos). I was nervous about the split hem, having never sewn one before and not having a tutorial to go by, so I didn't want to mess up nice fabric. Now that I have made this shirt twice, I think I'm ready to sew it up in some better quality knits. I do love the color of this version, though, and I'm looking forward to wearing it more once the weather cools down a bit. I love the way it looks with leggings or skinny jeans and boots!
The weather here hasn't really started to cool off much yet, but I've been thinking through some ideas for fall/winter sewing. I LOVE this Beatrix Top by Erin over at Sewbon and I'm pretty sure at least one version will make it into my wardrobe very soon. Have you started making your fall sewing plans? Are there any patterns you are just dying to sew up? I would love to hear about them in the comments!
The weather here hasn't really started to cool off much yet, but I've been thinking through some ideas for fall/winter sewing. I LOVE this Beatrix Top by Erin over at Sewbon and I'm pretty sure at least one version will make it into my wardrobe very soon. Have you started making your fall sewing plans? Are there any patterns you are just dying to sew up? I would love to hear about them in the comments!
| Pattern: | Mandy Boat Tee by Tessuti Fabrics | 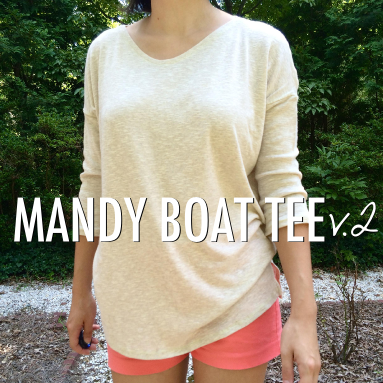 |
|---|---|---|
| Fabric: | Mystery Blend Lightweight Sweater Knit from Hancock Fabrics | |
| Body Measurements: | Bust 36/Waist 29/Hip 38 (in inches) | |
| Size: | N/A, one size | |
| Adjustments/Alterations: | 4 inches from front and back side seams graded to nothing at shoulder seam, lowered front neckline 2 inches, removed 1 inch from both front and back center seams, lengthened front 1 inch and back 2 inches, added split hem detail |
Mandy Boat Tee | Version 1
August 5, 2015
This post has been a long time in the making as it has been quite a while since I finished this shirt (it actually made an appearance in this post about what was going on with me this past fall/winter). I have come to believe, though, that there are merits in waiting to blog about finished garments, like knowing how it fits in my wardrobe (i.e. if I actually wear it) and also how it fits (can I make any adjustments for future versions). With that being said, I *probably* didn't need the 8+ months that have passed since I completed this shirt to find out that information. Oh well. Better late than never, as they say.

So let's talk about Mandy. The Mandy Boat Tee is a free pattern offered by Australian based fabric store Tessuti Fabrics. There are couple of things that instantly drew me to this pattern: FREE (because, duh) and the drop shoulder (because, I like them). I was skeptical about the "one-size-fits-all" and the boxiness of the top. I tend to stay away from patterns that use boxy in the description (for me usually boxy = not flattering), but I figured it's a free pattern, so what did I really have to lose? Luckily, I don't think it turned out too bad after all!

The fabric I used is a dark eggplant purple rayon blend knit from JoAnn's. It was a red-tag fabric and $5/yard, so if things ended up going bad I wouldn't cry over the loss of fabric. I knew the rayon would give the shirt a nice drape which I would need/want with this style top, and it also has a very subtle metallic heather to it that I liked, which you can see in the close up below. It's not the most terrible quality fabric I've ever worked with; it's pretty soft (thanks to the rayon, I'm sure) but it does lack a little bit in the recovery department. For $5/ yard it is pretty much what I expected.
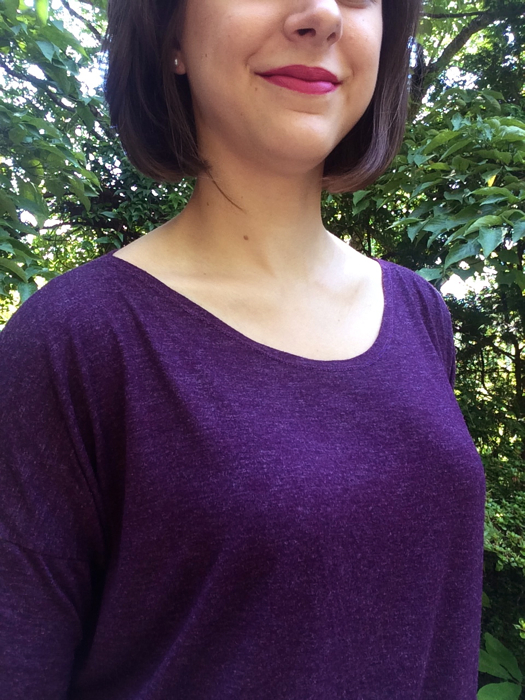
Even before I hit download on the pattern I knew I was going to have to do some altering to get a fit that I liked. For this version I only made two changes: I ended up taking 4 inches from the sides of both the front and back pattern pieces and graded to nothing at the shoulder seam. I used a shirt from American Eagle that I have had foreverrr but really like as guide for how much to take off. I also lowered the front neckline by 2 inches. For the construction I kept it simple; I serged all the seams and did a simple turn and topstitch on the neckline, arms, and bottom hem with a twin needle.
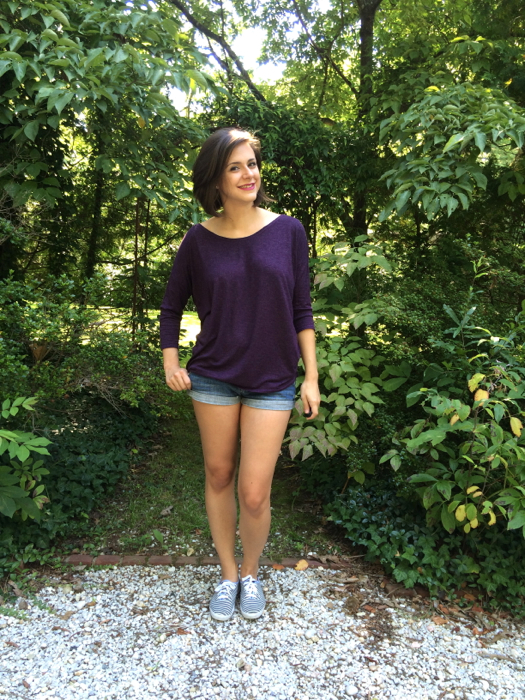
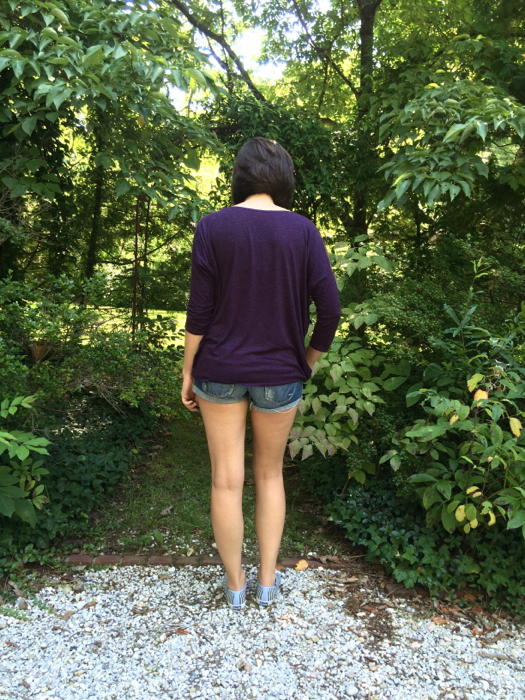
Overall, I am OK with how this first attempt turned out. After wearing it, I knew the biggest thing that needed adjusting was the neckline. It's realllyyy wide and tends to want to slide off my shoulders. I don't mind that slouchy off-the shoulder look but I find myself constantly pulling the shirt back onto my shoulders throughout the day which is kinda annoying. The not-so-great recovery of the fabric also means the arms stretch out a bit and I find myself always pushing them up. If they were a bit tighter or I used fabric with better recovery so they stay in place then the off-the-shoulder problem might be alleviated a bit. Despite the not-perfect fit and fabric, I still got a decent amount of wear out of it this winter/spring (Central VA summers are a bit too hot and humid for 3/4 length sleeves) and I actually made a second version-- stayed tuned for a post with all of those details.
Have you ever tried the Mandy Boat Tee pattern? Did you make any adjustments to the pattern? How did it turn out for you? I do have plans to make more, so I would love to know!
| Pattern: | Mandy Boat Tee by Tessuti Fabrics | 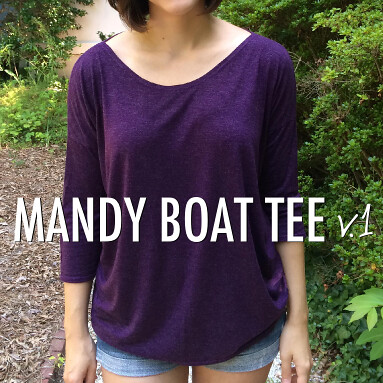 |
|---|---|---|
| Fabric: | Rayon Blend Metallic Heather Knit from JoAnn's | |
| Body Measurements: | Bust 36/Waist 29/Hip 38 (in inches) | |
| Size: | N/A, one size | |
| Adjustments/Alterations: | 4 inches from front and back side seams graded to nothing at shoulder seam, lowered front neckline 2 inches |
Hey What's Up Hellooo
April 30, 2015
HEY.
My blogging these last few (cough *6* cough) months has been sporadic at best. I could lie and say "I didn't have time" but that's a pretty lame excuse. It's actually my least favorite excuse. I wholeheartedly believe that we make time for the things that are important to us, so to say I didn't have time to blog(sew) is to say that blogging(sewing) is not important to me but it IS! I love this little space I've created to share and document projects that I put so much time and heart into. It was a tough winter for me (for a laundry list of reasons that I won't go into here), and I just didn't get much blogging or sewing done. But I don't want to focus on what didn't get done, instead let's talk about what I HAVE been doing these last 6+ months.
SEWING. I have actually been sewing more the past 6 months than I ever have in my entire life, because it's my job. The entire month of February and some of March, I made Roman Shades. Every single weekday, and even a few weekend days, too, I was making Roman Shades. I think I made an average of 20 a week. It was ridiculous. As far as sewing for fun, I made a few skirts, a couple shirts, some scarves. Not a whole lot, really.


BLOGGING. I guess you could say I've been cheating on this little blog of mine, because I have been blogging for the company I work for. At the beginning of the year I was tasked with creating content for our blog and parts of our website and it's been a great learning experience. I still feel like I have a lot to figure out and I feel like there is so much more I want to do, especially with the blog. But Rome wasn't built in a day, right? #supercheesycliché #sorrynotsorry If you are curious you can check out our blog/website here.
BUYING STUFF (fabric, patterns, and machines!). I just told ya'll that I haven't been doing much sewing for myself, but you wouldn't know it by the amount of fabric and patterns I've been buying. I think I finally got myself under control and have an embargo in place on spending in both of those areas, at least until I have another amazing idea that I just have to have that fabric/pattern right then. No, but really though, I'm not, because I am NOT buying fabric or patterns (probably). Oh and by the way, I got a serger and an industrial sewing machine!! *Does crazy sewing lady happy dance* I purchased my serger back in October, a Brother 1034-D. My regular machine is a Brother and I have been nothing but happy with it, so I figured this machine, which is super popular among the home sewing crowd, would be a good place to start for someone who has no serger knowledge or experience. It's sorta a long/complicated story but I also came into possession of an industrial sewing machine. All you need to know is it was bought for a specific project, that project is still on my to-do list, and I'm still so intimidated by the machine that I have not even attempted to teach myself how to use it. But I'll be sure to keep ya'll posted with any updates on the #GreatIndustrialSewingMachineSaga and eventually give ya'll the whole back story, too.

MOVING MY SEWING AREA. Up until a couple of months ago, the only place for me to sew was in our (fairly small) living room. Now one of the bedrooms has opened up and I get my very own sewing ROOM, which I've never had before and am very excited about. It is still very much a work in progress, but I already feel so much more organized which I hope will translate to more productive. My favorite part? This huge mirror I found at a local thrift store, Class and Trash, for ONLY $15! You can fully expect an influx of #mirrorpics on Instagram and I am not even the least bit sorry because ONLY $15!

That pretty much sums up what's been going on over here for the last several months. If you want to see what I'm up to when I disappear from the blog, you can always follow me on Instagram (that's where you can find me most consistently).
#handmadescarfswap
February 20, 2015
It's cold here. Like REALLY cold. Like single digit temperatures cold. I understand that in parts of the country/world this is not uncommon for February, but I don't live in those parts of the country/world for that very reason. I live in Central Virginia, it is not supposed to get this cold here! I've always said I don't mind the cold as long as there's snow, and we got a bit over 6 inches on Monday/Tuesday that is still sticking around so I can't complain too much. I would still rather be soaking up sun on a beach somewhere that doesn't know what 3 degrees with a wind chill of -5 to -10 degrees feels like.
I received two beautiful scarves, and I made two scarves to send to my partner, Crystal, as well! The first I made out of 2 yards of a lightweight sheermist cotton/poly blend. I knew I wanted the scarf navy and I've been on a neon accent kick lately, so I decided to embroider a plaid design onto the fabric using my sewing machine and some neon green and neon pink thread.
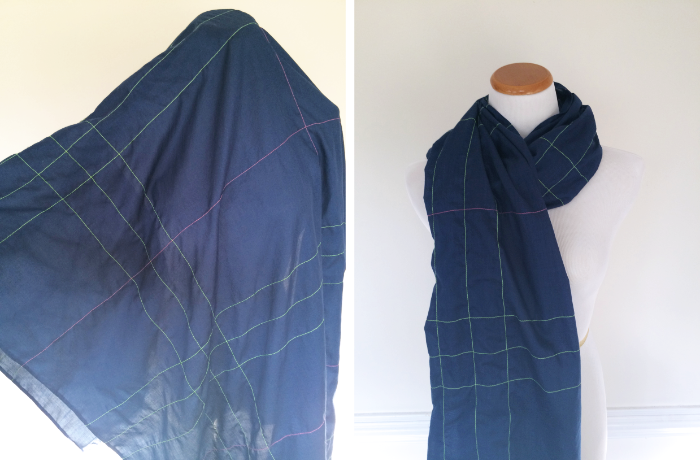
The original plan was to play around with different decorative stitches and widths for a more authentic plaid look, but the fabric was so lightweight I was getting all kinds of tension issues with the wider stitches. I ended up using just a simple straight stitch and I actually love the simplicity of the design. Plus, it took a lot less time! Here is a graphic showing the design and dimensions I used.

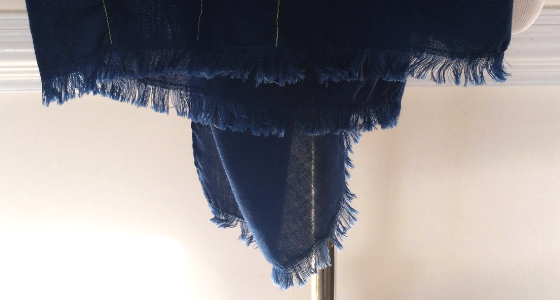
I finished the two longer edges using a narrow double fold hem and frayed the shorter edges. To fray the shorter ends, I "stay-stitched" about and inch from the end of the scarf (just a straight stitch to keep the entire scarf from unraveling) and used a pin to help pull out the threads running parallel to the stitching. Here is a close up of the ends...
The second scarf I sent was ridiculously easy to make. I found this scarf fabric at Joann's (can't find it online though) that was nice and drape-y, and I loved the metallic stripe detail. I think the fabric was around 44" wide and I just kept it that width since the selvedges were nice and that meant I wouldn't have to finish them. I frayed the short edges like the plaid scarf. It was that simple!
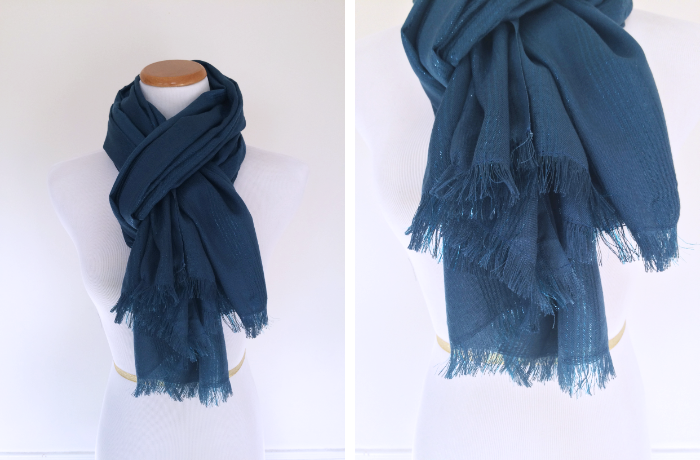
Even though the fabric is fairly light weight, the extra width gives it some thickness and warmth. Here is a picture that shows the drapey-ness and stripe detail a little better.
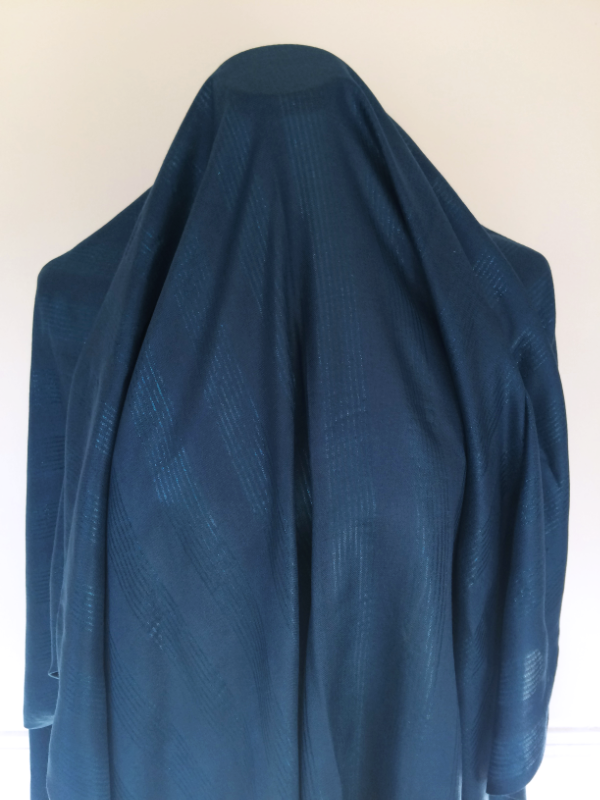
I might have liked this one so much that I bought another 2 yards to make myself one. Whoopsies!
Thanks to Sew Caroline and Sewbon for organizing this swap! Did any of ya'll participate? What did you make/get?
2015 Monthly Calendar FREE Printable
December 31, 2014
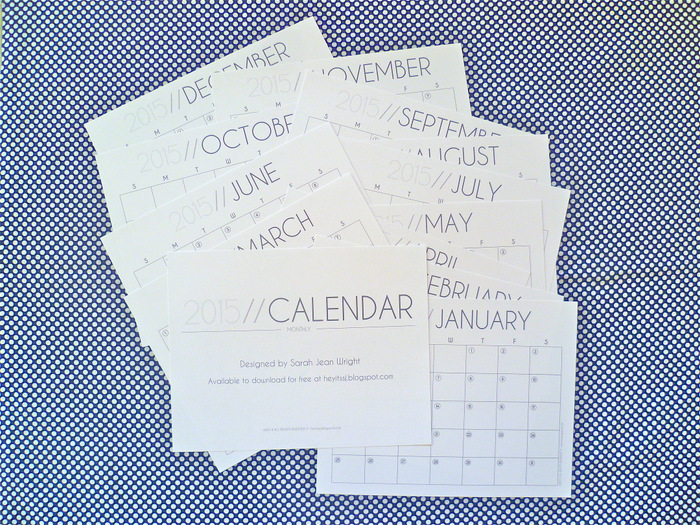
New year, new calendar, and this clean and modern 2015 monthly calendar is FREE for you to print and use!
[The link will open in a new window]

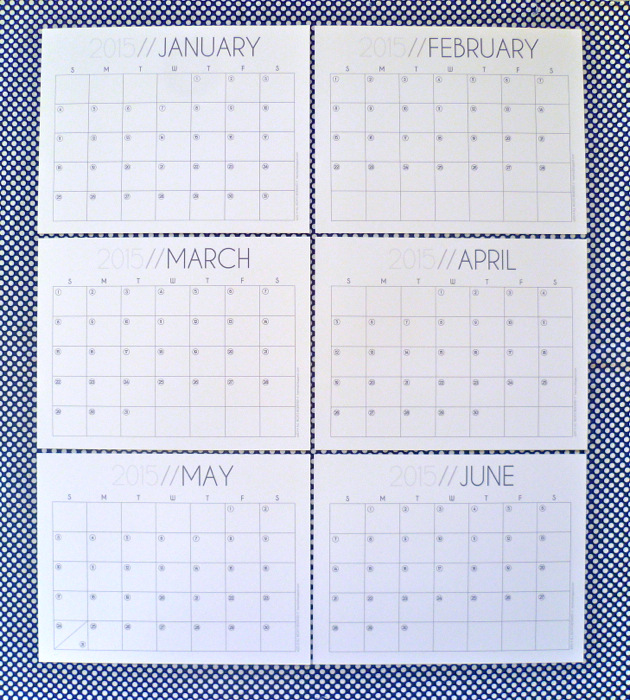
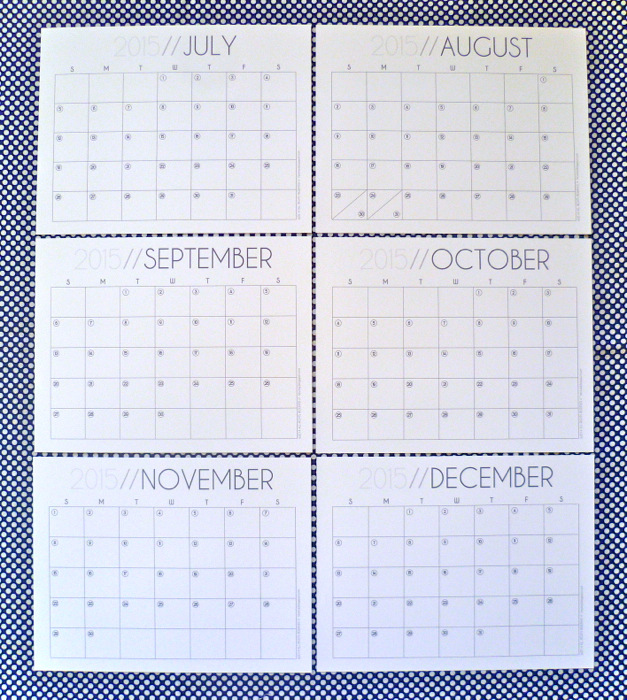
The PDF document is 13 pages long and contains monthly calendars for January through December 2015. Don't need the whole year? You can just print the individual page! The page numbers correspond to the month: for example, if you only need January, just print page one(1), February page two(2), March page three(3), etc.
Please note this calendar is free for personal use only. Please contact me in regards to using the calendar in items for sale, or if you have any other questions.
Potential Project Tuesday Vol. 2 // DIY J.Crew Inspired Vest
October 28, 2014
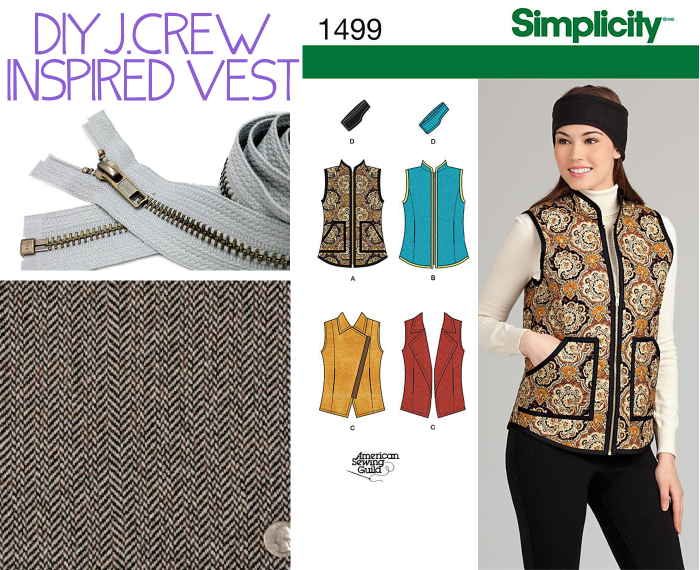
So I don't know about you, but now that it's fall I can't seem to get on Pinterest without coming across this J.Crew vest. I've never actually seen this vest in person (I really do need to get out more), so it was only the other day that I realized that it isn't actually made out of tweed, it's just printed nylon. WUT?! Maybe I'm just super cheap but for a $100+ jacket I expect it to be made out of something other than polyester. In fact, I'm pretty sure I could make an actual wool one for less than half that price.
 |
| (Click on images for product information) |
One of the hardest parts (which I don't even think would be that hard) would be quilting the fabric. I would cut the outer, interlining, and lining fabric into smaller pieces that are several inches larger on all sides than each of the pattern pieces, make a little interlining sandwich, and then get to quilting. This post about cross hatch quilting would be a good reference.
Here's a quick little list of the materials needed and some sources:
Lining-- I would probably use an affordable Ambiance/bemberg lining, but silk charmeuse or silk crepe de chine would also be options for a luxe vest.
Interlining-- For a super warm vest, I'm really interested in using Thinsulate.
Fabric-- LOVE this herringbone wool coating from Mood.
Bias Tape-- The quick and dirty way would obviously be to use store-bought tape. Alternatively, you could get a really nice quality cotton and make your own.
Zipper-- My only condition would be that it is separating (obviously), and metal, because I hate the look of those plastic parka zippers that they sell at Joann's/Hancock. Something like this but in black would work.
And an estimated cost break down...
$20/yd for a decent wool outer fabric (and I would get 1.5 yards to be safe) = $30
$8/yd for lining (again, 1.5 yards) = $12
$8/yd for Thinsulate (again, 1.5 yards) = $12
$6 for bias tape (store bought or homemade)
$5 for a zipper
Total = $65 IF everything was purchased at full price (and that's a big if because you know I love a good sale!)
I think this would be relatively simple as far as sewing outwear goes (there are no sleeves!) and I think the results would be absolutely amazingggg. And for only about $65 worth of materials it wouldn't break the bank! Someone please make one of these up so I can live vicariously through you :)
And an estimated cost break down...
$20/yd for a decent wool outer fabric (and I would get 1.5 yards to be safe) = $30
$8/yd for lining (again, 1.5 yards) = $12
$8/yd for Thinsulate (again, 1.5 yards) = $12
$6 for bias tape (store bought or homemade)
$5 for a zipper
Total = $65 IF everything was purchased at full price (and that's a big if because you know I love a good sale!)
I think this would be relatively simple as far as sewing outwear goes (there are no sleeves!) and I think the results would be absolutely amazingggg. And for only about $65 worth of materials it wouldn't break the bank! Someone please make one of these up so I can live vicariously through you :)
DIY Reversible Kimono Refashion
October 25, 2014
I was pretty excited when I found this dress at my local Goodwill. You may be wondering why, since it is obviously just a big shapeless sack on me. Well, let me tell you: 1. The larger size/longer length means more fabric, 2. It was actually 2(!) whole dresses (the outer tank dress and inner short sleeved one) sewn together at the shoulder seams, which means double fabric, and 3. It had a yellow tag, which just so happened to be that week's 50% off color. SOLD.
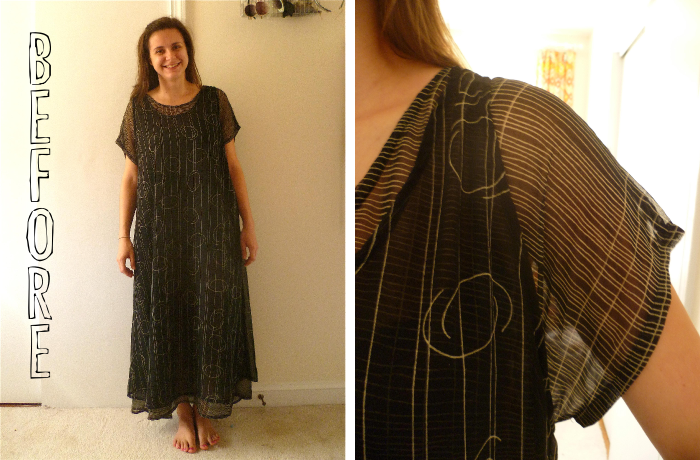
Since I had a lot of fabric, I thought this would be the perfect time to jump on the DIY kimono bandwagon (seriously, these things are all over the blogosphere right now). Although my sister (who was shopping with me that day) didn't care for them, I really liked the prints on both of the dresses. I played around with the idea of doing a contrast sleeve or back, but then decided to just make two kimonos. This quickly turned into sewing the two together to create a reversible kimono, and voilà!

As far as the pattern/construction goes... I based my measurements for my pieces on this tutorial, but my front pieces were slightly shorter and my sleeves were a little more narrow. I sewed the shoulder, sleeves and side seams with french seams, and inserted the sleeves "on-the-flat" (before sewing the underarm or the side seams together, see this post). Inserting them this way was a lot easier with the chiffon, but I would also recommend it for any fabric with this pattern since there is absolutely no difference in the finished product and it is SO much easier.
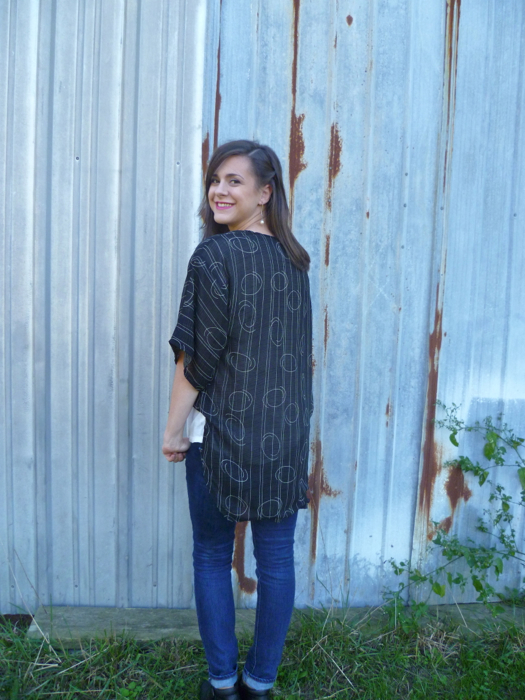
To make it reversible, I sewed up the two kimonos, one from each of the dresses. Then with right sides together, I stitched along the front and bottom hems, leaving the back of the neck open to turn, and then turned the kimono right side out. To finish the sleeves I folded a 1/2 inch hem to the wrong side of each of the sleeves (each side has two sleeves, so I had to do this 4 times), then I pinned the two sleeves on each side together and top stitched them, creating a single sleeve with no raw edges. I closed the hole in the neckline just by topstitching, and then also topstitched around the front and bottom hems to give the edges a cleaner finish.
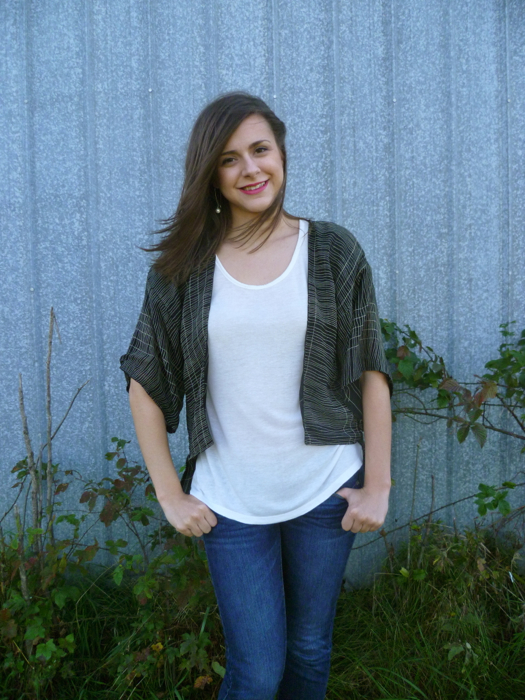
I have to say, I struggled through pretty much every step of this process, not because it was hard, just because I didn't enjoy it. Cutting/sewing the chiffon was a nightmare; it's one of those fabrics that I love to wear, but then I sit down to work with it and it frustrates me to no end. But I sucked it up. I figured that since it was just a bunch of rectangles it wouldn't be too bad. Well, it's not easy to cut any shape out of slippery chiffon (which I knew going into the project, but that still doesn't make it any easier to actually do). Then, after I started cutting, I realized I wasn't going to have enough fabric to make the front panels and sleeves quite as big as I wanted. No biggie, I just cut them a little smaller and dealt with it. Then, even though this kimono was going to be reversible with no exposed seams, I had the *genius* idea to use french seams for a super professional finish. So I had to sew each seam twice, and since it is reversible, I had to do them on each of the two kimonos. UGH. This greatly increased the amount of time it took me to sew the whole thing together, turning what could have been a quick and easy project into a long(er), more dreadful one. But I finally got it finished, and I don't know, it just doesn't wow or excite me. Yes, it's a kimono, it's reversible, and I like the prints, but I look at it and I just think "meh." I am happy with the construction; I think most of my dissatisfaction is with the fact that I want it to be longer in the front. I don't know, I'm going to give it a few weeks and wear it some and see if it grows on me.
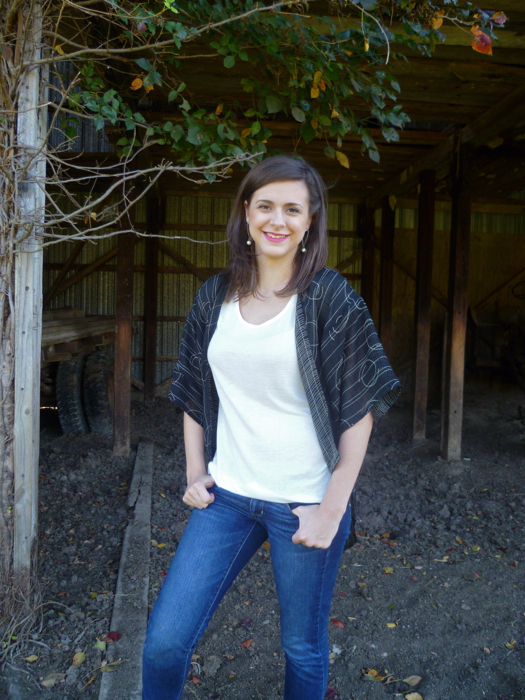
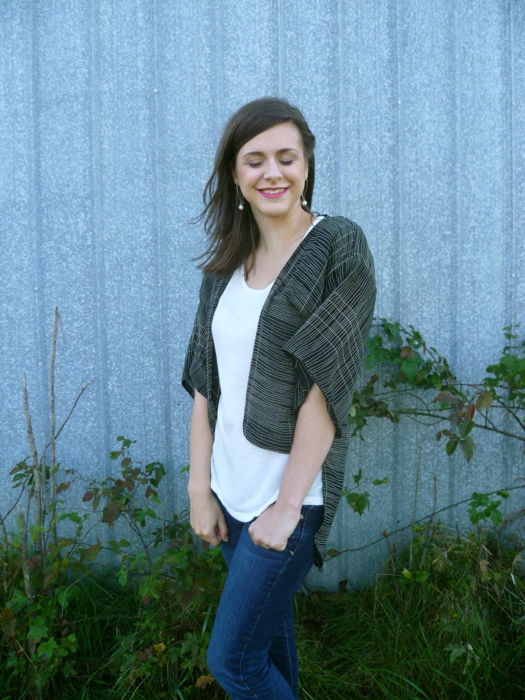
I didn't get very many (good) photos of this make because it was crazy windy the day I decided to take pictures and of course chiffon + wind = impossible to photograph. I did get some good outtakes though!
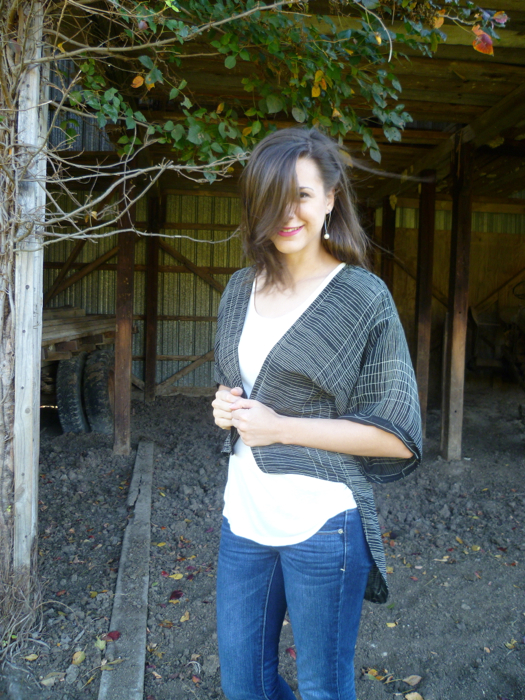
And I even got this one with the cows grazing in the background. (I also didn't pick the best time of day, and the lighting was less than desirable.) Still a pretty unique picture, I think!
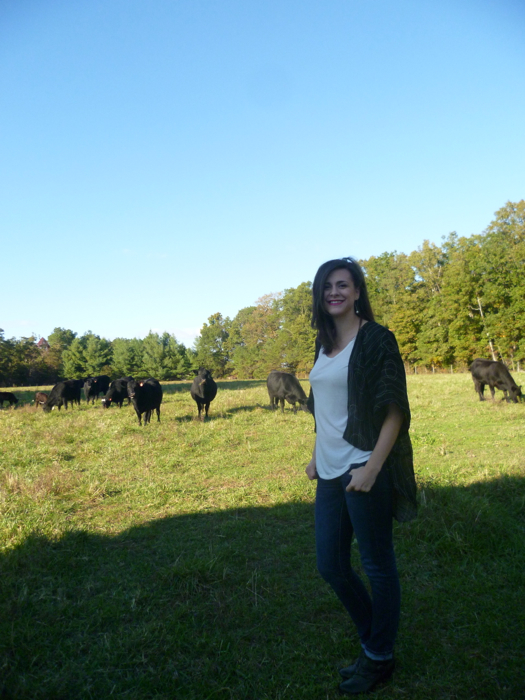
I really don't want to discourage anyone from making one of these; I think with a different fabric choice and enough fabric to make it the way I wanted I would absolutely love this project, and to prove it to myself I will probably give it another try. In the meantime, I think this one will be nice to wear on these cool but not cold, transitional fall days.
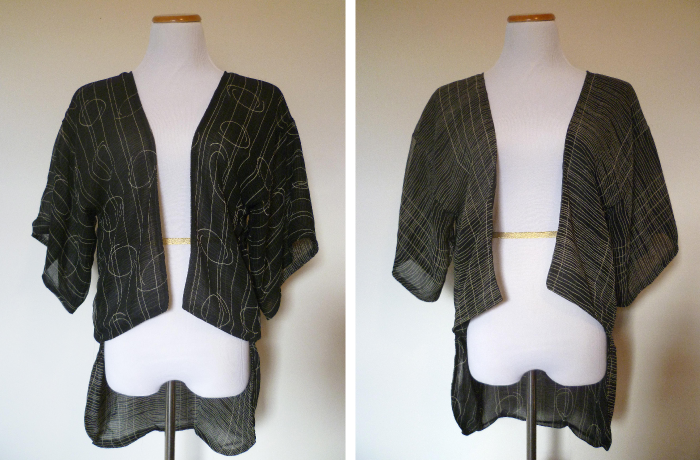
Now, I'm curious to know, which side do you like better? The one with the circle-y things, or the one that's just lines? Also, would anyone be interested in a more detailed tutorial about the reversible part? I'm thinking about writing one up, with diagrams and everything!
I am also sharing this project over on Refashion Co-Op. Here's the link to check it out, if you so desire.