
I know ya'll have probably been on the edge of your seat waiting for this post that I promised a month ago... okay, probably not, but I am super happy to be catching up on my blogging back log. So let's get straight down to business, my second version of the Mandy Boat Tee by Tessuti Fabrics. I talked a lot about the pattern and adjustments I made in this post about my first version, so this time I'm going to focus on the additional changes I made the second time around.


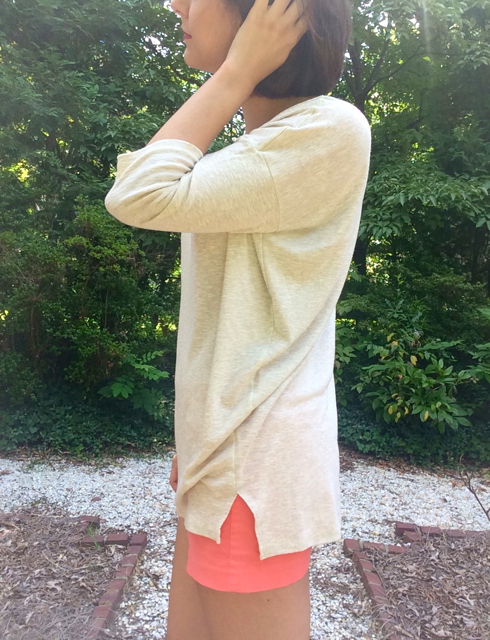
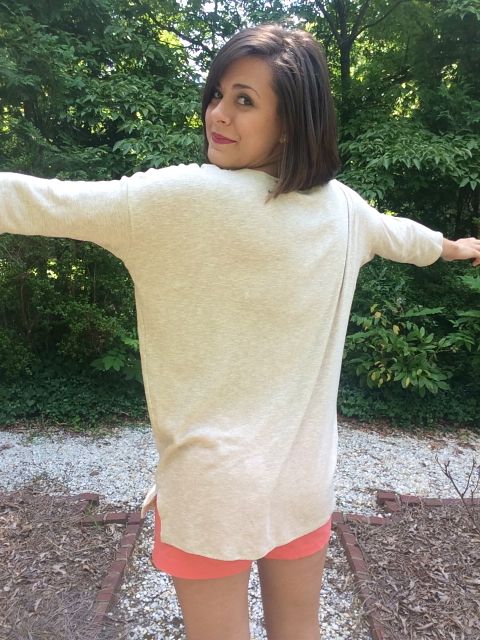
I have a slight (and sorta random) obsession with high-low split hems right now. I can't really explain why, I just love them, and I thought the Mandy Boat Tee pattern would be a great pattern to add a split-hem detail to. When I was doing research on techniques on how to sew a split hem for a shirt I realized that most of them involve adding two different length bands of fabric to the bottom of a shirt. For mine I really wanted the front and back to be continuous pieces of fabric, so I was just going to "wing it" until I found a men's shirt at Urban Outfitters that had the exact hem I wanted. I used this shirt as a guide for how long to make the front and back and also copied the technique used to construct the hem. Here is a brief synopsis of the steps I took:
1. Add 1 inch of length to front and 2 inches of length to back
2. Serge side seams, stopping 1/2 inch from where split will start (mine was about 4.5 inches from bottom of back piece)
3. Sew short line of straight stitching along side seam starting 1/2 inch above where serging stops and continuing to point where split will start
4. Finish/hem bottom of shirt on front and back
5. Fold under unfinished sides of hem twice and straight stitch in place
6. Stitch perpendicular to side seam just above spilt for reinforcement
I might put together a full tutorial for this technique (with pictures and all that jazz) at some point but in the meantime I hope that makes some sort of sense. Here's what the inside looks like:
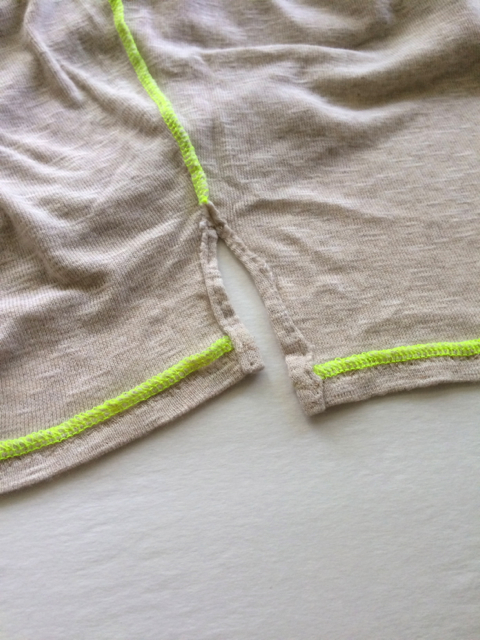
I'm not super proud of my craftsmanship (it's a little sloppy) but I gave myself a break since it's my first time using the technique. And as you can see, I used neon yellow serger thread as a fun detail. You can kinda see it through the fabric but it doesn't bother me--I kinda have this thing for neon accents (see here, here, and here).
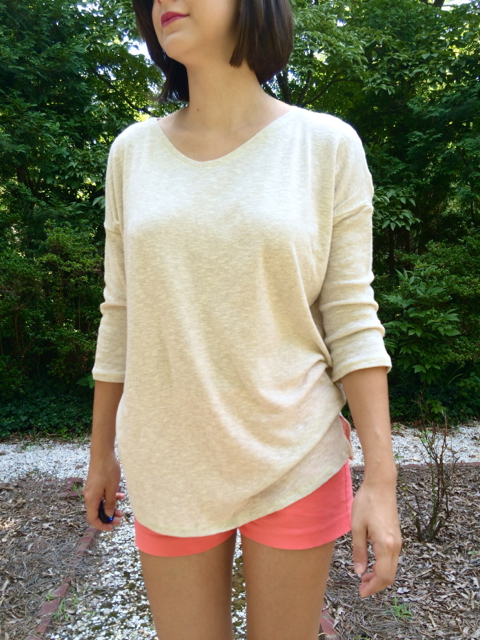
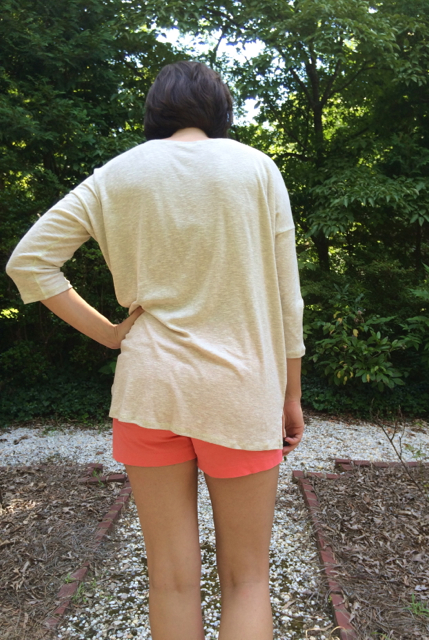
I made the same fit adjustments to this version as I did in my first version (remove width from side seams, lower font neckline), and in addition I removed 1 inch from the center front and center back (inspired by Kelli's version here). This version sits much better on my shoulders thanks to that adjustment, so if you have made this pattern before and were having similar issues, then I definitely recommend trying it. I also added clear elastic to stabilize the shoulder seams since the fabric was pretty stretchy and I think this also helps keep the shirt from stretching out as I wear it and therefore stays on my shoulders better.

The fabric I used is a lightweight sweater knit from Hancock Fabrics. I found it in their value fabrics section and I can't remember the exact fiber content. It's probably some blend of cotton/polyester and maybe a little bit of Spandex. The recovery is pretty awful (especially in the arms, which you can see in some of the photos). I was nervous about the split hem, having never sewn one before and not having a tutorial to go by, so I didn't want to mess up nice fabric. Now that I have made this shirt twice, I think I'm ready to sew it up in some better quality knits. I do love the color of this version, though, and I'm looking forward to wearing it more once the weather cools down a bit. I love the way it looks with leggings or skinny jeans and boots!
The weather here hasn't really started to cool off much yet, but I've been thinking through some ideas for fall/winter sewing. I LOVE this Beatrix Top by Erin over at Sewbon and I'm pretty sure at least one version will make it into my wardrobe very soon. Have you started making your fall sewing plans? Are there any patterns you are just dying to sew up? I would love to hear about them in the comments!
The weather here hasn't really started to cool off much yet, but I've been thinking through some ideas for fall/winter sewing. I LOVE this Beatrix Top by Erin over at Sewbon and I'm pretty sure at least one version will make it into my wardrobe very soon. Have you started making your fall sewing plans? Are there any patterns you are just dying to sew up? I would love to hear about them in the comments!

| Pattern: | Mandy Boat Tee by Tessuti Fabrics | 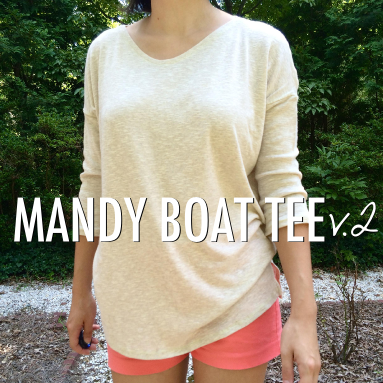 |
|---|---|---|
| Fabric: | Mystery Blend Lightweight Sweater Knit from Hancock Fabrics | |
| Body Measurements: | Bust 36/Waist 29/Hip 38 (in inches) | |
| Size: | N/A, one size | |
| Adjustments/Alterations: | 4 inches from front and back side seams graded to nothing at shoulder seam, lowered front neckline 2 inches, removed 1 inch from both front and back center seams, lengthened front 1 inch and back 2 inches, added split hem detail |