Mandy Boat Tee | Version 1

August 5, 2015

This post has been a long time in the making as it has been quite a while since I finished this shirt (it actually made an appearance in this post about what was going on with me this past fall/winter). I have come to believe, though, that there are merits in waiting to blog about finished garments, like knowing how it fits in my wardrobe (i.e. if I actually wear it) and also how it fits (can I make any adjustments for future versions). With that being said, I *probably* didn't need the 8+ months that have passed since I completed this shirt to find out that information. Oh well. Better late than never, as they say.
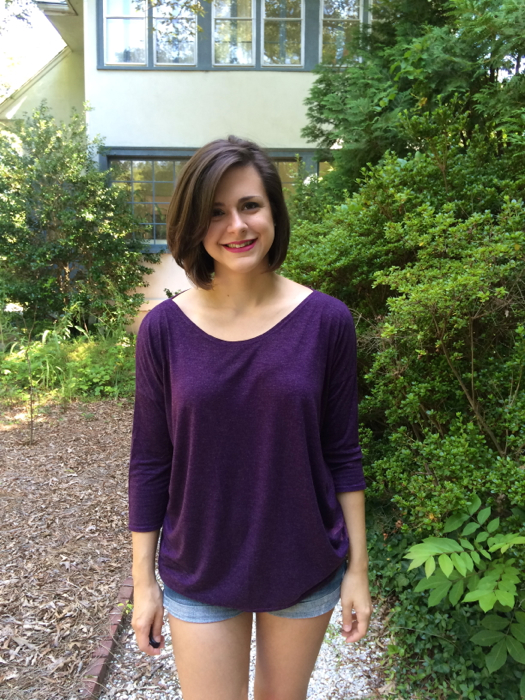
Mandy Boat Tee Version 1 by Hey it's SJ - front 2
So let's talk about Mandy. The Mandy Boat Tee is a free pattern offered by Australian based fabric store Tessuti Fabrics. There are couple of things that instantly drew me to this pattern: FREE (because, duh) and the drop shoulder (because, I like them). I was skeptical about the "one-size-fits-all" and the boxiness of the top. I tend to stay away from patterns that use boxy in the description (for me usually boxy = not flattering), but I figured it's a free pattern, so what did I really have to lose? Luckily, I don't think it turned out too bad after all!
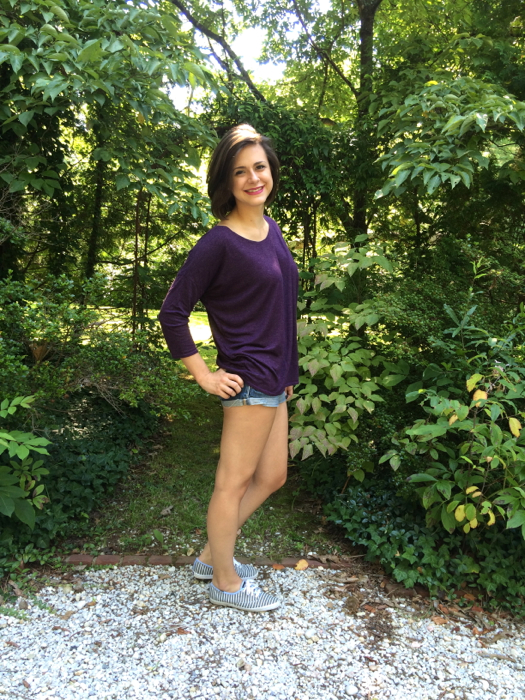
Mandy Boat Tee Version 1 by Hey it's SJ - side
The fabric I used is a dark eggplant purple rayon blend knit from JoAnn's. It was a red-tag fabric and $5/yard, so if things ended up going bad I wouldn't cry over the loss of fabric. I knew the rayon would give the shirt a nice drape which I would need/want with this style top, and it also has a very subtle metallic heather to it that I liked, which you can see in the close up below. It's not the most terrible quality fabric I've ever worked with; it's pretty soft (thanks to the rayon, I'm sure) but it does lack a little bit in the recovery department. For $5/ yard it is pretty much what I expected.
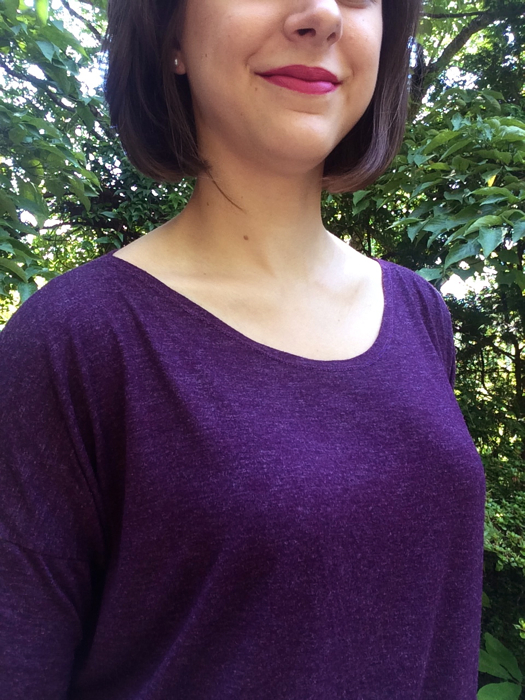
Mandy Boat Tee Version 1 by Hey it's SJ - close up
Even before I hit download on the pattern I knew I was going to have to do some altering to get a fit that I liked. For this version I only made two changes: I ended up taking 4 inches from the sides of both the front and back pattern pieces and graded to nothing at the shoulder seam. I used a shirt from American Eagle that I have had foreverrr but really like as guide for how much to take off. I also lowered the front neckline by 2 inches. For the construction I kept it simple; I serged all the seams and did a simple turn and topstitch on the neckline, arms, and bottom hem with a twin needle.
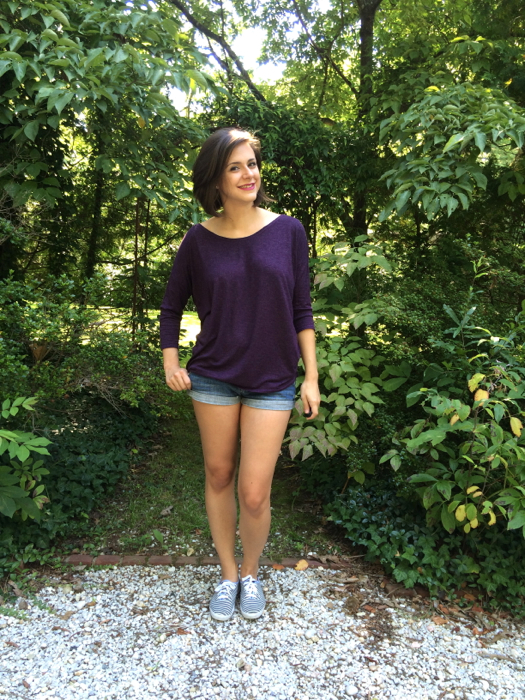
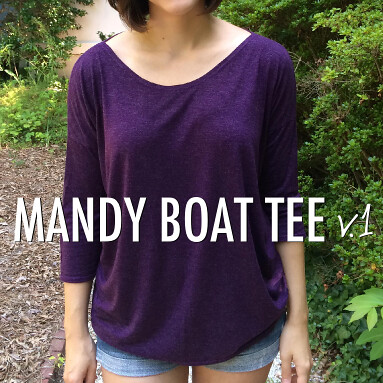
Mandy Boat Tee Version 1 by Hey it's SJ - front
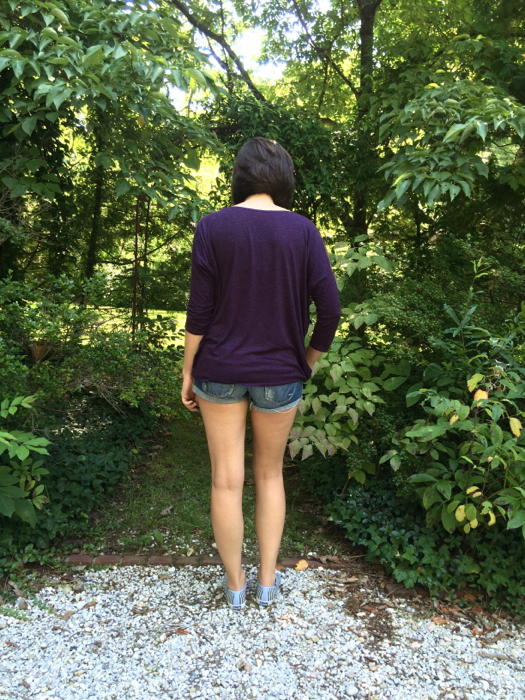
Mandy Boat Tee Version 1 by Hey it's SJ - back
Overall, I am OK with how this first attempt turned out. After wearing it, I knew the biggest thing that needed adjusting was the neckline. It's realllyyy wide and tends to want to slide off my shoulders. I don't mind that slouchy off-the shoulder look but I find myself constantly pulling the shirt back onto my shoulders throughout the day which is kinda annoying. The not-so-great recovery of the fabric also means the arms stretch out a bit and I find myself always pushing them up. If they were a bit tighter or I used fabric with better recovery so they stay in place then the off-the-shoulder problem might be alleviated a bit. Despite the not-perfect fit and fabric, I still got a decent amount of wear out of it this winter/spring (Central VA summers are a bit too hot and humid for 3/4 length sleeves) and I actually made a second version-- stayed tuned for a post with all of those details.

Have you ever tried the Mandy Boat Tee pattern? Did you make any adjustments to the pattern? How did it turn out for you? I do have plans to make more, so I would love to know!


Pattern: Mandy Boat Tee by Tessuti Fabricsmandy boat tee v1 thumbnail
Fabric: Rayon Blend Metallic Heather Knit from JoAnn's
Body Measurements: Bust 36/Waist 29/Hip 38 (in inches)
Size: N/A, one size
Adjustments/Alterations: 4 inches from front and back side seams graded to nothing at shoulder seam, lowered front neckline 2 inches

Hey What's Up Hellooo

April 30, 2015

HEY.

My blogging these last few (cough *6* cough) months has been sporadic at best. I could lie and say "I didn't have time" but that's a pretty lame excuse. It's actually my least favorite excuse. I wholeheartedly believe that we make time for the things that are important to us, so to say I didn't have time to blog(sew) is to say that blogging(sewing) is not important to me but it IS! I love this little space I've created to share and document projects that I put so much time and heart into. It was a tough winter for me (for a laundry list of reasons that I won't go into here), and I just didn't get much blogging or sewing done.  But I don't want to focus on what didn't get done, instead let's talk about what I HAVE been doing these last 6+ months.

SEWING. I have actually been sewing more the past 6 months than I ever have in my entire life, because it's my job. The entire month of February and some of March, I made Roman Shades. Every single weekday, and even a few weekend days, too, I was making Roman Shades. I think I made an average of 20 a week. It was ridiculous. As far as sewing for fun, I made a few skirts, a couple shirts, some scarves. Not a whole lot, really.
BLOGGING. I guess you could say I've been cheating on this little blog of mine, because I have been blogging for the company I work for. At the beginning of the year I was tasked with creating content for our blog and parts of our website and it's been a great learning experience. I still feel like I have a lot to figure out and I feel like there is so much more I want to do, especially with the blog. But Rome wasn't built in a day, right? #supercheesycliché #sorrynotsorry If you are curious you can check out our blog/website here.

BUYING STUFF (fabric, patterns, and machines!). I just told ya'll that I haven't been doing much sewing for myself, but you wouldn't know it by the amount of fabric and patterns I've been buying. I think I finally got myself under control and have an embargo in place on spending in both of those areas, at least until I have another amazing idea that I just have to have that fabric/pattern right then. No, but really though, I'm not, because I am NOT buying fabric or patterns (probably). Oh and by the way, I got a serger and an industrial sewing machine!! *Does crazy sewing lady happy dance* I purchased my serger back in October, a Brother 1034-D. My regular machine is a Brother and I have been nothing but happy with it, so I figured this machine, which is super popular among the home sewing crowd, would be a good place to start for someone who has no serger knowledge or experience. It's sorta a long/complicated story but I also came into possession of an industrial sewing machine. All you need to know is it was bought for a specific project, that project is still on my to-do list, and I'm still so intimidated by the machine that I have not even attempted to teach myself how to use it. But I'll be sure to keep ya'll posted with any updates on the #GreatIndustrialSewingMachineSaga and eventually give ya'll the whole back story, too.

MOVING MY SEWING AREA. Up until a couple of months ago, the only place for me to sew was in our (fairly small) living room. Now one of the bedrooms has opened up and I get my very own sewing ROOM, which I've never had before and am very excited about. It is still very much a work in progress, but I already feel so much more organized which I hope will translate to more productive. My favorite part? This huge mirror I found at a local thrift store, Class and Trash, for ONLY $15! You can fully expect an influx of #mirrorpics on Instagram and I am not even the least bit sorry because ONLY $15!
That pretty much sums up what's been going on over here for the last several months. If you want to see what I'm up to when I disappear from the blog, you can always follow me on Instagram (that's where you can find me most consistently).

#handmadescarfswap

February 20, 2015

It's cold here. Like REALLY cold. Like single digit temperatures cold. I understand that in parts of the country/world this is not uncommon for February, but I don't live in those parts of the country/world for that very reason. I live in Central Virginia, it is not supposed to get this cold here! I've always said I don't mind the cold as long as there's snow, and we got a bit over 6 inches on Monday/Tuesday that is still sticking around so I can't complain too much. I would still rather be soaking up sun on a beach somewhere that doesn't know what 3 degrees with a wind chill of -5 to -10 degrees feels like. 

On the bright (and slightly warmer) side, I got some new handmade scarves! Specifically, these two beauties from Korie Su of ReTied Headwear during the #handmadescarfswap hosted by SewCaroline and SewBon. I don't knit/crochet and I am such newb that I don't even know if these are knitted or crocheted. Regardless, I am more than thrilled to add some handmade knit or crochet items to my out-of-control scarf collection that is (sadly) mostly store-bought. The red is a beautiful, vibrant color and nice and thick (read: WARM). And I think the oatmeal colored rope scarf is super fun, though I may have to save that one for some warmer temperatures.

A photo posted by Sarah Jean (@ohheyitssj) on

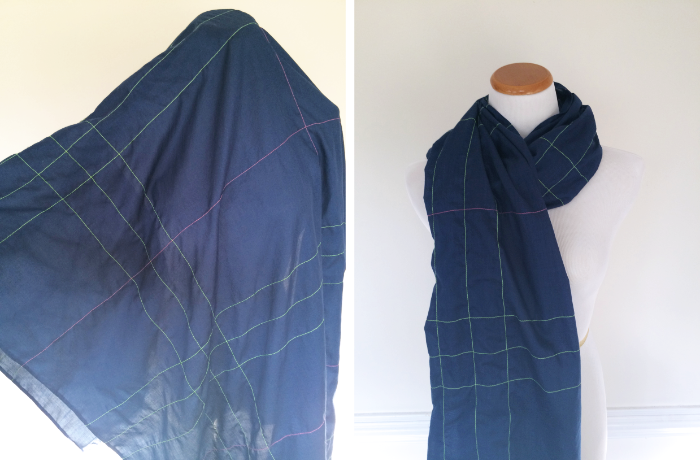
I received two beautiful scarves, and I made two scarves to send to my partner, Crystal, as well! The first I made out of 2 yards of a lightweight sheermist cotton/poly blend. I knew I wanted the scarf navy and I've been on a neon accent kick lately, so I decided to embroider a plaid design onto the fabric using my sewing machine and some neon green and neon pink thread.
#handmadescarfswap Embroidered Plaid Scarf with Fringe
The original plan was to play around with different decorative stitches and widths for a more authentic plaid look, but the fabric was so lightweight I was getting all kinds of tension issues with the wider stitches. I ended up using just a simple straight stitch and I actually love the simplicity of the design. Plus, it took a lot less time! Here is a graphic showing the design and dimensions I used. 
Embroidered Plaid Scarf diagram
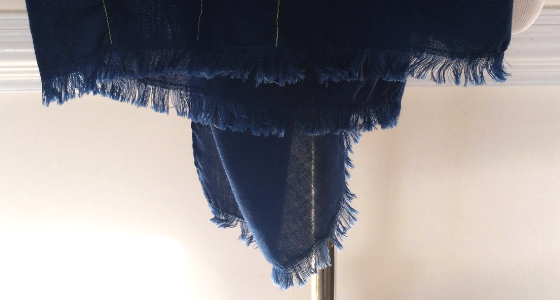
I finished the two longer edges using a narrow double fold hem and frayed the shorter edges. To fray the shorter ends, I "stay-stitched" about and inch from the end of the scarf (just a straight stitch to keep the entire scarf from unraveling) and used a pin to help pull out the threads running parallel to the stitching. Here is a close up of the ends...
#handmadescarfswap Embroidered Plaid Scarf with Fringe close up
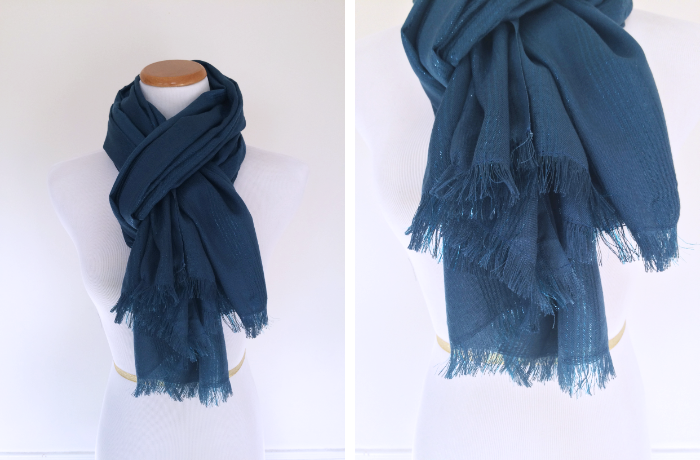
The second scarf I sent was ridiculously easy to make. I found this scarf fabric at Joann's (can't find it online though) that was nice and drape-y, and I loved the metallic stripe detail. I think the fabric was around 44" wide and I just kept it that width since the selvedges were nice and that meant I wouldn't have to finish them. I frayed the short edges like the plaid scarf. It was that simple!
#handmadescarfswap Metallic Striped Scarf with Fringe
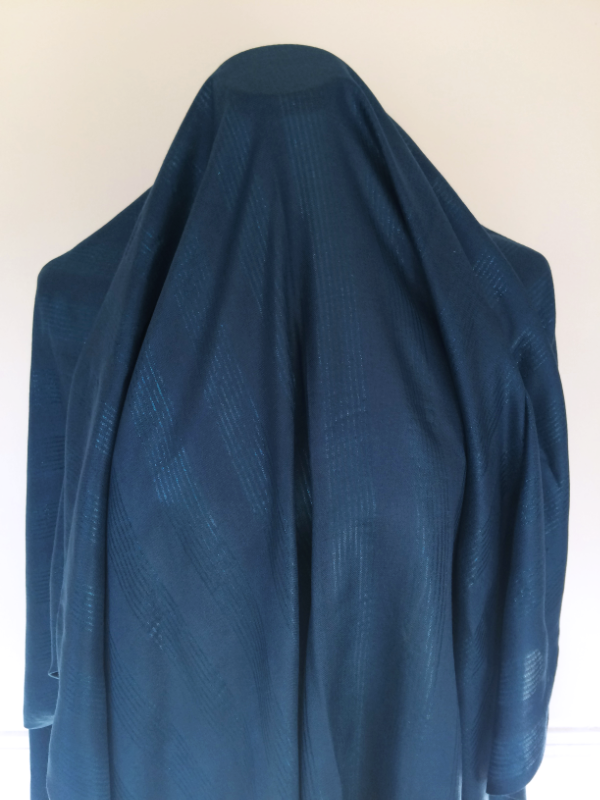
Even though the fabric is fairly light weight, the extra width gives it some thickness and warmth. Here is a picture that shows the drapey-ness and stripe detail a little better.
#handmadescarfswap Metallic Striped Scarf with Fringe draped
I might have liked this one so much that I bought another 2 yards to make myself one. Whoopsies!

Thanks to Sew Caroline and Sewbon for organizing this swap! Did any of ya'll participate? What did you make/get?